
Spooky Zombie Dirt Pudding Cups Recipe: Frighteningly Fun Treat
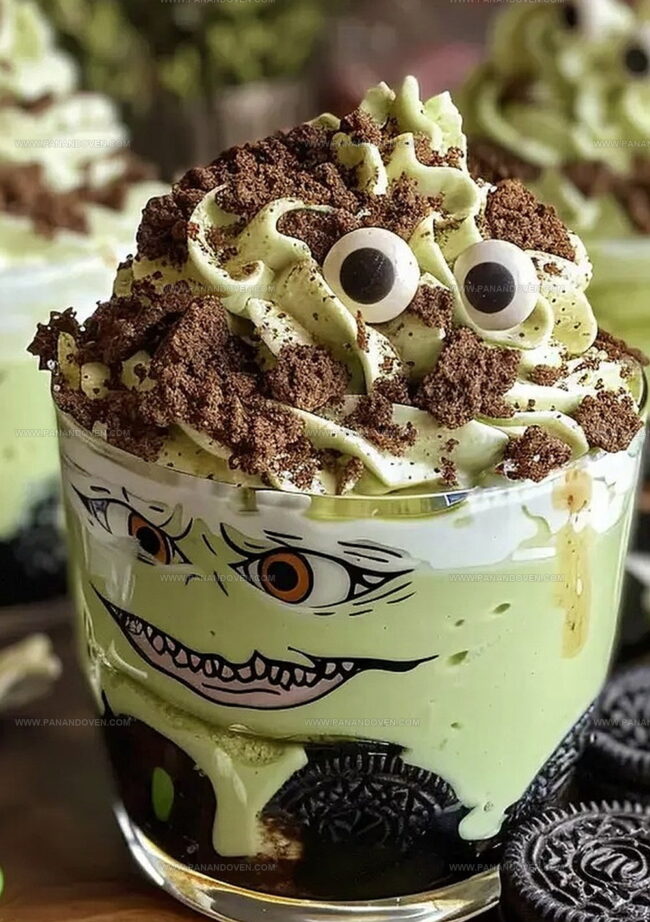
Decadent chocolate pudding takes an unexpected turn with this zombie dirt pudding cups recipe that turns dessert into a playful Halloween treat.
Dark chocolate crumbles mimic graveyard soil while gummy worms snake through creamy layers.
Crushed Oreo cookies create a rich, textured base that kids and adults adore.
Creamy pudding transforms into an edible landscape of delightful spookiness.
Each spoonful delivers a perfect balance of sweet chocolate and whimsical design.
These pudding cups bring ghoulish fun to any seasonal gathering.
Unleash your inner dessert monster and get ready to devour this wickedly delicious creation.
Zombie Dirt Pudding Cups: Spooky, Fun, And Delicious
Sweet, Creepy Ingredients For Dirt Pudding Cups
Main Ingredients:Decoration Ingredients:Color and Flavor Ingredient:Pudding Cup Tools For The Perfect Spooky Snack
Building Zombie Dirt Pudding Cups Step-By-Step
Step 1: Prepare Oreo Zombies
Carefully twist one side off 12 Oreo cookies, keeping the filling intact.
Set aside the cookies with exposed filling for later zombie creation.
Step 2: Crush Cookie Crumbs
Use a food processor to transform the remaining Oreos into fine, dirt-like crumbs.
Ensure the texture resembles loose soil for an authentic look.
Step 3: Create Ghoulish Pudding Base
In a large mixing bowl, combine milk and pudding mix.
Whisk vigorously for 1-2 minutes until the mixture thickens.
Add green food coloring to give the pudding a haunting, toxic appearance.
Step 4: Blend Creamy Texture
Gently fold Cool Whip into the green pudding, creating a smooth and airy consistency that will make your zombie dirt cups irresistibly creepy.
Step 5: Build Layered Landscape
Assemble the pudding cups with careful layering:Step 6: Chill Spooky Treat
Refrigerate the pudding cups for one hour, allowing the layers to set and flavors to meld together.
Step 7: Craft Zombie Eyes
For each cookie:Press these into the exposed cookie filling to create zombie faces.
Step 8: Final Zombie Decoration
Stand the zombie cookies upright in the pudding cups.
Optional: Sprinkle bone or skeleton-shaped decorations on top for an extra creepy touch.
Tips For Spooky Decorations And Tasty Layers
Ghoulish Variations For Themed Dirt Pudding Cups
Creative Ways To Present Zombie Dirt Cups At Parties
Keeping Dirt Pudding Cups Fresh For Fright Night
FAQs
Yes, you can prepare Zombie Dirt Pudding Cups up to 2 days in advance. Keep them covered in the refrigerator and add zombie cookie decorations just before serving to maintain their crisp appearance.
Absolutely! Use gluten-free chocolate sandwich cookies and confirm your pudding mix is gluten-free. This will help those with gluten sensitivities enjoy the treat.
Gel food coloring is recommended because it provides a more vibrant green color and doesn’t thin out the pudding mixture. Start with a few drops and adjust until you reach your desired zombie-like green shade.
Print
Zombie Dirt Pudding Cups Recipe
- Total Time: 1 hour 20 minutes
- Yield: 12 1x
Description
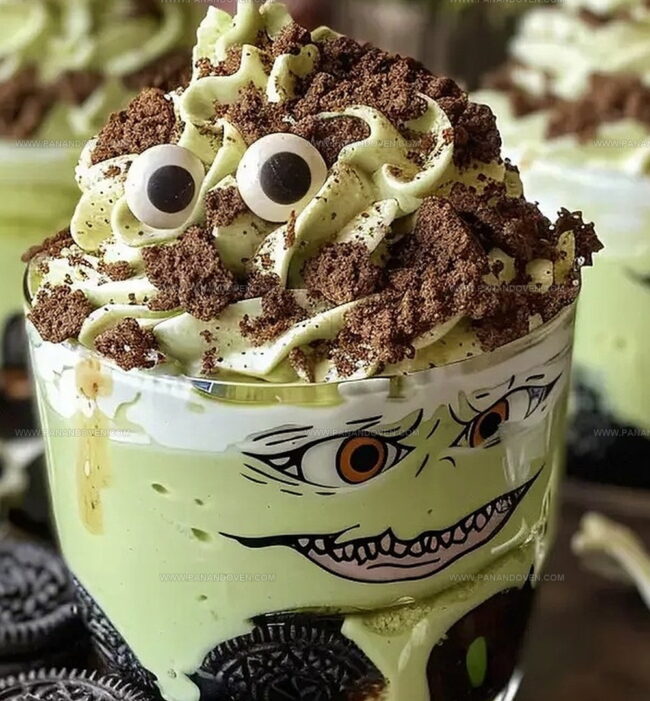
Zombie dirt pudding cups bring haunting Halloween vibes to classic chocolate desserts. Chocolate pudding, cookie crumbles, and gummy worms create a spooky treat you’ll devour with ghoulish delight.
Ingredients
Main Ingredients:
- 1 18.7 ounce (530 grams) package mint oreo cookies
- 1 3.3 ounce (93 grams) box instant white chocolate pudding mix
- 2 cups (480 milliliters) whole milk, chilled
- 1 8 ounce (226 grams) tub cool whip, thawed
Decorative Ingredients:
- 6–8 drops green food color
- 8–12 large candy eyeballs
- 8–12 small candy eyeballs
- Bone or skeleton sprinkles
Instructions
- Carefully separate 12 Oreo cookies, keeping the filling intact on one side and setting aside the cookie halves.
- Pulverize the remaining Oreo cookies in a food processor until they resemble fine, crumbly dirt-like texture.
- In a large mixing bowl, vigorously whisk milk, pudding mix, and green food coloring for 1-2 minutes until the mixture thickens and becomes smooth.
- Gently incorporate Cool Whip into the green pudding, creating a light and airy consistency.
- Build layers in serving glasses by first sprinkling 1-2 tablespoons of Oreo crumbs at the bottom, then adding a generous pudding layer. Alternate between cookie crumbs and pudding, ensuring the final top layer is crushed Oreos.
- Refrigerate the pudding cups for 60 minutes to allow complete setting and chilling.
- For zombie decoration, carefully place one large and one small candy eyeball into the exposed cookie filling, creating zombie-like faces.
- Strategically position the zombie cookie faces upright in the pudding cups, and optionally garnish with bone or skeleton sprinkles for extra spooky effect.
Notes
- Select ultra-fresh Oreos for maximum crumb texture and clean cookie separation.
- Use gel food coloring for more vibrant green pudding without watering down the mixture.
- Consider alternative milk options like almond or oat milk for dairy-free adaptations.
- Refrigerate pudding cups up to 24 hours in advance for convenient party preparation.
- Prep Time: 20 minutes
- Cook Time: 1 hour
- Category: Desserts, Snacks
- Method: Chilling
- Cuisine: American
Nutrition
- Serving Size: 12
- Calories: 220
- Sugar: 15g
- Sodium: 200mg
- Fat: 10g
- Saturated Fat: 5g
- Unsaturated Fat: 4g
- Trans Fat: 0g
- Carbohydrates: 30g
- Fiber: 1g
- Protein: 3g
- Cholesterol: 20mg
Marcus Reed
Founder & Food Content Creator
Expertise
Single-recipe development, Seasonal and local ingredient utilization, Food photography and styling, Culinary writing and content creation
Education
Culinary Arts Certificate, Blue Ridge Community and Technical College, WV
Focus: Fundamentals of culinary techniques, emphasizing hands-on experience in small-scale kitchen settings.
Marcus’s story begins in Asheville, where good food and family kitchens shaped his earliest memories. After hands-on culinary training and a lot of trial (and a little error), he realized that real cooking isn’t about perfection, it’s about connection.
At Pan and Oven, Marcus crafts recipes that are easy to follow, packed with flavor, and built for real kitchens.