
The Fluffiest Homemade Whipped Cream Recipe For Sweet Treats
Creamy, dreamy whipped cream brings instant delight to countless desserts and transforms ordinary treats into extraordinary experiences.
This simple whipped cream recipe delivers pure magic with just a few basic ingredients.
Soft peaks of velvety goodness emerge effortlessly from heavy cream humble beginnings.
Whisking creates a cloud-like texture that melts on your tongue and enhances everything from pies to hot cocoa.
Professional chefs and home cooks alike appreciate how quickly this recipe comes together with minimal effort.
Whip up this delectable topping in minutes and watch faces light up with pure culinary joy.
Prepare to indulge in a classic treat that never fails to impress.
Whipped Cream: Simple Reasons to Love It
Ingredients for Homemade Whipped Cream
Main Ingredients:Optional Ingredients:Chilling Ingredients:Kitchen Tools for Cream Whipping
Whipping Up Cream the Easy Way
Step 1: Chill Your Equipment
Grab a large mixing bowl and whisk attachment.
Pop them in the freezer for about 15 minutes to get super cold.
Cold tools help create the fluffiest, most luxurious whipped cream ever.
Step 2: Gather Your Ingredients
You’ll need:Step 3: Mix and Whip
Pour the cream into the chilled bowl.
Sprinkle in the powdered sugar and add a splash of vanilla.
Start mixing on low speed to prevent splattering, then gradually increase to high speed.
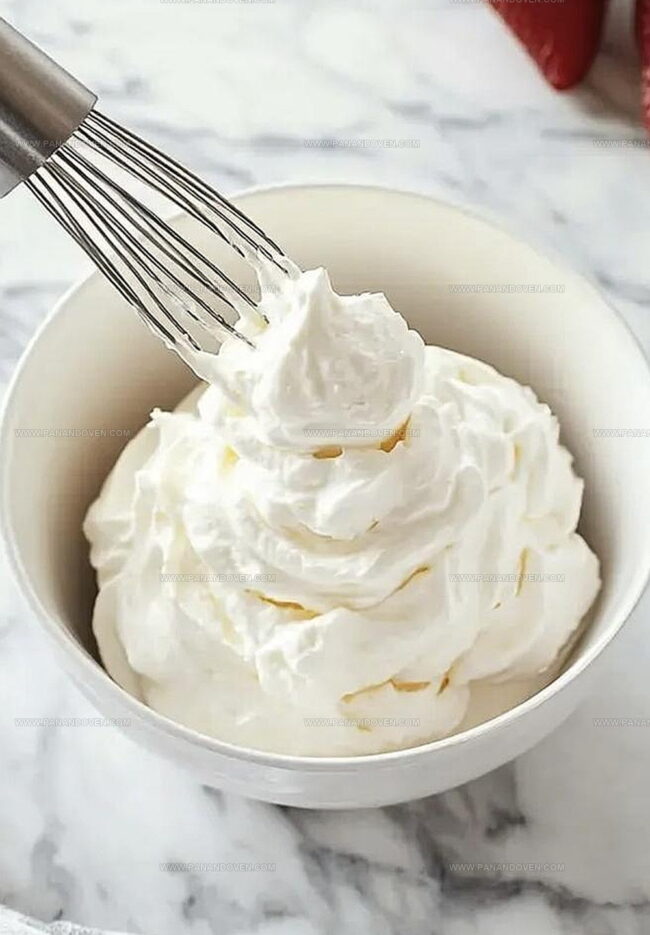
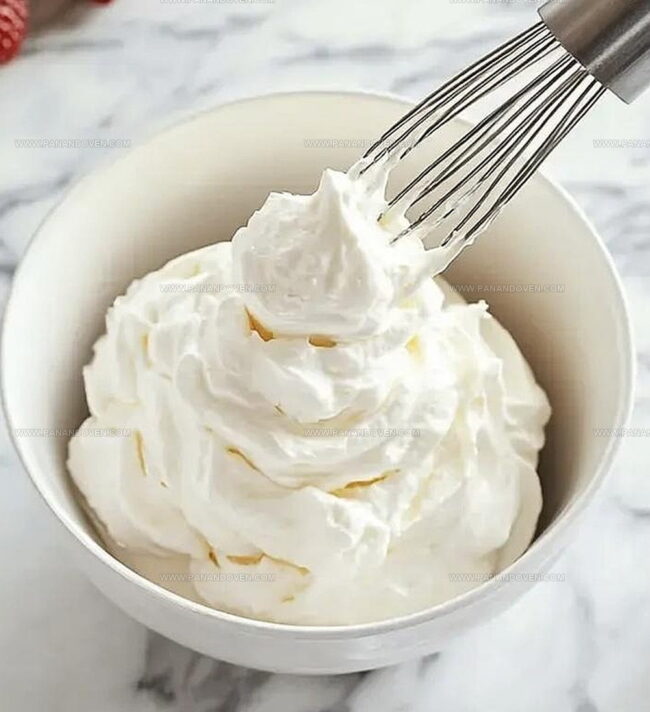
Step 4: Watch for Perfect Peaks
Keep whipping until the cream transforms into a cloud-like texture.
Look for stiff peaks that stand up straight when you lift the whisk.
This usually takes 2-4 minutes, so don’t walk away!
Step 5: Serve and Enjoy
Your homemade whipped cream is ready to elevate any dessert.
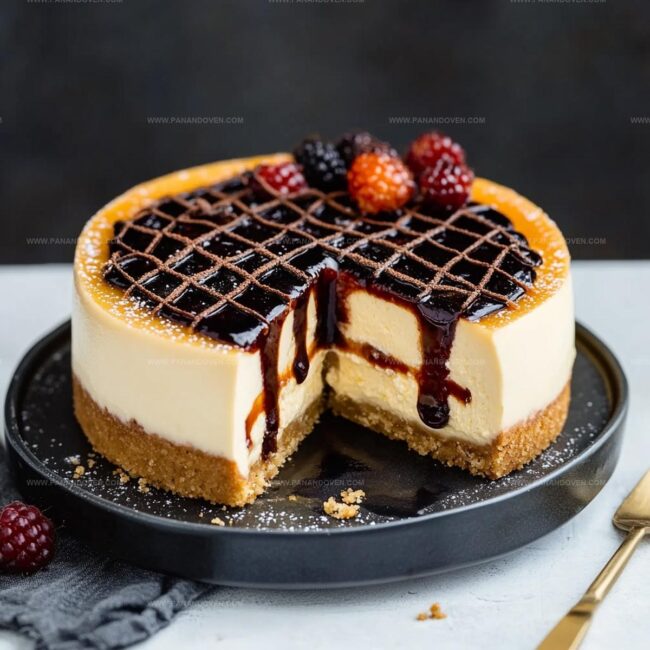
Dollop it on pies, cakes, hot chocolate, or eat it straight from the bowl (we won’t judge).
Store in the refrigerator and use within a week for maximum freshness.
Whipped Cream Tips for Fluffiness

Whipped Cream Mix-Ins and Additions

Serving Homemade Whipped Cream
Best Ways to Store Fresh Cream
FAQs
Powdered sugar dissolves more easily and helps create a smoother, more stable whipped cream without graininess. It also prevents the cream from becoming watery.
Yes, you can use a hand whisk or even a jar with a tight lid. However, it requires more arm strength and time compared to using an electric mixer. Manual whisking takes about 10-15 minutes of continuous whisking.
Over-whipped cream looks grainy and starts to separate, appearing chunky and close to turning into butter. Stop whipping as soon as stiff peaks form and the cream looks glossy and smooth.
Print
Whipped Cream Recipe
- Total Time: 19 minutes
- Yield: 2 1x
Description
Homemade whipped cream elevates classic desserts with simple elegance. Creamy clouds of sweetness emerge from fresh heavy cream, sugar, and vanilla, promising delightful indulgence you can craft in minutes.
Ingredients
Main Ingredients:
- 1 1/4 cups (296 milliliters) heavy whipping cream
- 1/2 cup (60 grams) powdered sugar
Flavor Enhancer:
- 3/4 teaspoon (3.75 milliliters) pure vanilla extract
Instructions
- Retrieve chilled heavy whipping cream from the refrigerator. Place mixing bowl and whisk attachment in freezer for 10-15 minutes to ensure maximum coldness, which accelerates whipping process.
- Transfer cold cream into chilled mixing bowl. Incorporate powdered sugar and vanilla extract directly into the cream.
- Attach whisk to mixer and position at high speed. Whip cream mixture continuously, watching transformation from liquid to fluffy texture.
- Monitor cream’s consistency carefully during whipping process. Total whipping time ranges between 2-4 minutes, depending on mixer’s power and cream’s temperature.
- Recognize perfect whipped cream when peaks stand upright and maintain distinct shape after lifting whisk. Peaks should appear glossy and voluminous without appearing grainy or separated.
- Immediately apply whipped cream to preferred desserts like cakes, ice cream, or cheesecakes. Alternatively, refrigerate prepared cream in sealed container for 5-7 days maximum to preserve freshness and texture.
Notes
- Opt for heavy whipping cream with at least 36% fat content to ensure stable and fluffy whipped cream that holds its shape perfectly.
- Avoid over-whipping by watching the cream closely, as it can quickly turn into butter if beaten too long, resulting in a grainy and separated texture.
- Create flavor variations by adding different extracts like almond, peppermint, or incorporating cocoa powder for chocolate whipped cream that complements various desserts.
- Make a dairy-free alternative using chilled coconut cream, which whips similarly and provides a rich, creamy texture for those with lactose intolerance or following a vegan diet.
- Prep Time: 15 minutes
- Cook Time: 4 minutes
- Category: Desserts
- Method: Whipping
- Cuisine: American
Nutrition
- Serving Size: 2
- Calories: 396
- Sugar: 14 g
- Sodium: 12 mg
- Fat: 36 g
- Saturated Fat: 23 g
- Unsaturated Fat: 0 g
- Trans Fat: 0 g
- Carbohydrates: 20 g
- Fiber: 0 g
- Protein: 1 g
- Cholesterol: 109 mg
Marcus Reed
Founder & Food Content Creator
Expertise
Single-recipe development, Seasonal and local ingredient utilization, Food photography and styling, Culinary writing and content creation
Education
Culinary Arts Certificate, Blue Ridge Community and Technical College, WV
Focus: Fundamentals of culinary techniques, emphasizing hands-on experience in small-scale kitchen settings.
Marcus’s story begins in Asheville, where good food and family kitchens shaped his earliest memories. After hands-on culinary training and a lot of trial (and a little error), he realized that real cooking isn’t about perfection, it’s about connection.
At Pan and Oven, Marcus crafts recipes that are easy to follow, packed with flavor, and built for real kitchens.