
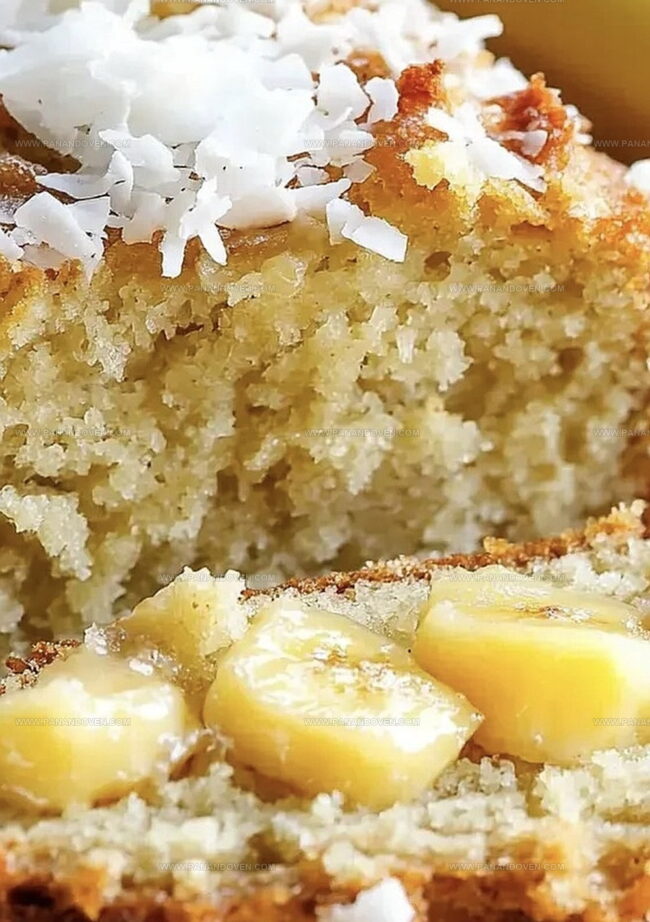
Dreamy Island-Inspired Tropical Banana Bread Recipe
Sweet, ripe bananas bring magic to this tropical banana bread recipe that bursts with island-inspired flavors.
Warm spices and golden brown edges create a delightful harmony in every slice.
The aroma alone will transport you to a sunny coastal paradise.
Subtle hints of coconut and rum elevate this classic bread into something extraordinary.
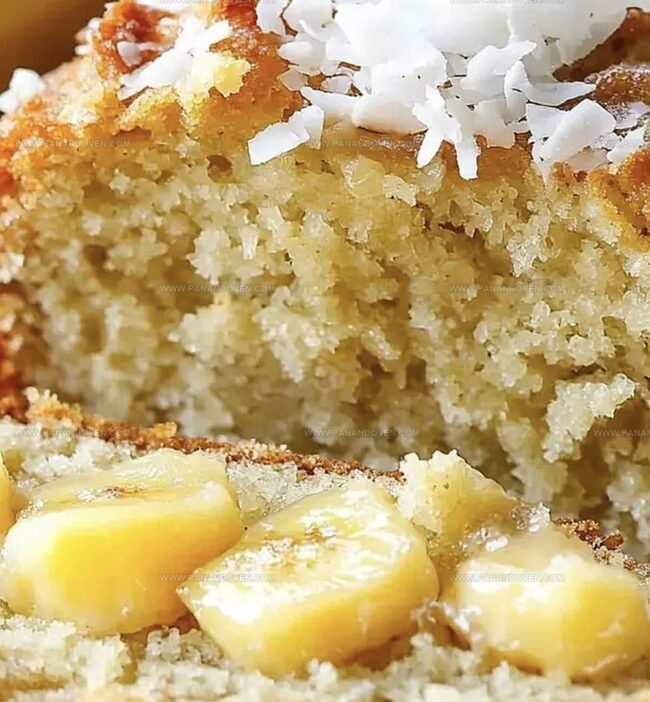
Each bite promises a perfect balance of moisture and richness.
Soft, tender crumbs melt in your mouth with tropical goodness.
You won’t be able to resist cutting another slice of this irresistible treat.
Hawaiian Banana Bread: Island Twist Benefits
What You Need for Hawaiian Banana Bread
Tools for Tropical Banana Bread Baking
Steps for Hawaiian Banana Bread Success
Step 1: Fire Up The Tropical Oven
Crank your oven to a toasty 350F (175C).
Grab a 9×5 loaf pan and give it a generous coating of butter or non-stick spray so your bread slides out like a dream.
Step 2: Whip Up The Creamy Base
In a spacious mixing bowl, grab an electric mixer and transform softened butter and sugar into a cloud-like, fluffy mixture.
Drop in eggs one by one, blending each thoroughly until the batter looks smooth and dreamy.
Step 3: Introduce Tropical Fruit Friends
Mash a ripe banana and welcome crushed pineapple into your mixture.
Stir these juicy companions until they’re perfectly integrated, creating a vibrant, golden base.
Step 4: Assemble The Dry Team
In another bowl, bring together your dry squad:Whisk these ingredients until they’re well acquainted.
Step 5: Marry The Mixtures
Gently fold your dry ingredients into the wet mixture.
Use a light touch, mixing just until everything is combined – no overmixing allowed!
Step 6: Sprinkle Tropical Magic
Introduce shredded coconut to your batter, stirring to distribute those delightful white flakes evenly throughout.
Step 7: Bake To Golden Perfection
Pour your tropical batter into the prepared pan, smoothing the top with a spatula.
Slide into the preheated oven and bake for about 1 hour.
Your bread is ready when a toothpick emerges clean from the center.
Step 8: Let The Bread Rest And Shine
Once baked, let the bread hang out in the pan for 10 minutes.
Then transfer to a wire rack and allow it to cool completely before slicing into this tropical treasure.
Pro Tips for Perfect Banana Bread
Island-Style Banana Bread Variations

Serving Up Hawaiian Banana Bread
How to Keep Banana Bread Soft
FAQs
This version includes crushed pineapple and shredded coconut, giving it a tropical twist that adds moisture, extra sweetness, and unique texture compared to traditional banana bread recipes.
Yes, you can use canned pineapple. Just make sure to drain most of the juice but keep some for added moisture. Frozen pineapple works too, but thaw and drain it completely before adding to the batter.
Absolutely! The pineapple and coconut help balance and soften the banana taste, making it more subtle and appealing to those who might find traditional banana bread too intense.
Print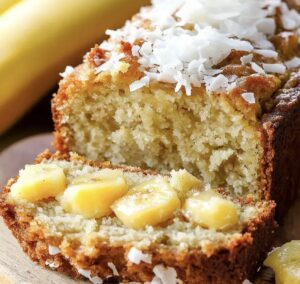
Tropical Banana Bread Recipe
- Total Time: 1 hour 20 minutes
- Yield: 12 1x
Description
Delectable banana bread celebrates Caribbean flavors with ripe bananas, warm spices, and coconut. Rich ingredients blend seamlessly, creating a moist, aromatic loaf you’ll savor to the last crumb.
Ingredients
Main Ingredients:
- 2 cups all-purpose flour
- 1 cup sugar
- 1 mashed ripe banana
- 1 cup crushed pineapple with juice
- 2 large eggs
Fats and Liquids:
- 1/2 cup softened butter
Leavening and Seasoning:
- 1 teaspoon baking powder
- 1/2 teaspoon baking soda
- 1/4 teaspoon salt
- 1/4 cup shredded coconut
Instructions
- Prepare the oven by heating to 350F (175C) and lightly coat a 9×5 loaf pan with non-stick spray or butter to ensure easy release.
- In a spacious mixing bowl, cream butter and sugar using an electric mixer until the mixture becomes airy and pale, creating a smooth foundation for the bread.
- Incorporate eggs one at a time into the butter-sugar mixture, blending thoroughly after each addition to create a uniform consistency.
- Gently fold in mashed ripe banana and crushed pineapple, including its natural juice, which will infuse tropical moisture into the batter.
- In a separate bowl, sift together flour, baking powder, baking soda, and salt, ensuring even distribution of dry ingredients.
- Delicately merge the dry ingredient mixture into the wet ingredients, stirring minimally to maintain a tender bread texture and prevent overmixing.
- Introduce shredded coconut into the batter, distributing evenly to create pockets of tropical flavor and interesting texture.
- Transfer the batter into the prepared loaf pan, smoothing the surface with a spatula to create an even top.
- Bake for approximately 60 minutes, checking doneness by inserting a toothpick into the center – it should emerge clean when the bread is fully cooked.
- Allow the bread to rest in the pan for 10 minutes, then carefully transfer to a wire rack to cool completely, enabling easier slicing and serving.
Notes
- Pick ultra-ripe bananas with dark brown spots for maximum sweetness and deeper banana flavor.
- Drain crushed pineapple slightly to prevent excess moisture making the bread too wet and dense.
- Toast shredded coconut beforehand to enhance its nutty, caramelized flavor profile and add a delightful crunch.
- For gluten-free version, swap all-purpose flour with almond or coconut flour and add xanthan gum for better binding.
- Prep Time: 20 minutes
- Cook Time: 1 hour
- Category: Breakfast, Snacks, Desserts
- Method: Baking
- Cuisine: American
Nutrition
- Serving Size: 12
- Calories: 210
- Sugar: 14 g
- Sodium: 120 mg
- Fat: 8 g
- Saturated Fat: 5 g
- Unsaturated Fat: 3 g
- Trans Fat: 0 g
- Carbohydrates: 33 g
- Fiber: 1 g
- Protein: 2 g
- Cholesterol: 35 mg
Marcus Reed
Founder & Food Content Creator
Expertise
Single-recipe development, Seasonal and local ingredient utilization, Food photography and styling, Culinary writing and content creation
Education
Culinary Arts Certificate, Blue Ridge Community and Technical College, WV
Focus: Fundamentals of culinary techniques, emphasizing hands-on experience in small-scale kitchen settings.
Marcus’s story begins in Asheville, where good food and family kitchens shaped his earliest memories. After hands-on culinary training and a lot of trial (and a little error), he realized that real cooking isn’t about perfection, it’s about connection.
At Pan and Oven, Marcus crafts recipes that are easy to follow, packed with flavor, and built for real kitchens.