The Best Christmas Sugar Cookie Bars Recipe: Jolly Sweet Treats
Sweet and buttery Christmas sugar cookie bars bring joy to every festive gathering with their irresistible charm.
Loaded with festive cheer, these delectable treats melt in your mouth like pure holiday magic.
the soft, pillowy texture creates a delightful canvas for colorful sprinkles and classic sugar cookie flavor.
Families adore these simple yet elegant dessert bars that come together in minutes.
Baking these bars fills your kitchen with warm, nostalgic aromas that instantly spark holiday memories.
Each bite promises a perfect balance of sweetness and comfort.
Deck your dessert table with these crowd-pleasing bars and watch everyone’s eyes light up with pure delight.
Why Christmas Sugar Cookie Bars Are a Must Bake
Everything Needed for Christmas Sugar Cookie Bars
Base Ingredients:Wet Ingredients:Dry Ingredients:Frosting Ingredients:Equipment for Soft Sugar Cookie Bars at Home
Christmas Sugar Cookie Bar Instructions Made Easy
Step 1: Preparing the Baking Setup
Line an 8×8 inch baking pan with parchment paper.
Spray lightly with cooking spray to ensure easy removal.
Set your oven rack to the center position and preheat to 350°F.
Step 2: Creaming the Base
In a large mixing bowl, combine softened butter with granulated and brown sugars.
Use an electric mixer to blend until the mixture becomes light and fluffy, creating a smooth and creamy texture.
Step 3: Adding Moisture and Flavor
Introduce eggs and vanilla extract to the butter-sugar mixture.
Beat thoroughly until all ingredients are fully incorporated and the batter looks consistent and silky.
Step 4: Combining Dry Ingredients
In a separate bowl, whisk together:Gradually fold the dry ingredients into the wet mixture, stirring gently until just combined.
Avoid overmixing to keep the bars tender.
Step 5: Baking the Bars
Pour the batter into the prepared pan, spreading evenly with a spatula.
Bake for 18-20 minutes, watching for golden edges and a slightly firm center.
A toothpick inserted should come out with a few moist crumbs.
Step 6: Creating Festive Frosting
Whip cream cheese and butter until smooth.
Gradually add powdered sugar, vanilla extract, and a pinch of salt.
Beat until the frosting becomes light and spreadable.
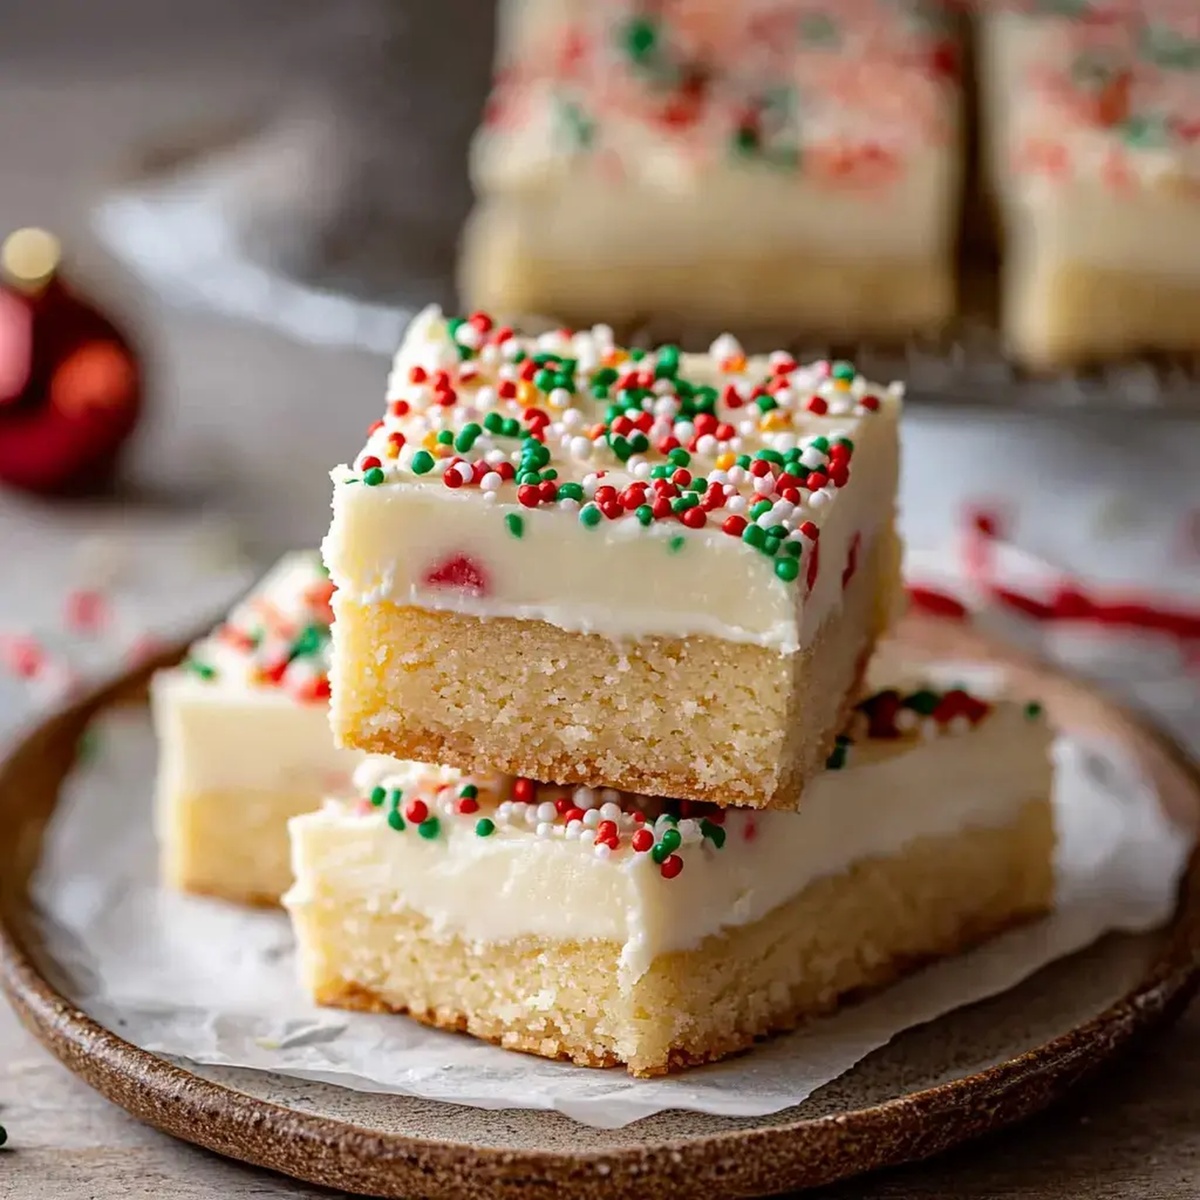
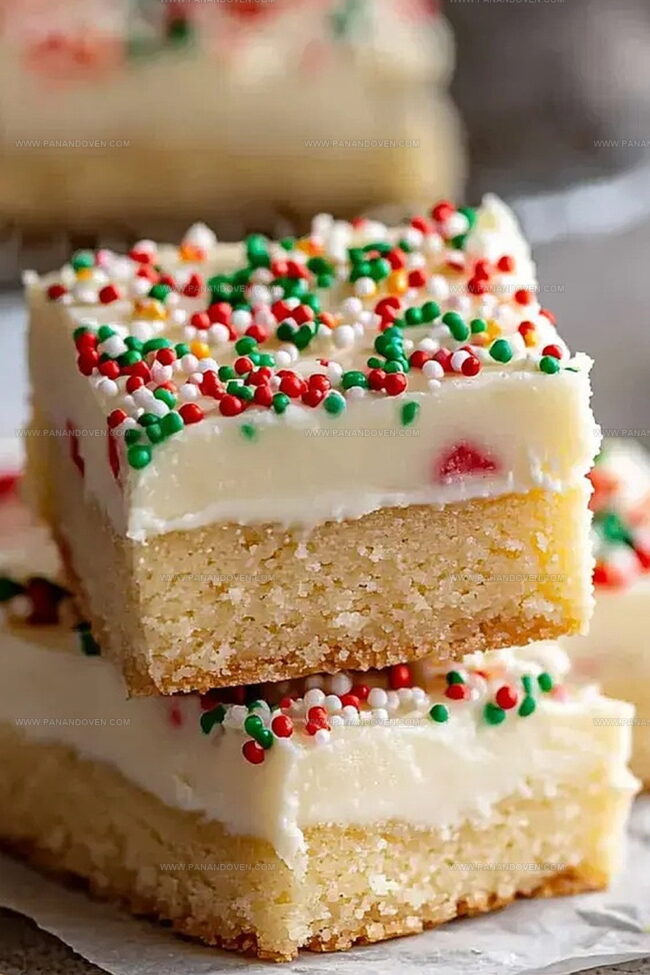
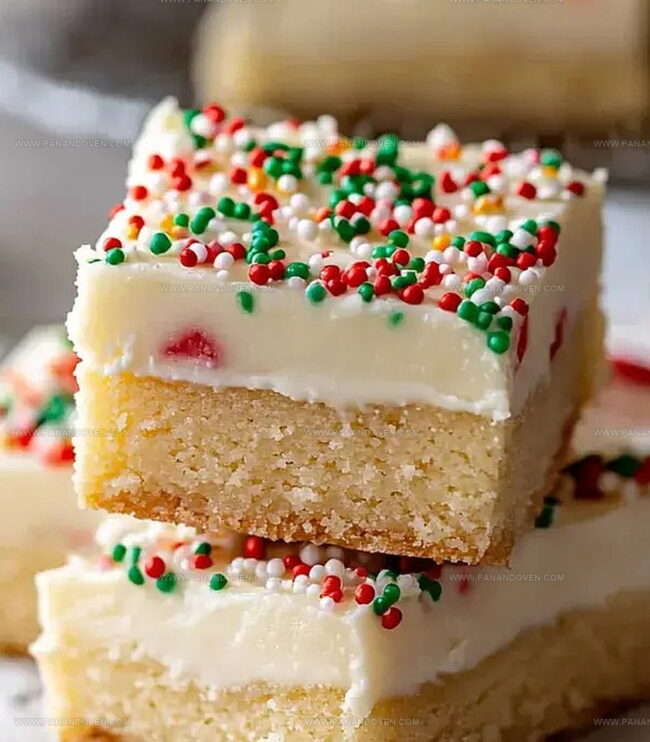
Step 7: Decorating and Finishing
Allow bars to cool completely in the pan.
Spread frosting evenly across the surface.
Sprinkle with holiday-themed or colorful sprinkles for a festive touch.
Cut into squares and serve.
Baking Tips for Gooey Sugar Cookie Bars
Fun Variations for Festive Sugar Cookie Bars
How to Plate Sugar Cookie Bars for Celebrations
Keeping Sugar Cookie Bars Soft and Chewy
FAQs
Yes! These bars are perfect for children to help make and decorate. Kids can easily add sprinkles and help mix ingredients, making it a fun family baking activity.
Absolutely! You can skip vanilla or almond extract, but they add wonderful flavor depth. If you don’t have extracts, the bars will still taste delicious with just the basic ingredients.
Look for set edges and a slightly golden color. The center might seem slightly soft, but it will firm up as the bars cool. Avoid overbaking to keep them soft and tender.
Print
The Best Christmas Sugar Cookie Bars Recipe
- Total Time: 40 minutes
- Yield: 12 1x
Description
Festive Christmas sugar cookie bars merge holiday cheer with sweet nostalgia. Buttery, rich bars sparkle with festive sprinkles and creamy frosting, inviting you to savor seasonal warmth and joy.
Ingredients
Main Ingredients:
- 1 cup all-purpose flour
- 1/2 cup butter
- 1/2 cup granulated sugar
- 1 large egg
- 3 tablespoons cornstarch
Flavor Enhancers:
- 2 teaspoons vanilla extract
- 1/4 teaspoon almond extract
- 2 tablespoons brown sugar
- 1/2 teaspoon baking powder
- 1/4 teaspoon salt
Frosting and Decoration:
- 4 tablespoons butter, softened
- 1 cup powdered sugar
- 3 tablespoons heavy cream
- 1 teaspoon vanilla extract
- Christmas sprinkles
Instructions
- Prepare the baking vessel by lining an 8×8 inch pan with parchment paper and heating the oven to 350°F for optimal baking conditions.
- Create a creamy base by thoroughly blending softened butter with sugars until the mixture achieves a smooth, uniform consistency.
- Introduce egg and aromatic extracts to the butter mixture, incorporating them completely to develop a rich flavor profile.
- Gently fold dry ingredients into the wet mixture, stirring just until combined to maintain a tender texture and prevent overmixing.
- Transfer the prepared dough to the lined pan, spreading evenly and ensuring uniform thickness for consistent baking.
- Place in preheated oven and bake for approximately 15-18 minutes, watching for golden edges and a set center as indicators of doneness.
- Allow bars to cool completely on a wire rack, creating a stable surface for frosting application.
- Whip frosting ingredients until achieving a light, fluffy consistency that spreads smoothly and holds its shape.
- Once bars are entirely cooled, generously apply the prepared frosting using an offset spatula for even coverage.
- Embellish the frosted surface with festive sprinkles, adding a touch of holiday cheer and visual appeal to the dessert.
Notes
- Softening butter beforehand ensures smoother, more even mixing for perfectly creamy cookie bars.
- Avoid overmixing dry ingredients to maintain a tender, delicate texture that melts in your mouth.
- Customize frosting colors and sprinkles to match holiday themes or personal preferences for festive fun.
- Cool bars completely before frosting to prevent melting and achieve clean, crisp decorative edges.
- Prep Time: 20 minutes
- Cook Time: 20 minutes
- Category: Desserts, Snacks
- Method: Baking
- Cuisine: American
Nutrition
- Serving Size: 12
- Calories: 220
- Sugar: 15 g
- Sodium: 90 mg
- Fat: 10 g
- Saturated Fat: 6 g
- Unsaturated Fat: 4 g
- Trans Fat: 0 g
- Carbohydrates: 31 g
- Fiber: 0 g
- Protein: 2 g
- Cholesterol: 30 mg
Clara Thompson
Recipe Developer & Food Educator
Expertise
Plant-based and vegetarian recipe development, Nutritional analysis and meal planning, Culinary education and workshop facilitation, Content writing with a focus on healthy living
Education
Diploma in Culinary Arts, Mt. San Jacinto College, CA
Focus: Comprehensive culinary training with an emphasis on sustainable cooking practices.
Certificate in Nutrition and Healthy Living, Cornell University (Online Program)
Focus: Understanding the principles of nutrition to create balanced and health-conscious recipes.
Clara lives where fresh ideas and fresh ingredients meet. She pairs her culinary know-how with her passion for healthy, planet-friendly cooking.
For Clara, good food should taste great, nourish your body, and feel easy to make. Her recipes highlight whole foods, colorful produce, and a deep respect for seasonal eating.