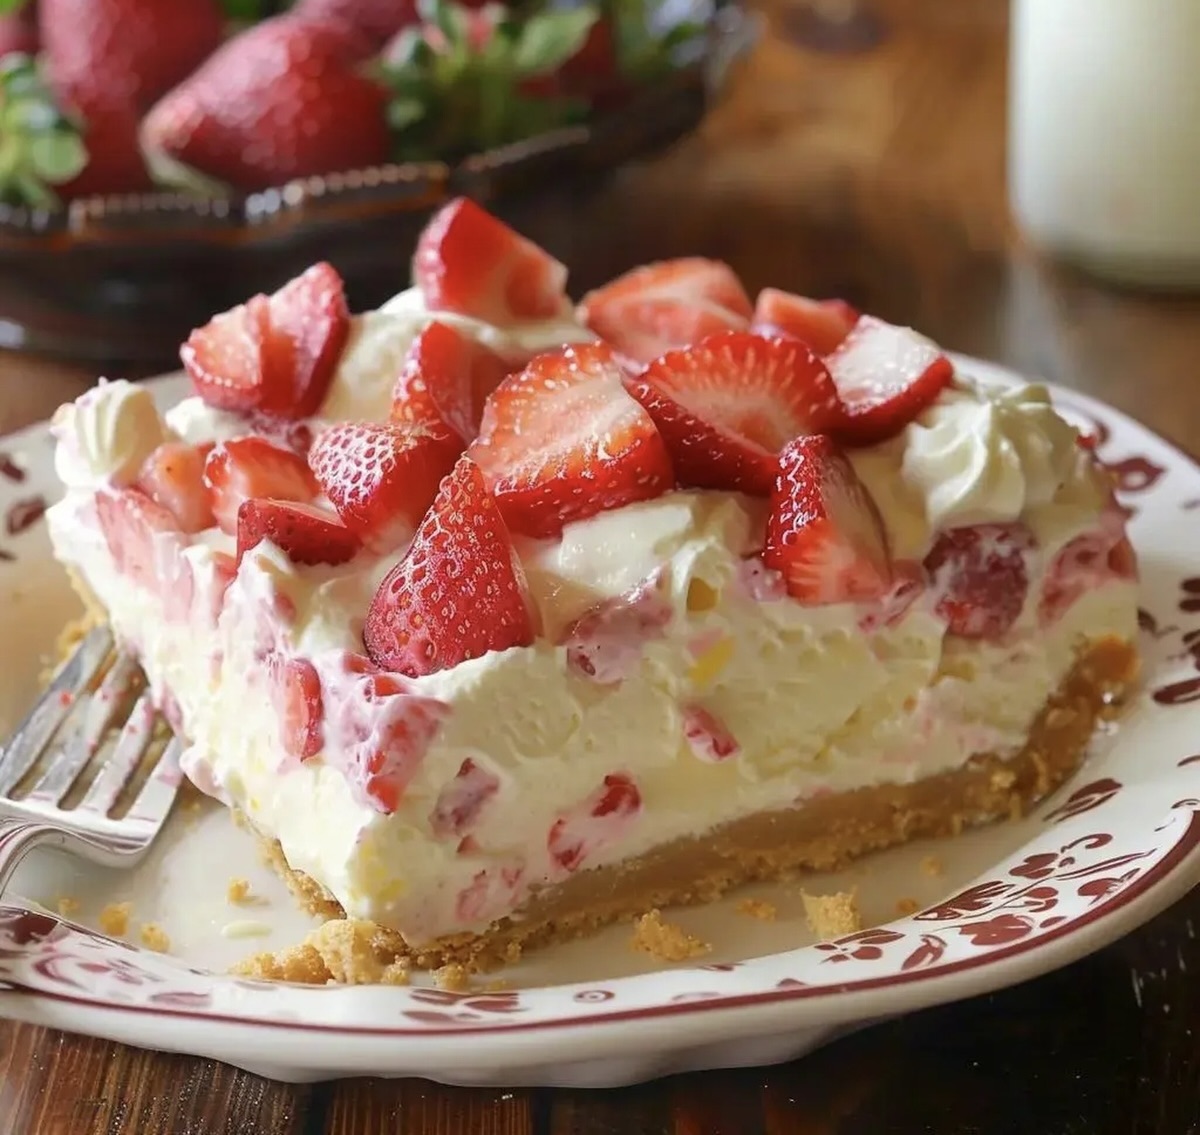
The Dreamiest Strawberry Cheesecake Lush Recipe You’ll Ever Make
Creamy, dreamy strawberry cheesecake lush recipe steals the spotlight at every dessert table.
Layers of velvety goodness melt together in a symphony of sweet perfection.
Soft graham cracker crust provides the perfect foundation for this decadent treat.
Each spoonful promises a delightful blend of tangy cream cheese and luscious strawberry goodness.
The no-bake magic makes this dessert a total game-changer for busy home cooks.
Elegant yet simple, this dessert transforms ordinary moments into extraordinary memories.
Prepare to indulge in a slice of pure bliss that will have everyone asking for seconds.
Why Strawberry Cheesecake Lush is a No-Bake Winner
What’s in Strawberry Cheesecake Lush Dessert
Crust Base:Cream Cheese Layer:Pudding and Fruit Layer:Tools & Dishes Needed for Cheesecake Lush
Steps to Create Strawberry Cheesecake Lush with Ease
Step 1: Crush Cookie Base
Grab your favorite graham crackers or vanilla wafers and transform them into a fine, sandy texture.
Toss the cookies into a food processor and pulse until they become delicate crumbs.
No food processor?
No worries!
Place the cookies inside a sturdy zip-lock bag and roll a rolling pin over them, crushing them into tiny pieces.
Step 2: Create Buttery Foundation
Pour the cookie crumbs into a mixing bowl and drizzle melted butter over them.
Blend the mixture using a fork until the crumbs become moist and clump together.
Spread this delectable base into a 9 x 13 baking dish, pressing firmly to create an even layer.
Pop the dish into the refrigerator to chill and set.
Step 3: Whip Up Creamy Cheese Layer
In a large mixing bowl, combine cream cheese, powdered sugar, and a generous dollop of Cool Whip.
Using an electric mixer, blend these ingredients until smooth and creamy.
Carefully spread this luscious mixture over the chilled cookie crust, creating a velvety surface.
Step 4: Craft Dreamy Pudding Topping
Prepare the cheesecake pudding mix by whisking it with whole milk.
Fold in another portion of Cool Whip to create a light, airy texture.
Gently spread this pudding layer over the cream cheese mixture, ensuring an even coverage.
Step 5: Decorate with Fresh Strawberries
Slice ripe, vibrant strawberries and arrange them in a beautiful, overlapping pattern across the entire surface.
The bright red berries will add a burst of color and fresh flavor to your no-bake dessert.
Step 6: Chill and Serve
Refrigerate the dessert for at least 4 hours or overnight.
This resting time allows the layers to set and the flavors to meld together.
When ready to serve, slice into squares and enjoy the cool, creamy, fruity sensation.
Tips for Creamier Strawberry Cheesecake Lush
Unique Ways to Change Up Cheesecake Lush
Strawberry Cheesecake Lush: Plating & Pairings
Strawberry Spectacular Serving Ideas:Storing Strawberry Cheesecake Lush the Right Way
FAQs
You’ll need a 9×13 baking dish, food processor or rolling pin, hand mixer, mixing bowls, and measuring cups.
Yes! Graham crackers, vanilla wafers, or shortbread cookies work great as alternatives to the original recipe’s cookie base.
Absolutely! Kids love the sweet strawberry flavor and creamy layers. It’s a no-bake recipe, so children can help with mixing and layering.
The mixture should be smooth and free of lumps. Beat until the cream cheese and powdered sugar are fully combined with a creamy, consistent texture.
Print
Strawberry Cheesecake Lush Recipe
- Total Time: 30 minutes
- Yield: 12 1x
Description
Creamy strawberry cheesecake lush brings together delightful layers of graham cracker crust, smooth cream cheese, and fresh strawberry goodness. Sweet dessert perfection awaits when you dive into this irresistible treat that promises pure indulgence.
Ingredients
Crust:
- 1 package Golden Oreos (36 cookies)
- 6 tablespoons (85 grams) butter, melted
Cream Cheese Layer:
- 1 (8 ounces / 226 grams) cream cheese, room temperature
- 1 cup (120 grams) powdered sugar
- 1 (16-ounce / 454 grams) container Cool Whip
Pudding and Fruit Layer:
- 2 packages (3.4 ounces / 96 grams each) instant cheesecake pudding mix (sugar free)
- 3 cups (720 milliliters) whole milk
- 4 cups (600 grams) sliced strawberries
Instructions
- Pulverize graham crackers into fine, uniform crumbs using a food processor or by crushing inside a sealed plastic bag with a rolling pin.
- Combine crushed cracker crumbs with melted butter, mixing thoroughly until evenly moistened. Press the mixture firmly into the bottom of a 9×13 inch baking dish, creating a compact base. Chill in refrigerator for 15 minutes to set.
- Whip cream cheese with powdered sugar using an electric mixer until smooth and creamy. Gently fold in 1 cup of whipped topping until fully incorporated. Spread this luxurious mixture evenly over the chilled crust, ensuring complete coverage.
- Prepare pudding layer by whisking cheesecake pudding mix with whole milk until thickened and smooth. Fold in remaining whipped topping to create a light, airy texture. Carefully distribute this layer over the cream cheese mixture, spreading gently to prevent disturbing the previous layer.
- Arrange fresh strawberry slices in a uniform, overlapping pattern to completely blanket the pudding layer. For best presentation, select ripe, vibrant strawberries and slice them thinly for maximum coverage.
- Refrigerate the dessert for at least 4 hours or overnight to allow layers to set and flavors to meld. Serve chilled for optimal taste and texture.
Notes
- Crushing Cookies Tip: For a more uniform texture, pulse cookies in short bursts to avoid over-processing, which can make crumbs too fine and dense.
- Crust Modification: Add a pinch of cinnamon or vanilla extract to the cookie crumb mixture for an extra flavor dimension that complements the strawberries.
- Dairy-Free Adaptation: Substitute cream cheese with vegan cream cheese alternatives and use coconut whipped cream to make the dessert lactose-free and suitable for plant-based diets.
- Fresh Fruit Swap: Experiment with seasonal berries like raspberries or blackberries to create different flavor variations while maintaining the dessert’s creamy texture.
- Prep Time: 30 minutes
- Cook Time: 0 minutes
- Category: Desserts, Snacks
- Method: None
- Cuisine: American
Nutrition
- Serving Size: 12
- Calories: 300
- Sugar: 18 g
- Sodium: 250 mg
- Fat: 16 g
- Saturated Fat: 8 g
- Unsaturated Fat: 6 g
- Trans Fat: 0 g
- Carbohydrates: 38 g
- Fiber: 1 g
- Protein: 4 g
- Cholesterol: 30 mg
Marcus Reed
Founder & Food Content Creator
Expertise
Single-recipe development, Seasonal and local ingredient utilization, Food photography and styling, Culinary writing and content creation
Education
Culinary Arts Certificate, Blue Ridge Community and Technical College, WV
Focus: Fundamentals of culinary techniques, emphasizing hands-on experience in small-scale kitchen settings.
Marcus’s story begins in Asheville, where good food and family kitchens shaped his earliest memories. After hands-on culinary training and a lot of trial (and a little error), he realized that real cooking isn’t about perfection, it’s about connection.
At Pan and Oven, Marcus crafts recipes that are easy to follow, packed with flavor, and built for real kitchens.