The Spookiest Chocolate Cookies Recipe for Halloween Fun
Dark chocolate and Halloween spirit collide in these wickedly delicious spooky chocolate cookies that will bewitch your taste buds.
Sinister yet sweet, these treats promise a delightful twist on classic cookie recipes.
Rich cocoa powder blends seamlessly with decadent dark chocolate chunks.
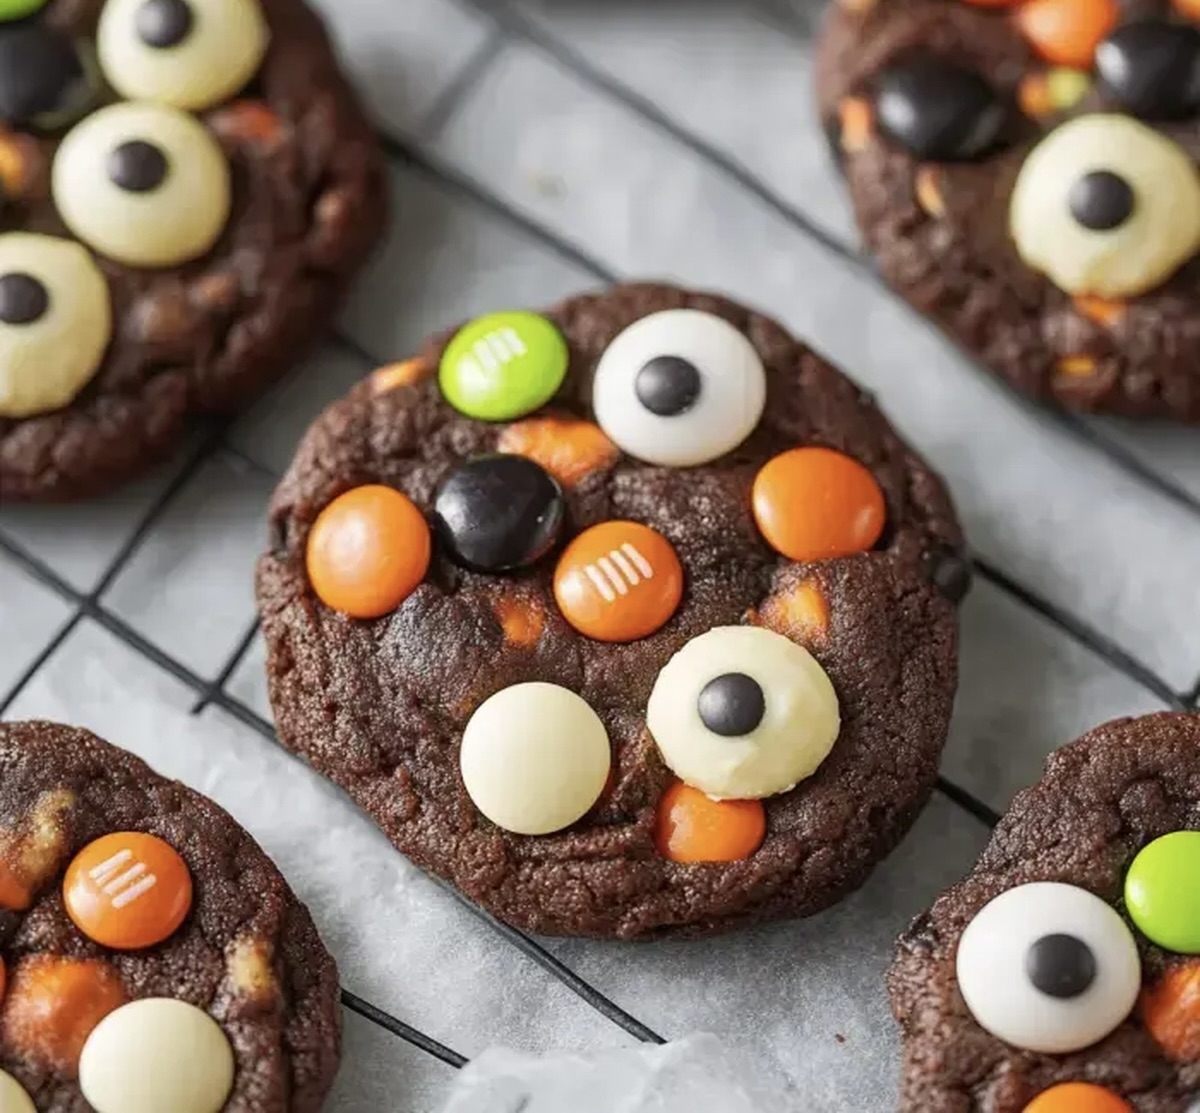
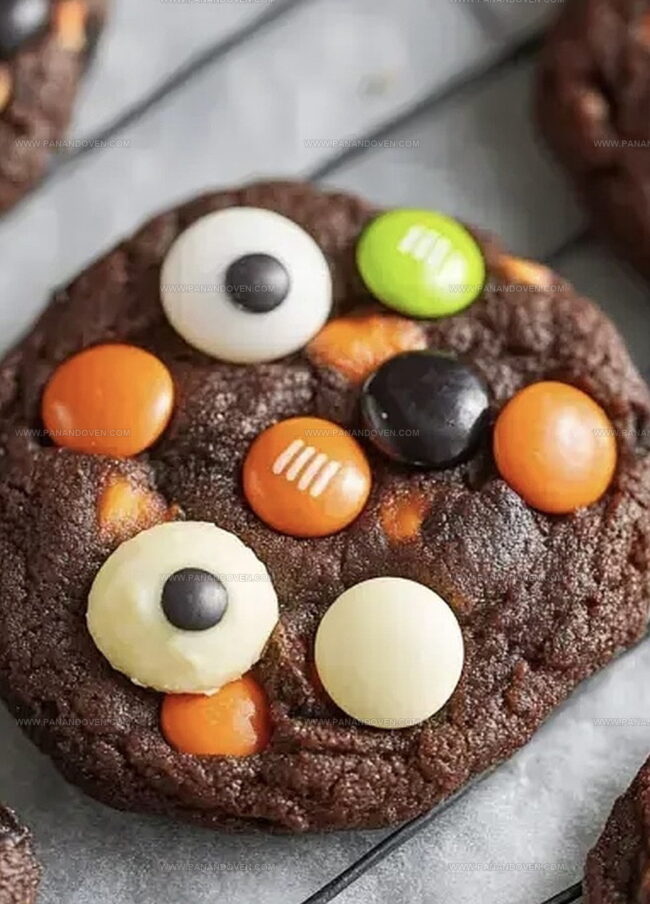
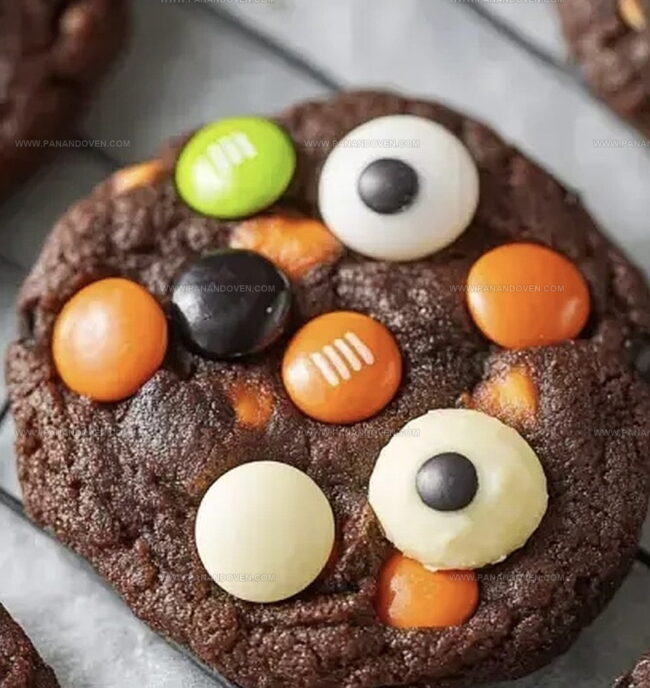
Decorated with playful ghost and spider designs, each cookie becomes a miniature Halloween masterpiece.
Sprinkled with haunting edible decorations, these cookies turn an ordinary baking session into a ghoulishly fun experience.
You’ll love how simple ingredients transform into spine-tingling delights that capture the essence of Halloween.
Let these spooky chocolate cookies cast their delicious spell on your dessert table.
What Makes Double Chocolate Cookies So Spooky?
All You Need for Double Chocolate Cookies
Dry Ingredients:Wet Ingredients:Mix-Ins and Decorations:Baking Gear for Double Chocolate Cookies
Simple Directions for Spooky Chocolate Cookies
Step 1: Warm Up the Oven
Fire up your oven to 350F (175C) and get ready for some delicious baking magic.
Step 2: Prepare Baking Surfaces
Grab your baking sheets and line them with parchment paper or silicone mats to prevent any sticky situations.
Step 3: Mix Dry Ingredients
Combine your dry ingredients in a medium bowl:Sift everything together to create a smooth, lump-free mixture.
Step 4: Cream Butter And Sugars
In a large mixing bowl, whip up:Use an electric mixer to beat these ingredients until they become light, fluffy, and creamy.
Step 5: Add Moisture
Blend in:Mix until everything is perfectly combined.
Step 6: Combine Wet And Dry Ingredients
Slowly add the dry ingredient mixture to the wet ingredients.
Mix on low speed until just combined.
Don’t overmix!
Step 7: Fold In Delicious Extras
Gently fold in white chocolate chips or your favorite mix-ins using a rubber spatula.
Step 8: Shape Cookie Dough
Scoop out 1½ to 2-tablespoon sized balls of dough onto your prepared baking sheets.
Use a spoon or cookie scoop for consistent sizing.
Step 9: Flatten Cookies
Use the palm of your hand to gently flatten each dough ball.
This helps the cookies spread evenly while baking.
Step 10: Bake to Perfection
Pop the sheets into the oven and bake for about 10 minutes.
Once done, let the cookies rest on the baking sheets for 5 minutes before moving them to wire racks.
Step 11: Add Spooky Decorations
For a Halloween twist, place candy googly eyes on top of the cookies to give them a playful, monster-like appearance.
Step 12: Store and Enjoy
Keep your cookies fresh by storing them in an airtight container at room temperature for up to 5 days.
Pro Tips for Chewy Double Chocolate Cookies
Unique Mix-Ins for Double Chocolate Cookies
Halloween Serving Ideas for Spooky Cookies

Storing Spooky Double Chocolate Cookies Safely

FAQs
These double chocolate cookies get their rich chocolate flavor from cocoa powder in the dry ingredients and optional white chocolate chips for extra decadence.
Absolutely! You can swap white chocolate chips for dark, milk, or semi-sweet chocolate chips based on your preference or what you have available in your pantry.
Look for slightly set edges and a soft center. The cookies should look slightly underbaked, as they will continue to firm up while cooling on the baking sheet.
Yes! This recipe is straightforward and requires basic baking skills. The step-by-step instructions make it easy for novice bakers to create delicious chocolate cookies successfully.
Print
Spooky Chocolate Cookies Recipe
- Total Time: 30 minutes
- Yield: 24 1x
Description
Dark chocolate cookies emerge from a haunting Halloween-inspired recipe, blending rich cocoa with eerie decorative elements. Creepy spider web icing and crumbly chocolate base invite sweet terror to your seasonal dessert table.
Ingredients
Main Ingredients:
- 1 cup unsalted butter, at room temperature (around 67°F / 19°C)
- 1 cup granulated sugar
- 1 cup light brown sugar
- 2 3/4 cups all-purpose flour
- 1 large egg, at room temperature
Chocolate Ingredients:
- 1 cup white chocolate chips
- Cocoa powder (preferably Black Cocoa or Dutch-process cocoa powder)
- Optional mix-ins: dark chocolate chips, semi-sweet chocolate chips, Reeses Pieces
Flavor and Decoration Ingredients:
- 1 teaspoon vanilla extract
- 1 pinch of salt
- Optional: Candy googly eyes for decoration
Instructions
- Prepare the oven by heating to 350F (175C), creating an ideal baking environment for the chocolate treats.
- Create a non-stick surface by lining baking sheets with parchment paper or silicone mats.
- Combine dry ingredients through a fine-mesh sifter, ensuring a smooth and lump-free mixture of flour, cocoa powder, baking powder, and salt.
- Cream butter and sugars using an electric mixer, whipping until the mixture becomes light, fluffy, and pale in color.
- Incorporate egg and vanilla extract, blending thoroughly to create a uniform wet mixture.
- Slowly integrate the dry ingredient mixture into the wet ingredients, mixing on low speed until just combined to maintain a tender texture.
- Gently fold white chocolate chips into the dough using a rubber spatula, distributing evenly throughout the mixture.
- Portion dough onto prepared baking sheets using a cookie scoop, creating uniform rounds approximately 1½ to 2 tablespoons in size.
- Gently press down on each dough ball with the palm of your hand, encouraging even spreading during baking.
- Slide the baking sheets into the preheated oven, baking for 10 minutes until edges are set but centers remain slightly soft.
- Allow cookies to rest on baking sheets for 5 minutes, then transfer to wire cooling racks to reach room temperature.
- For a playful Halloween touch, adorn cookies with candy googly eyes if desired.
- Preserve freshness by storing cookies in an airtight container at room temperature for up to 5 days, or freeze unbaked dough balls for future baking.
Notes
- Swap regular cocoa powder with Dutch-processed cocoa for a richer, deeper chocolate flavor that makes these cookies more indulgent.
- Use room temperature butter and egg to ensure smoother mixing and better cookie texture, preventing potential lumpy or uneven dough.
- Chill the dough for 30 minutes before baking to prevent excessive spreading and create thicker, chewier cookies with more defined edges.
- For gluten-free options, replace all-purpose flour with a 1:1 gluten-free baking blend, maintaining the same delicious chocolate taste and soft texture.
- Prep Time: 20 minutes
- Cook Time: 10 minutes
- Category: Desserts, Snacks
- Method: Baking
- Cuisine: American
Nutrition
- Serving Size: 24
- Calories: 200
- Sugar: 14 g
- Sodium: 120 mg
- Fat: 10 g
- Saturated Fat: 6 g
- Unsaturated Fat: 4 g
- Trans Fat: 0 g
- Carbohydrates: 28 g
- Fiber: 1 g
- Protein: 2 g
- Cholesterol: 20 mg
Marcus Reed
Founder & Food Content Creator
Expertise
Single-recipe development, Seasonal and local ingredient utilization, Food photography and styling, Culinary writing and content creation
Education
Culinary Arts Certificate, Blue Ridge Community and Technical College, WV
Focus: Fundamentals of culinary techniques, emphasizing hands-on experience in small-scale kitchen settings.
Marcus’s story begins in Asheville, where good food and family kitchens shaped his earliest memories. After hands-on culinary training and a lot of trial (and a little error), he realized that real cooking isn’t about perfection, it’s about connection.
At Pan and Oven, Marcus crafts recipes that are easy to follow, packed with flavor, and built for real kitchens.