
The Best Southern Sausage Gravy Recipe for Cozy Mornings
Creamy, hearty southern sausage gravy transforms a simple breakfast into a comforting morning feast.
Breakfast enthusiasts adore this classic southern dish that brings warmth to the table.
Rich ground pork sausage creates a luxurious base for the silky sauce.
Crispy bacon bits can add an extra layer of savory goodness to this traditional recipe.
Salt and black pepper blend perfectly with the meat’s natural flavors.
Each spoonful delivers a delightful combination of rustic comfort and homestyle cooking.
Serve this gravy over fresh, fluffy biscuits for a meal that will have everyone asking for seconds.
Why Sausage Gravy Wins Every Time
Pantry Staples for Sausage Gravy
Protein Base:Thickening Agents:Seasoning and Flavor Enhancers:Liquid Base:Gravy-Making Essentials Checklist

How to Whip Up Creamy Gravy
Step 1: Sizzle and Crumble Sausage
Drop the ground sausage into a large skillet over medium-high heat.
Break the meat into small, uneven crumbles as it cooks, letting it brown and develop deep, rich flavors.
The sausage will release its natural oils and create a delicious base for the gravy.
Step 2: Dust with Flour Power
Sprinkle flour over the crispy, golden sausage pieces.
Stir and coat the meat thoroughly, allowing the flour to absorb the flavorful fat and create a smooth foundation for your gravy.
Let this mixture cook for a minute or two, which helps eliminate any raw flour taste.
Step 3: Spice It Up
Enhance the gravy with a blend of seasonings:Stir these seasonings into the sausage-flour mixture, distributing the flavors evenly and creating a fragrant base.
Step 4: Creamy Transformation
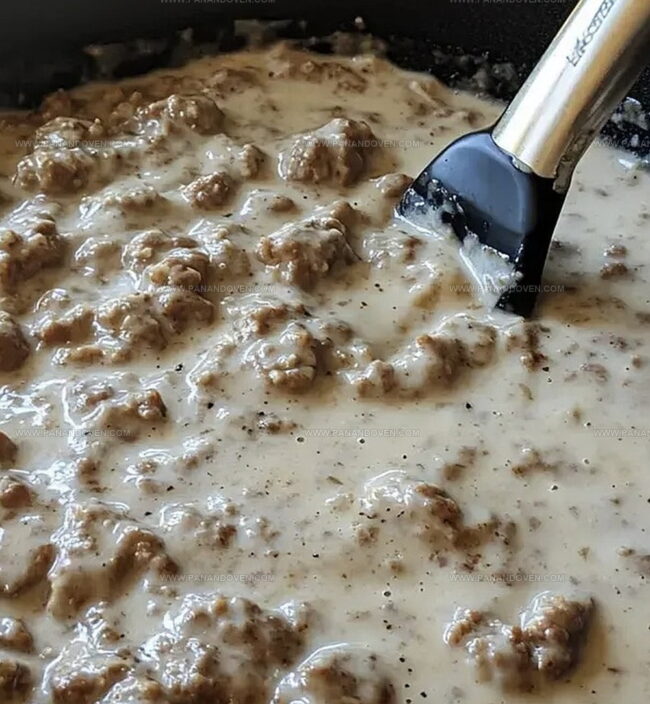
Slowly pour milk into the skillet, whisking continuously to prevent lumps.
Keep stirring as the mixture simmers and thickens.
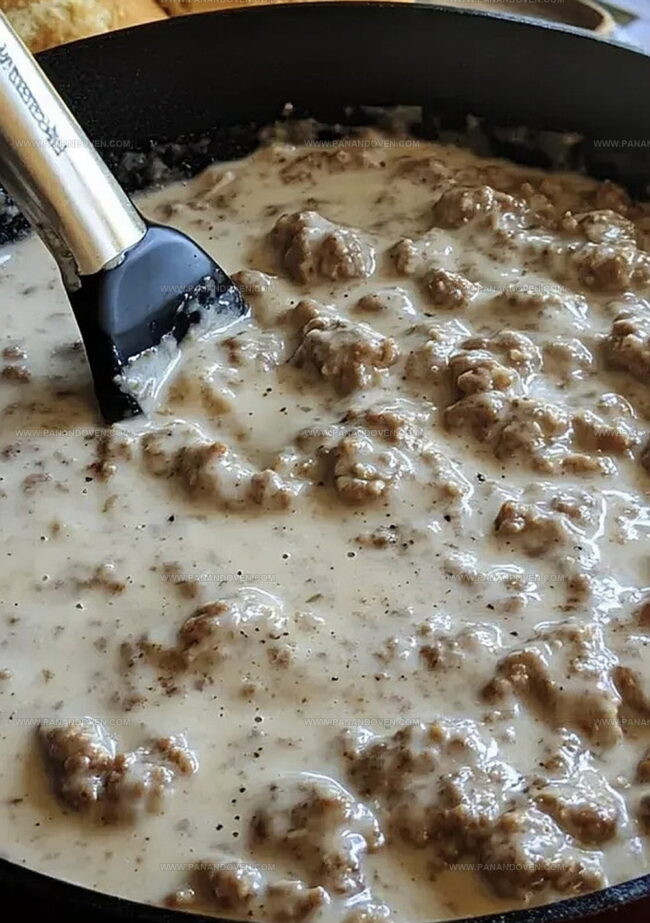
The gravy will gradually transform from a liquid to a luxurious, creamy consistency that clings perfectly to biscuits.
Step 5: Final Touch and Serve
Once the gravy reaches a rich, velvety texture, remove from heat.
Ladle the steaming, peppered gravy generously over warm, fluffy biscuits.
The gravy should be thick enough to coat the biscuits but still able to cascade down the sides.
Pro Secrets for Flawless Gravy

Flavor Upgrade Ideas for Gravy
Creative Gravy Serving Inspirations

Keeping Your Gravy Fresh

FAQs

Breakfast or country-style pork sausage with higher fat content works perfectly, creating richer flavor and better texture for traditional Southern sausage gravy.
Continuously whisk the mixture after adding flour and milk, stirring constantly to break down any potential clumps and create a smooth, creamy consistency.
Yes, you can prepare the gravy in advance and reheat it gently on the stovetop, adding a splash of milk if it becomes too thick during reheating.
After browning the sausage, you can drain some excess fat before adding flour, which helps reduce overall greasiness while maintaining great flavor.
Print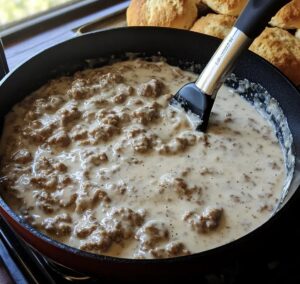
Southern Sausage Gravy Recipe
- Total Time: 20 minutes
- Yield: 8 1x
Description
Hearty southern sausage gravy delivers comfort on a plate with rich, creamy goodness. Homemade flavors blend perfectly, offering a classic breakfast experience you’ll savor with each satisfying bite.
Ingredients
Meat Ingredients:
- 1 lb mild ground breakfast sausage
Main Dry Ingredients:
- 1/3 cup all-purpose flour
- 1/2 teaspoon (2.5 grams) garlic powder
Liquid and Seasoning Ingredients:
- 3 cups whole milk
- Salt to taste
- Pepper to taste
- 8 biscuits
Instructions
- Heat a skillet over medium-high temperature and thoroughly cook the sausage, breaking it into small crumbles until no pink remains and a rich golden-brown color develops.
- Reduce heat to medium and sprinkle flour over the cooked sausage, stirring continuously to create a uniform mixture that coats the meat evenly.
- Incorporate garlic powder, salt, and pepper into the sausage-flour blend, ensuring the seasonings are distributed thoroughly throughout the mixture.
- Gradually pour whole milk into the skillet, whisking consistently to prevent lumps and create a smooth, creamy consistency.
- Continue cooking and stirring the gravy for 5-7 minutes, allowing it to simmer and thicken until it reaches a rich, velvety texture that coats the back of a spoon.
- Remove from heat and let the gravy rest for 2-3 minutes to further develop its flavor and stabilize its consistency.
- Ladle the hot sausage gravy generously over warm, freshly baked biscuits, ensuring each biscuit is completely covered with the savory sauce.
Notes
- Opt for high-fat ground sausage to ensure maximum flavor and richness in your gravy.
- Continuously stir the mixture to prevent flour from burning and creating lumpy texture.
- Control heat carefully to maintain smooth consistency without scorching milk.
- Consider using alternative milk options like oat or almond milk for dietary restrictions while maintaining creamy texture.
- Prep Time: 5 minutes
- Cook Time: 15 minutes
- Category: Breakfast, Dinner, Snacks
- Method: Sautéing
- Cuisine: Southern American
Nutrition
- Serving Size: 8
- Calories: 300
- Sugar: 2 g
- Sodium: 800 mg
- Fat: 20 g
- Saturated Fat: 8 g
- Unsaturated Fat: 10 g
- Trans Fat: 0 g
- Carbohydrates: 25 g
- Fiber: 1 g
- Protein: 10 g
- Cholesterol: 40 mg
Marcus Reed
Founder & Food Content Creator
Expertise
Single-recipe development, Seasonal and local ingredient utilization, Food photography and styling, Culinary writing and content creation
Education
Culinary Arts Certificate, Blue Ridge Community and Technical College, WV
Focus: Fundamentals of culinary techniques, emphasizing hands-on experience in small-scale kitchen settings.
Marcus’s story begins in Asheville, where good food and family kitchens shaped his earliest memories. After hands-on culinary training and a lot of trial (and a little error), he realized that real cooking isn’t about perfection, it’s about connection.
At Pan and Oven, Marcus crafts recipes that are easy to follow, packed with flavor, and built for real kitchens.