Zingy Sour Strawberry Gummies Recipe: Sweet-Tart Joy in Every Bite
Sweet meets tangy in this delightful sour strawberry gummies recipe that captures summer’s essence in every chewy bite.
homemade candies burst with vibrant strawberry flavor and a zesty punch.
These gummies deliver a perfect balance of sweetness and tartness that dance across your palate.
Crafting these treats requires minimal ingredients and simple steps anyone can master.
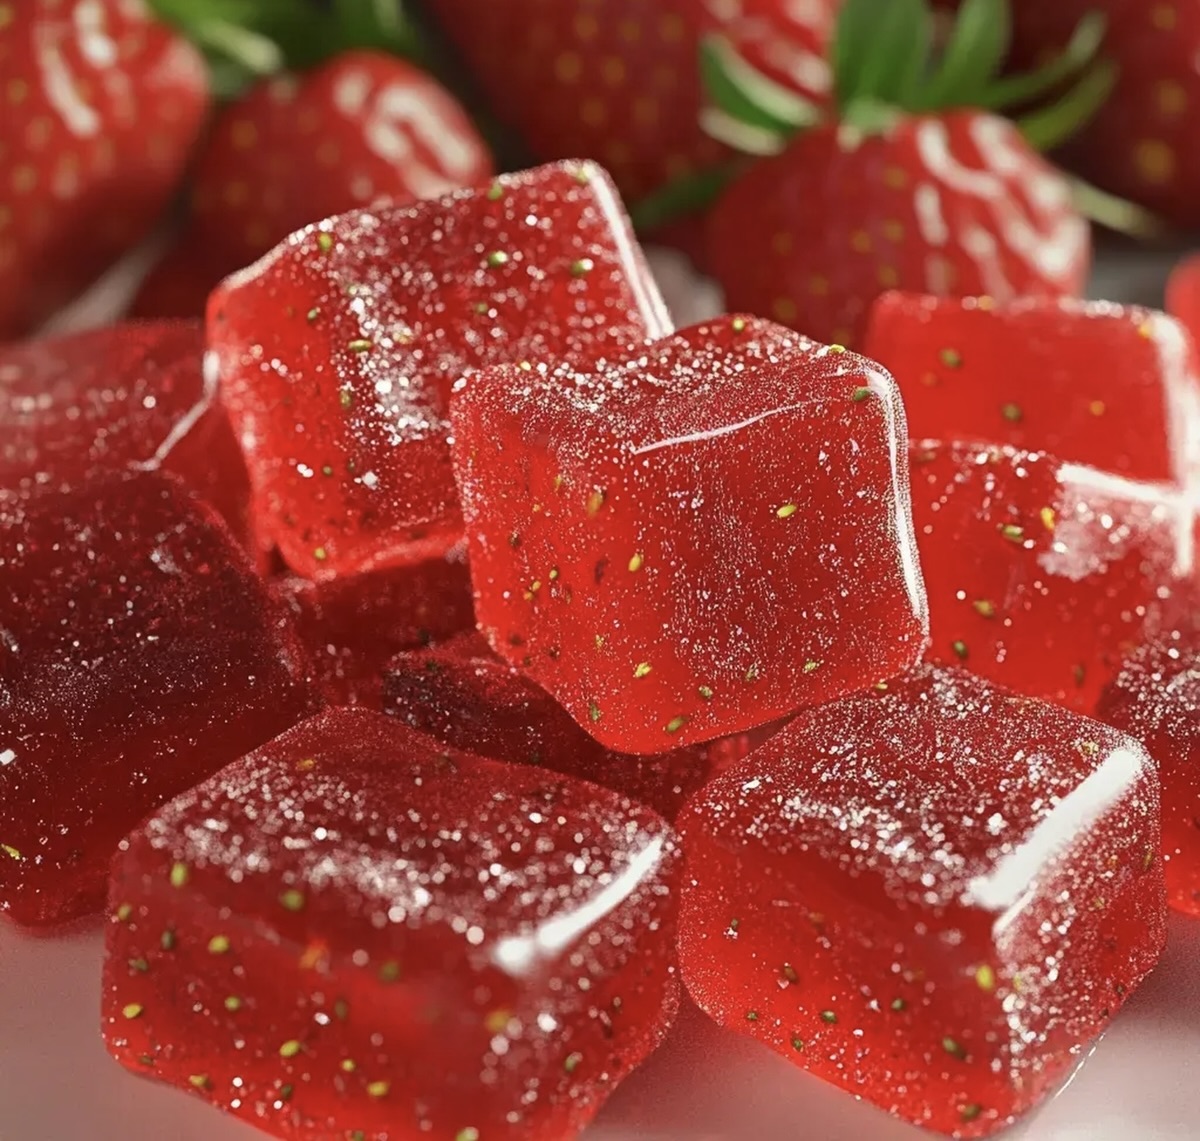
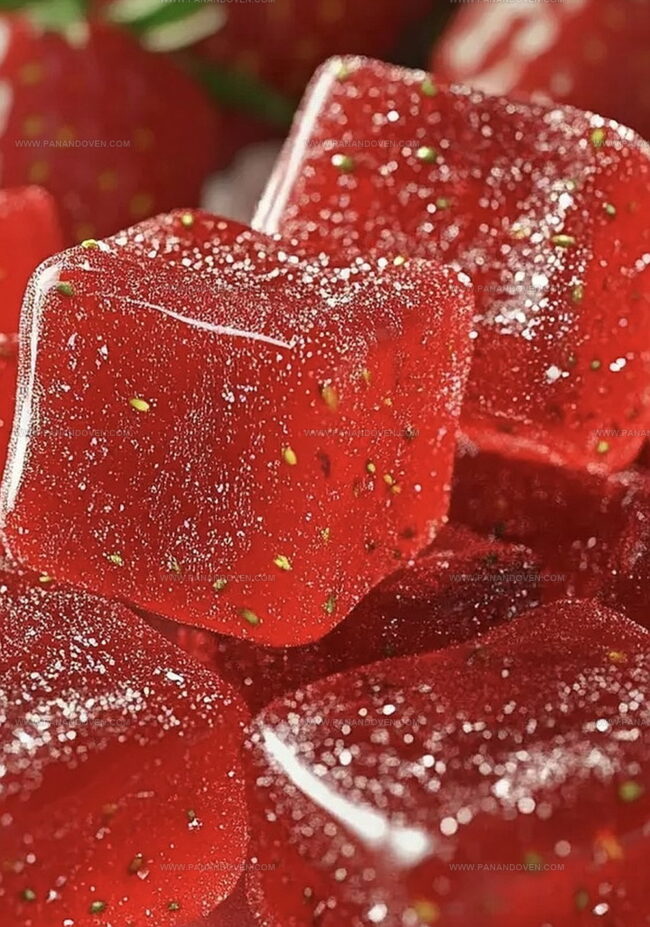
The bright red color and glossy finish make them irresistibly appealing to both kids and adults.
Soft, chewy, and packed with real fruit essence, these gummies transform ordinary snack time into a delectable adventure.
Prepare to tantalize your taste buds with this crowd-pleasing confection that promises pure, fruity delight.
Homemade Sour Strawberry Gummies Why These Gummies Are Special
What’s Needed for Sour Strawberry Gummies
Fruit Base:Sweetening and Binding Agents:Finishing Ingredients:Kitchen Tools for Gummy-Making
How to Make Sour Strawberry Gummies at Home

Step 1: Whip Up The Fruity Base
Grab your blender and toss in fresh, ripe strawberries.
Add a splash of cool water and a zesty squeeze of lemon juice.
Blend everything until you’ve got a silky smooth puree that looks like a vibrant red sunset.
Step 2: Warm The Fruity Mixture
Transfer your strawberry blend into a cozy saucepan.
Gently warm the mixture over medium-low heat, letting the flavors start to mingle and dance.
Step 3: Drizzle In Sweet Nectar
Pour in golden honey, stirring softly.
Keep the heat gentle – you want warmth, not a rolling boil.
The honey will add a rich, sweet undertone to your gummies.
Step 4: Sprinkle Magical Binding Powder
Slowly shower gelatin powder over the warm mixture.
Whisk with purpose, keeping those pesky lumps at bay.
Your goal is a smooth, silky consistency.
Step 5: Dissolve The Binding Magic
Continue stirring until every single gelatin crystal melts into the liquid.
Patience is key – you want a perfectly smooth mixture.
Step 6: Mold Your Gummy Treasures
Find your favorite silicone mold or grab a baking dish lined with parchment.
Carefully pour the glossy mixture into your chosen container.
Step 7: Chill And Set
Slide the mold into the refrigerator.
Let the gummies firm up for at least two hours.
Think of this as their transformation time.
Step 8: Release The Gummy Treats
Once set, pop the gummies out of the mold.
If needed, slice them into bite-sized pieces with a sharp knife.
Step 9: Add A Sweet Sparkle
Roll each gummy in a light dusting of granulated sugar.
This gives them a delightful, sparkly exterior that adds a bit of extra sweetness.
Step 10: Preserve Your Delicious Creation
Tuck the gummies into an airtight container.
Keep them chilled in the refrigerator, ready to be enjoyed whenever a sweet craving strikes.
Tricks for Tangy Strawberry Flavor
Gummy Swaps and Twists for Every Batch
Serving Gummies for Snacking and Sharing
Gummy Storage Tips
FAQs
Yes, frozen strawberries work great! Just thaw them completely and drain any excess liquid before blending.
They typically stay fresh for about 5-7 days when stored in an airtight container in the refrigerator.
No, because the recipe uses gelatin, which is an animal-derived product. Vegetarians would need to use agar-agar as a substitute.
Absolutely! You can increase or decrease the amount of honey to suit your taste preferences. Start with less and add more if needed.
Print
Sour Strawberry Gummies Recipe
- Total Time: 2 hours 15 minutes
- Yield: 12 1x
Description
Homemade sour strawberry gummies combine tangy fruit flavors with chewy gelatin magic. Sweet-tart treats deliver pure snacking pleasure with minimal kitchen effort.
Ingredients
Main Ingredients:
- 1 1/2 cups (360 milliliters) fresh strawberries, hulled and chopped
- 3 tablespoons (45 grams) gelatin powder
- 1/2 cup (120 milliliters) water
Additional Ingredients:
- 2 tablespoons (30 milliliters) lemon juice
- 2 tablespoons (30 milliliters) honey
Coating:
- 1/4 cup (50 grams) granulated sugar
Instructions
- Pulverize fresh strawberries, water, and lemon juice in a blender until achieving a silky, uniform consistency.
- Transfer the vibrant crimson puree into a saucepan, applying gentle medium-low heat to warm the liquid.
- Incorporate honey into the mixture, stirring carefully to maintain a warm temperature without triggering a boil.
- Gradually sprinkle gelatin powder across the surface, whisking vigorously to prevent clumping and ensure smooth integration.
- Continue stirring the mixture until gelatin completely dissolves, creating a glossy, homogeneous liquid.
- Carefully transfer the mixture into silicone molds or a prepared baking dish, ensuring even distribution.
- Place in refrigerator for approximately 120 minutes, allowing the gummies to solidify and develop a firm texture.
- Extract the gummies from the mold, slicing into delectable bite-sized pieces if desired.
- Delicately roll each gummy through granulated sugar, creating a light, crystalline exterior coating.
- Preserve the gummies in a sealed container within the refrigerator to maintain optimal freshness and texture.
Notes
- Select ripe, sweet strawberries for the most intense flavor and natural sweetness in your gummies.
- Adjust honey levels to control sweetness, using less for a more tart gummy or more for a sweeter treat.
- Experiment with different silicone mold shapes to make fun, unique gummy designs that surprise and delight.
- Use grass-fed, unflavored gelatin for a cleaner, more natural ingredient profile and better nutritional value.
- Prep Time: 15 minutes
- Cook Time: 2 hours
- Category: Snacks, Desserts
- Method: Blending
- Cuisine: American
Nutrition
- Serving Size: 12
- Calories: 60
- Sugar: 9g
- Sodium: 0mg
- Fat: 0g
- Saturated Fat: 0g
- Unsaturated Fat: 0g
- Trans Fat: 0g
- Carbohydrates: 15g
- Fiber: 1g
- Protein: 1g
- Cholesterol: 0mg
Marcus Reed
Founder & Food Content Creator
Expertise
Single-recipe development, Seasonal and local ingredient utilization, Food photography and styling, Culinary writing and content creation
Education
Culinary Arts Certificate, Blue Ridge Community and Technical College, WV
Focus: Fundamentals of culinary techniques, emphasizing hands-on experience in small-scale kitchen settings.
Marcus’s story begins in Asheville, where good food and family kitchens shaped his earliest memories. After hands-on culinary training and a lot of trial (and a little error), he realized that real cooking isn’t about perfection, it’s about connection.
At Pan and Oven, Marcus crafts recipes that are easy to follow, packed with flavor, and built for real kitchens.