
The Sweet Magic of S’mores Campfire Cones Recipe
Dessert nights around the campfire spark joy with these delightful s’mores campfire cones that blend classic chocolate and marshmallow flavors into a handheld treat.
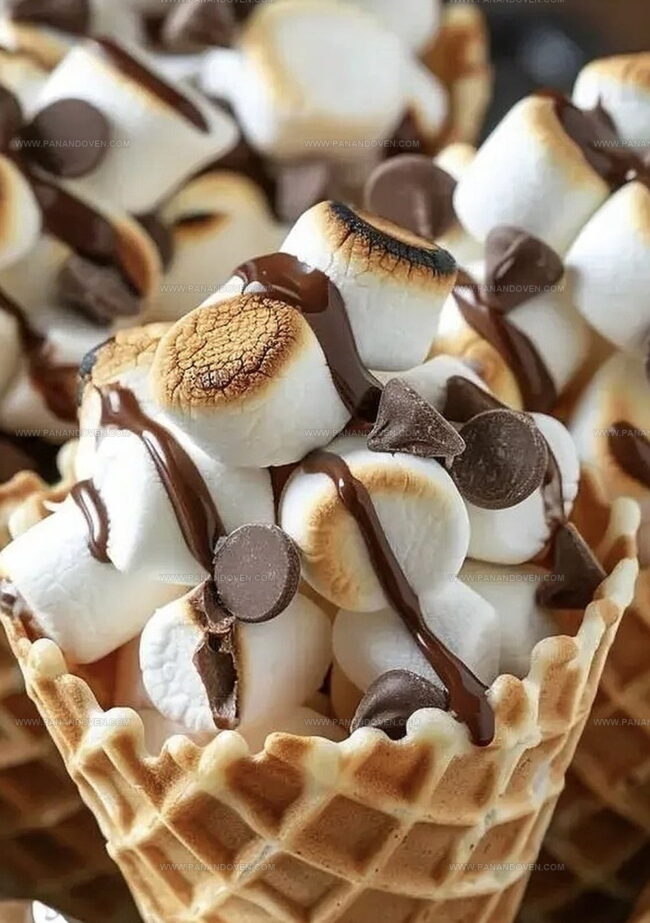
Crisp waffle cones loaded with gooey chocolate and soft marshmallows create a nostalgic camping experience everyone will love.
Each cone becomes a personal treasure of sweet indulgence waiting to be devoured.
Melted chocolate drips alongside toasted marshmallows, creating a decadent mixture that satisfies every sweet craving.
Kids and adults alike will adore this simple yet delicious dessert that requires minimal preparation.
Fire up the campfire and transform ordinary cones into an extraordinary dessert adventure.
You won’t be able to resist these irresistible treats that promise pure summer happiness.
S’mores Campfire Cones: Sweetness In A Cone
Irresistible Ingredients Inside Campfire S’mores Cones
Cones:Chocolate:Marshmallows:Cooking Accessories:Cone-Making Tools For Gooey S’mores Treats
The Campfire Cone-Making Process, Step By Step

Step 1: Prepare Cone Ingredients
Gather your favorite waffle cones and get ready for a delightful twist on the classic campfire treat.
You’ll want to have these key ingredients ready:Step 2: Layer Delicious Fillings
Start building your gooey masterpiece by carefully filling each cone.
Create a mouthwatering layers of chocolatey goodness and fluffy marshmallows.
If you’re feeling extra adventurous, sprinkle some graham cracker crumbs between the layers for added crunch.
Step 3: Secure And Wrap Tightly
Wrap each cone completely in aluminum foil, making sure to seal the edges well.
This will help trap the heat and create a perfect melty interior while protecting the cone from direct flames or intense heat.
Step 4: Apply Gentle Heat
Cook your wrapped cones using one of these methods:Step 5: Unwrap And Savor
Carefully remove the foil, watching out for hot contents.
The cones will be steaming with melted chocolate and gooey marshmallows.
Let cool for a moment before diving into this portable dessert paradise.
Tips For Melting Marshmallows Perfectly In Every Cone
Ways To Remix Your Classic Campfire S’mores Cones
Fun Serving Ideas For Outdoor And Indoor S’mores
How To Keep Campfire Cones Fresh Until The Last Bite
FAQs
You’ll need ice cream cones, marshmallows, chocolate chips, and aluminum foil. Optional toppings like graham cracker crumbs can add extra flavor.
Yes! You can use a campfire, hot coals, or even a fire pit. Just be sure to carefully wrap the cones in foil and rotate them to ensure even heating.
Kids can help fill the cones with ingredients, but an adult should handle the heating and unwrapping process since the contents get very hot. Always supervise children around heat sources.
Print
SMores Campfire Cones Recipe
- Total Time: 20 minutes
- Yield: 12 1x
Description
S’mores campfire cones combine classic graham cracker goodness with melted chocolate and marshmallows in a delightful handheld treat. Campers and dessert enthusiasts will love this easy outdoor dessert that brings campfire magic to sweet moments.
Ingredients
Main Ingredients:
- 12 sugar or waffle cones
- 1 bag mini marshmallows
- 12 ounces (340 grams) chocolate chips
Supplementary Ingredients:
(none)
Optional Toppings:
(none)
Instructions
- Gather aluminum foil and prepare cones with an even distribution of chocolate chips and marshmallows, ensuring ingredients are nestled securely inside.
- Carefully encase each filled cone completely in aluminum foil, sealing edges tightly to prevent ingredients from escaping during heating.
- Position wrapped cones on a preheated grill or inside a 350°F oven, allowing them to warm for approximately 7-10 minutes until marshmallows become soft and chocolate melts into a gooey consistency.
- Remove cones from heat source using tongs or heat-resistant gloves, allowing them to cool slightly for safe handling.
- Gently unwrap foil, being cautious of potential steam and hot contents, and serve immediately while ingredients remain warm and melted.
- Optional: Sprinkle graham cracker crumbs or drizzle additional chocolate over the top for extra flavor and texture before consuming.
Notes
- Always use sturdy, thick waffle cones to prevent cracking during heating and handling.
- Experiment with different chocolate varieties like dark, milk, or white chocolate for unique flavor combinations.
- For a gluten-free version, ensure you’re using gluten-free chocolate chips and check cone ingredients.
- Let cones cool slightly before eating to avoid burning your mouth and allow fillings to melt perfectly.
- Prep Time: 10 minutes
- Cook Time: 10 minutes
- Category: Snacks, Desserts
- Method: Baking
- Cuisine: American
Nutrition
- Serving Size: 12
- Calories: 210
- Sugar: 20 g
- Sodium: 50 mg
- Fat: 8 g
- Saturated Fat: 4 g
- Unsaturated Fat: 2 g
- Trans Fat: 0 g
- Carbohydrates: 32 g
- Fiber: 1 g
- Protein: 2 g
- Cholesterol: 5 mg
Marcus Reed
Founder & Food Content Creator
Expertise
Single-recipe development, Seasonal and local ingredient utilization, Food photography and styling, Culinary writing and content creation
Education
Culinary Arts Certificate, Blue Ridge Community and Technical College, WV
Focus: Fundamentals of culinary techniques, emphasizing hands-on experience in small-scale kitchen settings.
Marcus’s story begins in Asheville, where good food and family kitchens shaped his earliest memories. After hands-on culinary training and a lot of trial (and a little error), he realized that real cooking isn’t about perfection, it’s about connection.
At Pan and Oven, Marcus crafts recipes that are easy to follow, packed with flavor, and built for real kitchens.