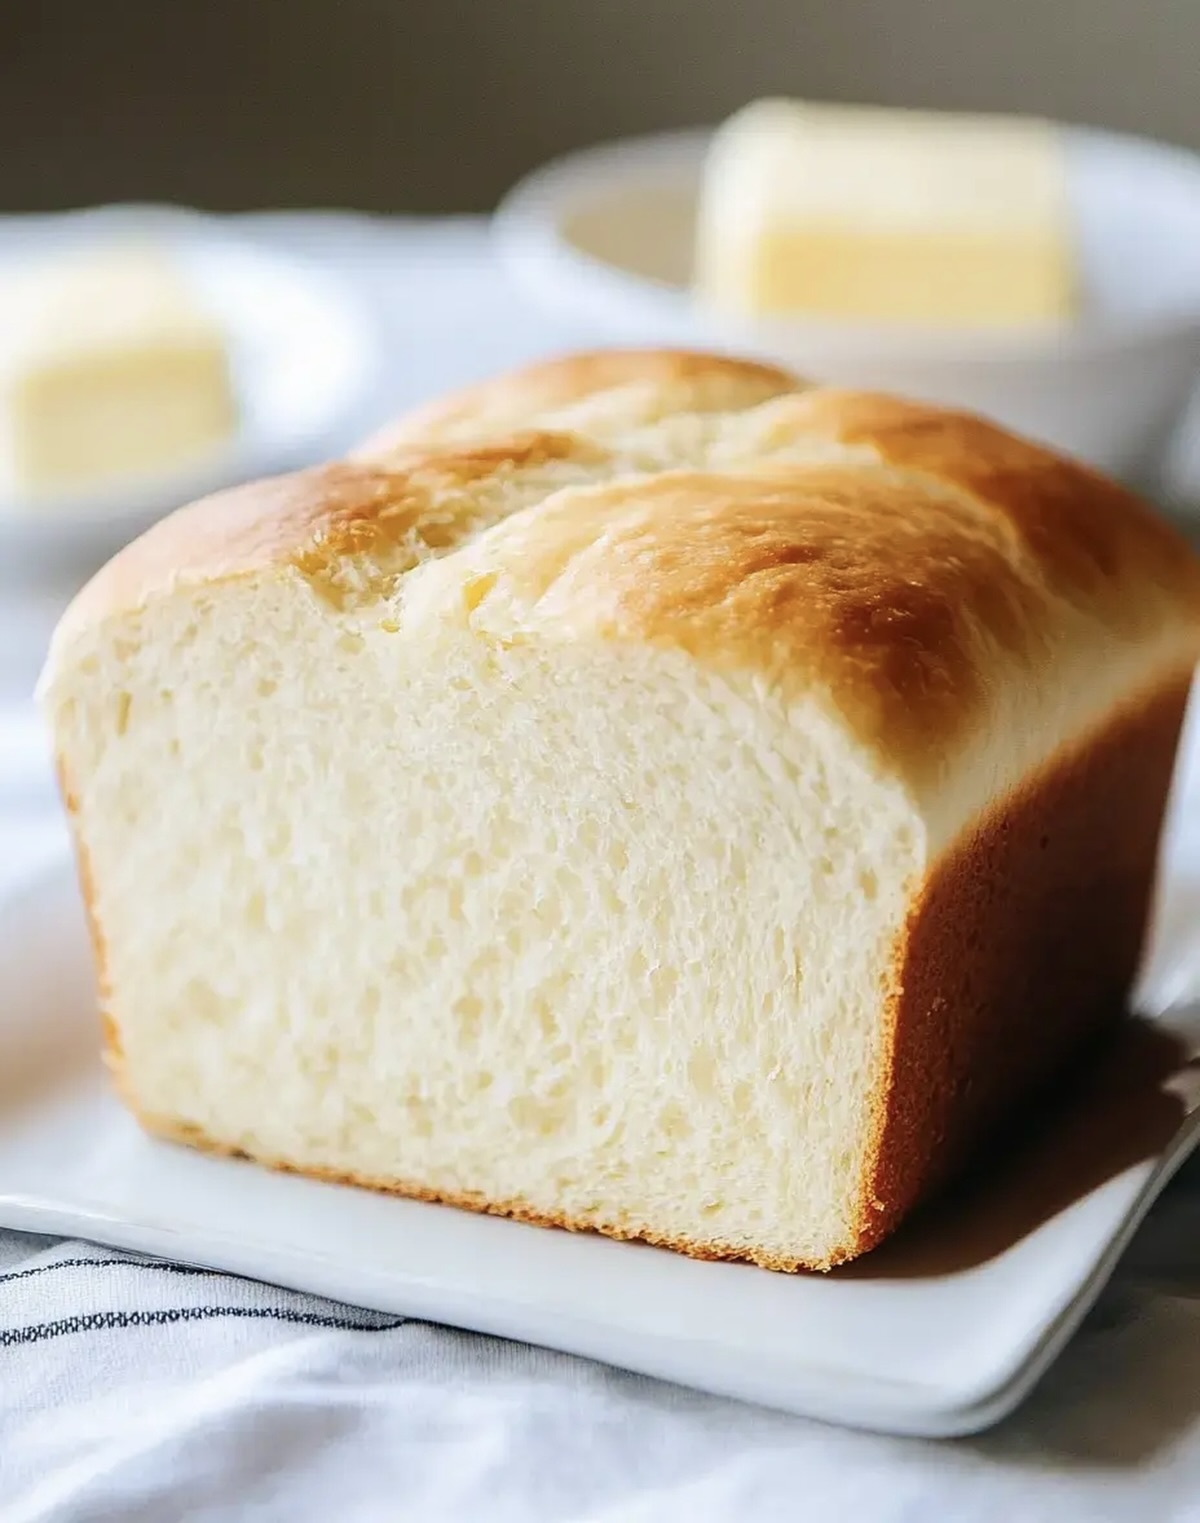
Easy Fluffy Homemade Bread Recipe Anyone Can Master
Baking fresh, warm homemade bread with a delightful homemade bread recipe can turn an ordinary kitchen into a fragrant paradise.
The aroma of freshly baked loaves fills every corner with comfort and warmth.
Kneading dough becomes a soothing ritual that connects us to generations of home cooks.
Each ingredient plays a crucial role in creating a perfect golden-brown masterpiece.
simple techniques and a handful of pantry staples are all you need to craft this timeless classic.
The satisfaction of pulling a steaming loaf from the oven beats any store-bought alternative.
Embrace the art of bread making and savor every delicious slice.
What Makes Simple Homemade Bread Recipe So Reliable
Ingredients for Bakery-Style Homemade Bread
Bread Base:Flavor Enhancers:Optional Finishing:Tools Needed for Bread-Baking Days
Steps for Perfect Homemade Bread
Step 1: Awaken The Yeast
Grab a spacious mixing bowl and combine warm water with a tiny sprinkle of sugar.
Gently stir in the yeast until it becomes frothy and bubbly, creating a lively mixture that signals the yeast is ready to work its magic.
Step 2: Create Dough Base
Add these ingredients to your yeast mixture:Blend everything together until the mixture transforms into a smooth, uniform consistency.
Step 3: Develop Perfect Dough Texture
Gradually incorporate additional flour into the mixture.
Knead the dough consistently for 6-8 minutes until it becomes soft, elastic, and slightly tacky.
Shape the dough into a beautiful round ball that feels smooth to the touch.
Step 4: First Dough Rise
Transfer the dough to an oiled bowl, ensuring the entire surface is lightly coated.
Cover with a clean kitchen towel or plastic wrap.
Let the dough rest in a warm, draft-free space for approximately 60 minutes until it dramatically expands.
Step 5: Shape Bread Loaves
Gently deflate the risen dough and divide it into two equal portions.
Roll each section into a rectangular shape, preparing for the next transformation.
Step 6: Roll And Form Loaves
Tightly roll each dough rectangle from the shorter edge, creating compact cylindrical shapes.
Ensure smooth, even rolling for consistent loaves.
Step 7: Final Rising Stage
Place the dough cylinders seam-side down into greased bread pans.
Cover and allow them to rise again for another hour.
The loaves should visibly expand, reaching just above the pan’s edges.
Step 8: Bake To Golden Perfection
Preheat the oven to 375 degrees Fahrenheit.
Slide the prepared loaves into the oven and bake for 30-35 minutes.
Look for a beautiful golden-brown color and listen for a hollow sound when gently tapping the crust.
Optional: Brush with melted butter for extra shine.
Remove and cool on a wire rack before slicing.
Baking Tips for Fluffy Homemade Loaves
Bread Variations and Add-In Ideas
Serving Suggestions for Fresh Bread
Bread Storage to Keep it Fresh
FAQs
Kneading develops gluten, which gives bread its structure and helps it rise properly. It creates elasticity and strength in the dough, ensuring a better texture and softer bread.
When you mix yeast with warm water and sugar, it should become bubbly and foamy within 5-10 minutes. If no bubbles form, your yeast might be old or inactive, and you’ll need fresh yeast.
After the first rise, gently press down the puffy dough to release air bubbles. This helps redistribute the yeast and create a more even texture in your final bread.
Print
Simple Homemade Bread Recipe
- Total Time: 1 hour 55 minutes
- Yield: 12 1x
Description
Delightful homemade bread emerges from a straightforward process of mixing, kneading, and baking. Warm, aromatic slices invite you to savor the comforting simplicity of freshly baked goodness.
Ingredients
Main Ingredients:
- 5 1/2 cups bread flour (612 grams)
- 2 1/4 cups warm water (532 milliliters)
- 1 tablespoon salt (15 grams)
Leavening and Sweetener:
- 2 1/4 teaspoons active dry yeast (1 packet)
- 1/4 cup sugar (50 grams)
- 1 pinch sugar
Additional Ingredients:
- 2 tablespoons vegetable oil (30 milliliters)
- Optional: butter for topping
Instructions
- Prepare yeast mixture by combining warm water and a pinch of sugar in a large mixing bowl. Stir until yeast becomes frothy and activated, approximately 5-10 minutes.
- Incorporate sugar, salt, oil, and initial portion of flour into the yeast mixture. Blend thoroughly until the ingredients form a consistent texture.
- Gradually introduce remaining flour, kneading continuously to develop a soft, pliable dough. Work the dough for 5-7 minutes, ensuring a smooth, slightly tacky consistency without being overly sticky.
- Transfer dough to a lightly oiled bowl, rotating to coat entire surface. Cover with plastic wrap and allow to rise in a warm environment for 60 minutes, or until volume doubles.
- Deflate risen dough by gently pressing down. Divide into two equal portions and roll each section into rectangular shapes approximately 8 inches wide.
- Tightly roll each rectangular section from the shorter edge, creating compact cylindrical loaves. Ensure smooth, even rolling technique.
- Position rolled dough cylinders seam-side down in greased bread pans. Cover and permit second rising for approximately 60 minutes, until loaves expand to 1/2 inch above pan edges.
- Preheat oven to 375°F. Bake loaves for 30-35 minutes, monitoring color until golden brown. Validate doneness by tapping loaf, which should produce a hollow sound. Optional: brush with melted butter before cooling on wire rack.
Notes
- Always use fresh, active yeast to ensure proper rising and optimal bread texture, checking the expiration date before starting.
- Warm water temperature matters critically; aim for 110-115°F to activate yeast without killing it, using a kitchen thermometer for precision.
- Kneading develops gluten structure, so take time to work the dough thoroughly, creating elasticity and helping bread achieve a soft, airy interior.
- Experiment with whole wheat or alternative flours for nutrition boost, but remember to adjust liquid ratios since these absorb moisture differently than white flour.
- Prep Time: 1 hour 20 minutes
- Cook Time: 35 minutes
- Category: Breakfast, Snacks, Dinner
- Method: Baking
- Cuisine: American
Nutrition
- Serving Size: 12
- Calories: 150
- Sugar: 1.2 g
- Sodium: 0.2 g
- Fat: 2.5 g
- Saturated Fat: 0.4 g
- Unsaturated Fat: 2.1 g
- Trans Fat: 0 g
- Carbohydrates: 28 g
- Fiber: 0.8 g
- Protein: 4 g
- Cholesterol: 0 mg
Marcus Reed
Founder & Food Content Creator
Expertise
Single-recipe development, Seasonal and local ingredient utilization, Food photography and styling, Culinary writing and content creation
Education
Culinary Arts Certificate, Blue Ridge Community and Technical College, WV
Focus: Fundamentals of culinary techniques, emphasizing hands-on experience in small-scale kitchen settings.
Marcus’s story begins in Asheville, where good food and family kitchens shaped his earliest memories. After hands-on culinary training and a lot of trial (and a little error), he realized that real cooking isn’t about perfection, it’s about connection.
At Pan and Oven, Marcus crafts recipes that are easy to follow, packed with flavor, and built for real kitchens.