Crispy Golden Rosettes Recipe: Sweet Carnival Bliss at Home
Sweet and delicate rosettes dance on the culinary landscape of traditional Norwegian holiday treats.
These crisp, lacy pastries melt effortlessly on your tongue with a whisper of sweetness.
Generations have cherished this delicate fried cookie passed down through families in Scandinavia.
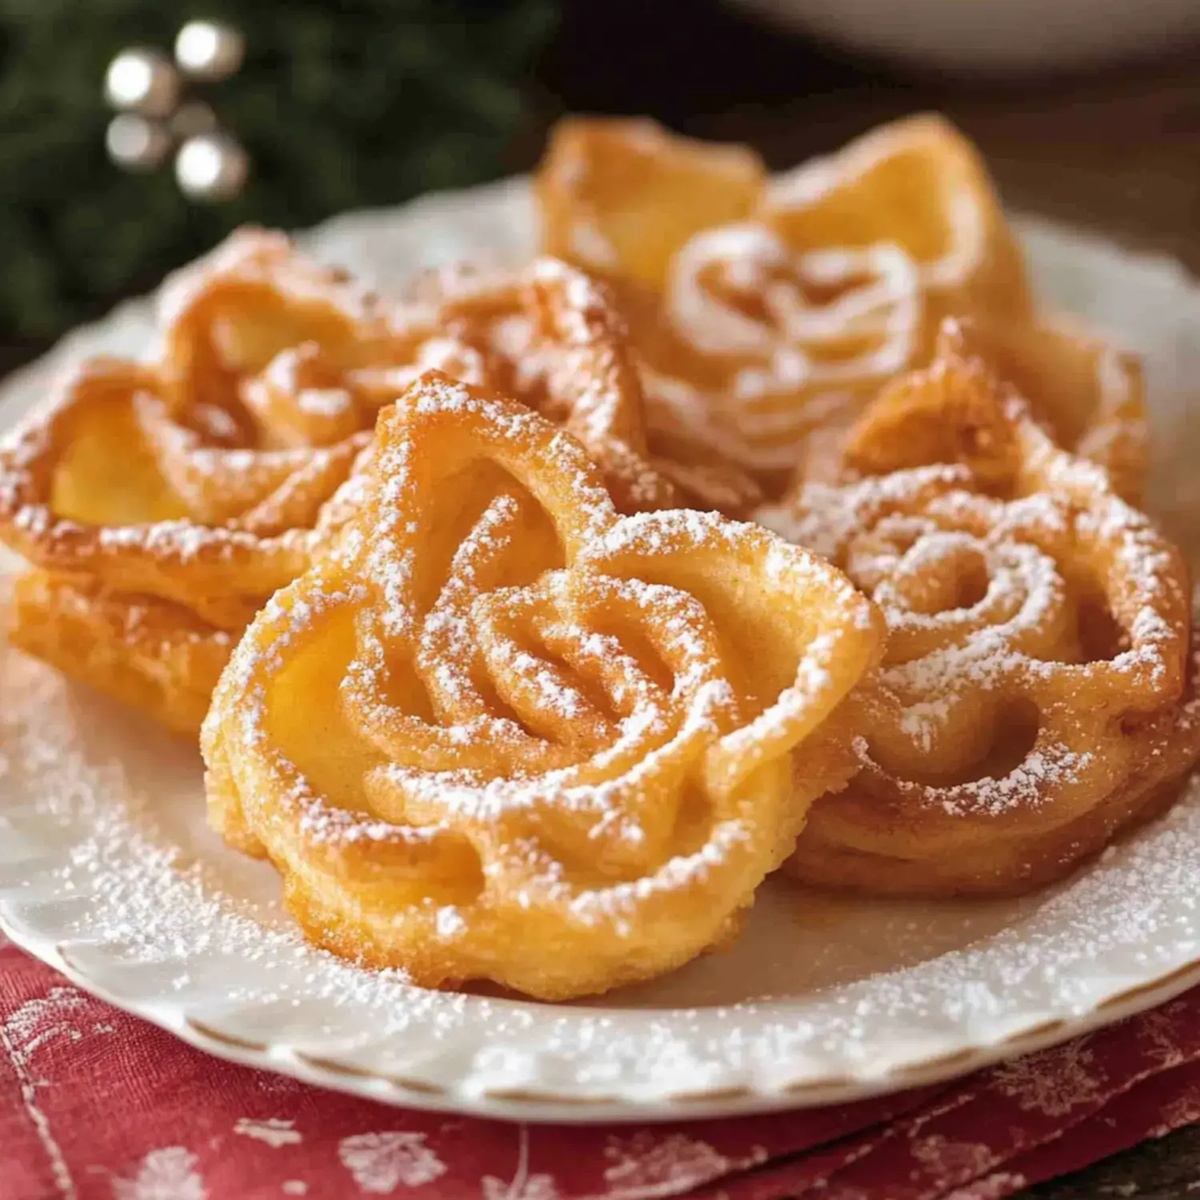
Each rosette emerges from hot oil with a golden, intricate pattern that looks like delicate lace.
The thin, crisp batter creates a stunning design when carefully poured into special rosette irons.
Powdered sugar adds the perfect finishing touch to these ethereal, light-as-air cookies.
You’ll fall in love with these elegant, melt-in-your-mouth delights that bring a touch of Nordic magic to your dessert table.
Rosettes – What Makes Them Special
Rosettes Ingredient Lineup
Base Ingredients:Liquid and Flavor Ingredients:Flour and Coating Ingredients:Additional Ingredients:Equipment Checklist for Rosettes Success
Making Rosettes the Traditional Way
Step 1: Whisk Wet Ingredients
Crack eggs into a mixing bowl and add sugar and salt.
Whisk the mixture vigorously until it becomes light and slightly frothy, creating a smooth base for your delicate rosettes.
Step 2: Create Silky Batter
Gradually incorporate:Blend ingredients gently with a whisk, ensuring no lumps form but avoiding overmixing to maintain the batter’s delicate texture.
Step 3: Prepare Frying Station
Select a deep, heavy-bottomed pan or electric fryer.
Pour vegetable or canola oil to a depth of about 2-3 inches.
Use a kitchen thermometer to confirm the oil reaches exactly 375°F, which is crucial for perfect crispiness.
Step 4: Warm Rosette Iron
Submerge the intricate metal rosette mold completely in the hot oil.
Allow it to heat for precisely 2 minutes, ensuring even temperature distribution across the entire iron.
Step 5: Batter And Fry Technique
Carefully dip the heated iron into the batter, coating about 7/8 of its surface.
Immediately transfer the batter-covered iron into the sizzling oil, allowing the delicate lace-like pastry to separate and crisp.
Step 6: Achieve Golden Perfection
Fry each rosette for approximately 30 seconds, watching for a beautiful golden-brown color.
The delicate edges should become wonderfully crisp and light.
Step 7: Remove And Drain
Gently transfer the freshly fried rosette from the iron onto a paper towel-lined cooling rack.
Use a gentle twisting motion to release the pastry from the mold, preserving its delicate shape.
Step 8: Elegant Finishing Touch
Sprinkle a light dusting of powdered sugar over the cooled rosettes, creating a soft, sweet exterior that enhances their delicate beauty.
Pro Hints for Perfect Rosettes
Creative Rosette Variations to Try
Ways to Serve Rosettes Beautifully
Rosettes – Keeping Them Fresh
FAQs
Rosettes are delicate, crispy pastries originating from Nordic countries, traditionally made using a special metal iron to create lacy, flower-like shapes when deep-fried.
Yes, a rosette iron is essential. These specialized metal molds create the distinctive shape and crispy texture unique to rosette cookies.
Look for a light golden-brown color and a crispy texture. They should be delicate and lacy, with a uniform color indicating proper frying time of about 30 seconds.
Print
Rosettes Recipe
- Total Time: 25 minutes
- Yield: 4 1x
Description
Delicate Norwegian rosettes embrace traditional holiday cookie magic with crisp, lacy edges. Scandinavian metalwork-inspired irons create intricate snowflake-like patterns you’ll savor during festive celebrations.
Ingredients
Main Ingredients:
- 1 cup flour
- 1 cup milk
- 2 eggs
Flavorings:
- 1 tablespoon sugar
- 2 teaspoons vanilla
- 1/4 teaspoon salt
Cooking Ingredients:
- Canola oil for frying
- Powdered sugar for dusting
Instructions
- Combine eggs, sugar, and salt in a mixing bowl, whisking thoroughly until the mixture becomes pale and slightly frothy.
- Gradually incorporate flour, milk, and vanilla extract into the egg mixture, stirring gently until a smooth, lump-free batter forms. Avoid overmixing to maintain the delicate texture.
- Pour vegetable oil into a deep fryer or heavy-bottomed pan, heating to precisely 375°F for optimal frying conditions.
- Submerge the rosette iron in the hot oil for approximately 2 minutes, ensuring even heat distribution across the entire iron.
- Carefully dip the preheated iron into the batter, coating about 7/8 of its surface, then immediately lower it into the sizzling oil.
- Allow the rosette to fry for roughly 30 seconds, watching for a uniform golden-brown color that indicates perfect crispiness.
- Gently transfer the fried rosette to a paper towel-lined cooling rack, delicately removing it from the iron to preserve its intricate shape.
- Once cooled slightly, dust the rosettes generously with powdered sugar, creating a delicate, sweet finish before serving.
Notes
- Choose a sturdy, deep iron rosette mold for consistent crispy results.
- Maintain oil temperature precisely at 375F to prevent soggy or burned pastries.
- Experiment with flavor variations by adding almond extract or citrus zest to batter.
- Make batter ahead and refrigerate for smoother, more consistent texture.
- Prep Time: 15 minutes
- Cook Time: 10 minutes
- Category: Desserts, Snacks
- Method: Frying
- Cuisine: Scandinavian
Nutrition
- Serving Size: 4
- Calories: 230
- Sugar: 2 g
- Sodium: 50 mg
- Fat: 10 g
- Saturated Fat: 1 g
- Unsaturated Fat: 9 g
- Trans Fat: 0 g
- Carbohydrates: 30 g
- Fiber: 1 g
- Protein: 6 g
- Cholesterol: 70 mg
Clara Thompson
Recipe Developer & Food Educator
Expertise
Plant-based and vegetarian recipe development, Nutritional analysis and meal planning, Culinary education and workshop facilitation, Content writing with a focus on healthy living
Education
Diploma in Culinary Arts, Mt. San Jacinto College, CA
Focus: Comprehensive culinary training with an emphasis on sustainable cooking practices.
Certificate in Nutrition and Healthy Living, Cornell University (Online Program)
Focus: Understanding the principles of nutrition to create balanced and health-conscious recipes.
Clara lives where fresh ideas and fresh ingredients meet. She pairs her culinary know-how with her passion for healthy, planet-friendly cooking.
For Clara, good food should taste great, nourish your body, and feel easy to make. Her recipes highlight whole foods, colorful produce, and a deep respect for seasonal eating.