The Perfect Roast Turkey Recipe for a Showstopping Feast
Thanksgiving brings joy and warmth to every gathering, and a perfectly seasoned roast turkey recipe stands as the centerpiece of memorable meals.
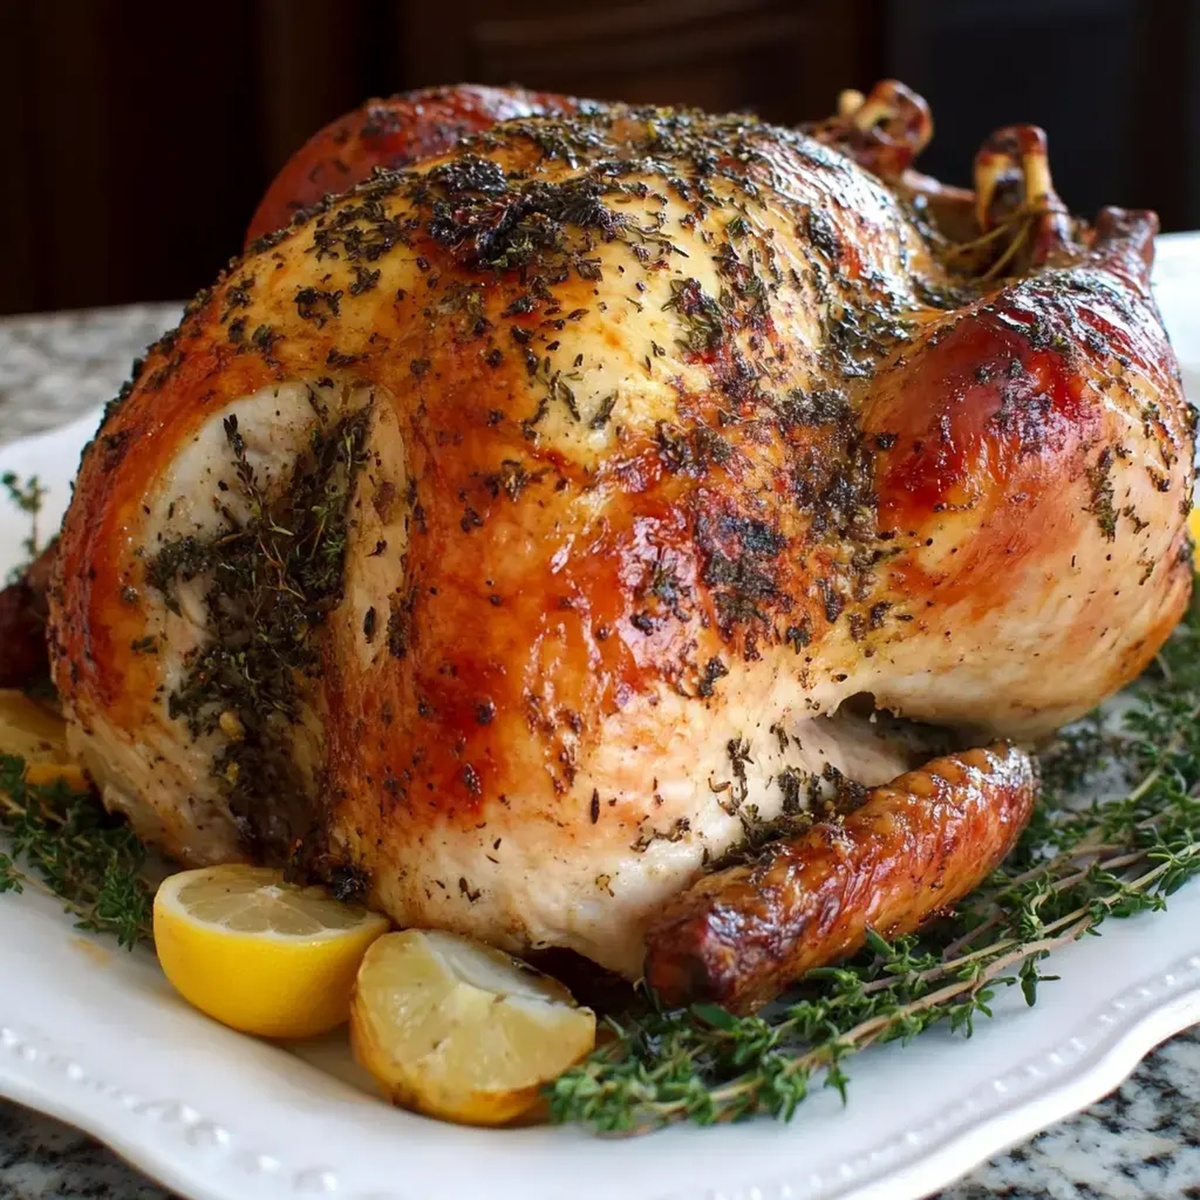
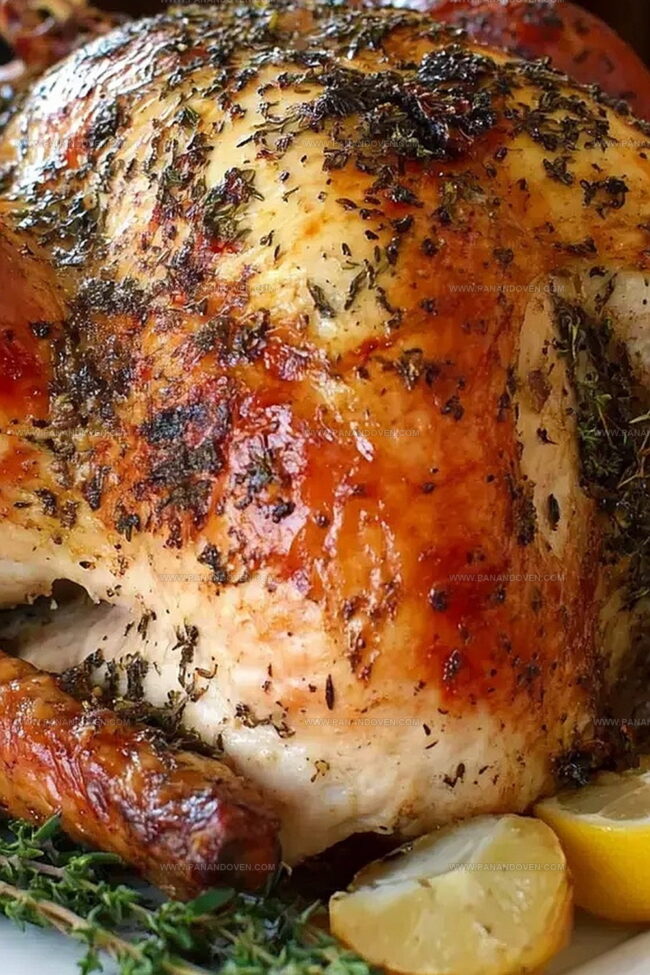
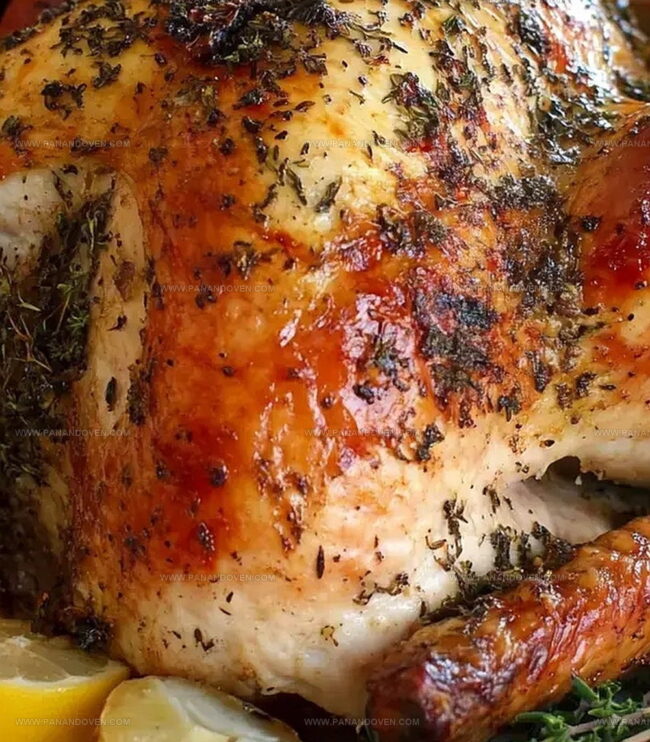
Succulent, golden-brown, and bursting with flavor, this classic dish transforms ordinary dinners into extraordinary celebrations.
The aroma of herbs and spices will fill your kitchen, creating an inviting atmosphere that draws everyone to the table.
Tender meat and crispy skin combine to create a culinary masterpiece that delights even the most discerning palates.
Each bite promises a rich, savory experience that connects generations through shared traditions.
Mastering this recipe ensures you’ll become the star chef at any holiday feast.
Prepare to impress and savor every delicious moment of this timeless turkey classic.
Roast Turkey Why It’s the Ultimate Main Event
Everything Needed for Roast Turkey Feast
Main Ingredients:Herb and Seasoning Blend:Cavity and Aromatics:Gear for Juicy Roast Turkey Results
Roast Turkey Preparation Walkthrough
Step 1: Wake Up The Turkey
Allow the turkey to chill at room temperature for one hour before you start cooking.
This helps ensure even cooking and keeps the meat tender.
Step 2: Fire Up The Oven
Position your oven rack just below the center and heat to 350F.
Do this towards the end of the turkey’s resting time so everything is ready to go.
Step 3: Clean And Prep The Bird
Step 4: Create Herb Butter Magic
Mix these ingredients until they become a fragrant, smooth blend.
Step 5: Gently Separate Skin
Use a wooden spoon handle to carefully separate the skin from the breast meat.
Work slowly to keep the skin completely intact.
Step 6: Tuck Herb Butter Under Skin
Spread one-third of the herb butter under the skin on each breast.
Smooth it out from the outside to distribute evenly.
Step 7: Massage The Exterior
Rub the remaining butter all over the turkey’s surface.
Generously season with salt and pepper for maximum flavor.
Step 8: Pack The Cavity With Flavor
Stuff the turkey cavity with:Step 9: Roast To Perfection
Place turkey in a roasting pan on a rack.
Tie legs with kitchen twine if desired.
Roast until the thigh reaches 175F and breast hits 165F, which typically takes about 14-15 minutes per pound.
Step 10: Protect From Burning
If the turkey starts browning too quickly, tent with foil to prevent burning.
Step 11: Let It Rest
Allow the turkey to rest for 30-60 minutes before carving.
This helps lock in those delicious juices and ensures a moist, tender result.
Pro Tips for Golden, Moist Turkey
Turkey Seasoning and Stuffing Ideas
Serving Up Roast Turkey for the Table
Roast Turkey Storage Made Simple
FAQs
Resting allows the turkey to come to room temperature, which helps it cook more evenly and prevents the meat from becoming tough. This step ensures a more consistent and juicy result throughout the bird.
Gently use a wooden spoon handle to separate the skin from the breast meat, being careful not to tear it. You’ll know you’ve done it right if the skin remains attached and creates a pocket for the herb butter without breaking.
Placing herb butter under the skin helps to infuse flavor directly into the meat and creates a barrier that keeps the turkey moist during roasting. The butter melts into the meat, making it more tender and flavorful from the inside out.
Print
Roast Turkey Recipe
- Total Time: 5 hours
- Yield: 8 1x
Description
Classic roast turkey brings festive comfort to holiday tables, showcasing tender meat and crisp skin. Herbs, butter, and careful seasoning guarantee a memorable centerpiece that delights guests gathered around the table.
Ingredients
Main Protein:
- 10–14 lb (4.5–6.4 kg) turkey, fresh or thawed
Herbs and Aromatics:
- 1 tablespoon fresh thyme leaves
- 1 tablespoon chopped fresh rosemary
- 2 teaspoons lemon zest
- 1/2 bunch fresh parsley
- 1 medium yellow onion, quartered
- 8 garlic cloves, smashed
Fats and Seasonings:
- 3/4 cup (170 grams) unsalted butter, softened
- Kosher salt
- Black pepper
Instructions
- Bring turkey to room temperature for one hour, allowing even cooking and optimal flavor development.
- Position oven rack just below center and preheat to 350F during final stage of turkey resting.
- Remove giblets and neck, meticulously dry turkey interior and exterior using paper towels to ensure crisp skin.
- Blend softened butter with lemon zest, thyme, and rosemary until ingredients form a harmonious mixture.
- Gently slide wooden spoon handle between skin and breast meat, creating a delicate separation without tearing.
- Distribute one-third of herb-infused butter underneath each breast, massaging from exterior to ensure even coverage.
- Massage remaining butter across turkey surface, then generously season with salt and pepper for robust flavor profile.
- Stuff turkey cavity with quartered onion, crushed garlic cloves, and fresh parsley sprigs to enhance aromatic complexity.
- Position turkey on roasting rack, securing legs with kitchen twine if desired. Roast approximately 14-15 minutes per pound until thigh reaches 175F and breast reaches 165F.
- Monitor browning process, draping aluminum foil loosely over turkey if exterior darkens too quickly during roasting.
- Allow turkey to rest 30-60 minutes post-roasting, enabling internal juices to redistribute and ensure succulent meat.
Notes
- Bring Turkey to Room Temperature Letting the turkey sit out helps ensure even cooking and prevents the meat from becoming tough or dry.
- Thoroughly Dry for Crispy Skin Patting the turkey completely dry allows the skin to crisp up beautifully and achieve that golden-brown color.
- Use Herbed Butter for Extra Flavor Infusing butter with fresh herbs adds depth and richness to the turkey’s overall taste profile.
- Protect Breast Meat from Overcooking Spreading butter under the skin creates a protective layer that keeps the breast meat moist and prevents it from drying out during long roasting times.
- Prep Time: 1 hour
- Cook Time: 4 hours (for a 14-pound turkey)
- Category: Dinner, Lunch, Appetizer
- Method: Roasting
- Cuisine: American
Nutrition
- Serving Size: 8
- Calories: 400
- Sugar: 0 g
- Sodium: 200 mg
- Fat: 25 g
- Saturated Fat: 10 g
- Unsaturated Fat: 15 g
- Trans Fat: 0 g
- Carbohydrates: 1 g
- Fiber: 0 g
- Protein: 40 g
- Cholesterol: 120 mg
Clara Thompson
Recipe Developer & Food Educator
Expertise
Plant-based and vegetarian recipe development, Nutritional analysis and meal planning, Culinary education and workshop facilitation, Content writing with a focus on healthy living
Education
Diploma in Culinary Arts, Mt. San Jacinto College, CA
Focus: Comprehensive culinary training with an emphasis on sustainable cooking practices.
Certificate in Nutrition and Healthy Living, Cornell University (Online Program)
Focus: Understanding the principles of nutrition to create balanced and health-conscious recipes.
Clara lives where fresh ideas and fresh ingredients meet. She pairs her culinary know-how with her passion for healthy, planet-friendly cooking.
For Clara, good food should taste great, nourish your body, and feel easy to make. Her recipes highlight whole foods, colorful produce, and a deep respect for seasonal eating.