
The Creamiest Red Velvet Cookies and Cream Recipe Ever
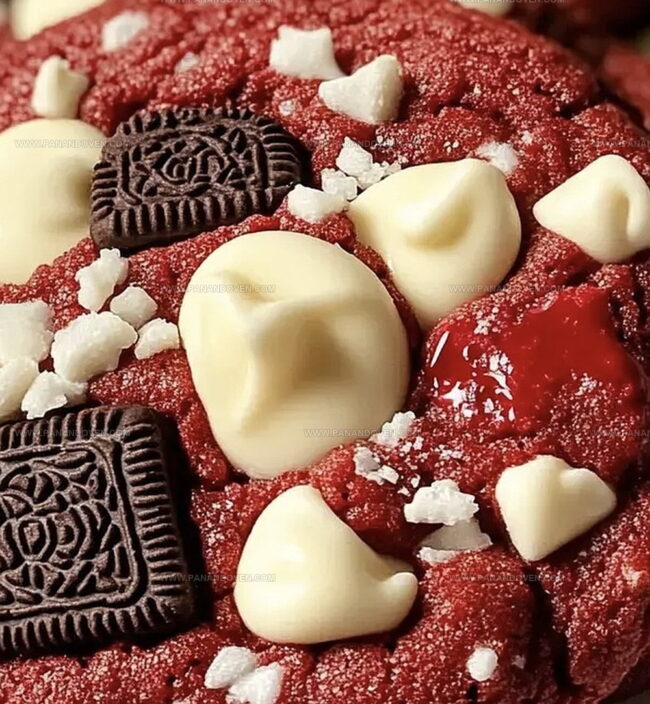
These decadent red velvet cookies with cream cheese swirls melt in your mouth with rich, velvety goodness.
Chocolate lovers adore the deep crimson color that makes these treats so visually stunning.
The perfect balance of cocoa and cream creates an irresistible texture that sets these cookies apart from ordinary desserts.
Soft, chewy edges combine with a tender center to deliver pure indulgence in every bite.
cream cheese frosting adds a luxurious tang that complements the deep chocolate notes beautifully.
Each cookie promises a delightful blend of classic red velvet charm and classic cream cheese elegance.
You’ll want to share these showstopping treats with everyone you know.
One taste will have friends and family begging for the recipe.
Red Velvet Cookies and Cream Cookies Sweet Reasons to Bake Again

Ingredients for Red Velvet Cookie Magic
Base Ingredients:Flavor Enhancers:Mix-Ins and Binding Ingredients:Tools for Cookies and Cream Cookie Fun
How to Make Red Velvet Cookies and Cream Cookies
Step 1: Prepare Baking Station
Warm up your oven to 350F.
Cover baking sheets with parchment paper or silicone mats to prevent sticking and ensure easy cookie removal.
Step 2: Whip Butter And Sugars
Grab a large mixing bowl and blend softened butter, white sugar, and brown sugar until the mixture becomes fluffy and light, creating a smooth base for your cookies.
Step 3: Incorporate Wet Ingredients
Crack eggs into the butter mixture one by one, then pour in vanilla extract and red food coloring.
Stir until everything blends beautifully and creates a vibrant red hue.
Step 4: Combine Dry Elements
In a separate bowl, mix together:Slowly incorporate these dry ingredients into the wet mixture, stirring gently to create a consistent dough.
Step 5: Add Delicious Mix-Ins
Carefully fold into the dough:Ensure these tasty bits are evenly distributed throughout the cookie dough.
Step 6: Form Cookie Balls
Use a cookie scoop or tablespoon to create rounded dough balls.
Place them on prepared baking sheets, leaving about 2 inches between each cookie.
Step 7: Bake To Perfection
Slide the baking sheets into the oven and bake for 10-12 minutes.
Look for set edges and slightly soft centers – this indicates perfectly baked cookies.
Step 8: Cool And Set
Let cookies rest on baking sheets for a few minutes, then transfer to wire racks for complete cooling.
Step 9: Indulge And Enjoy
Serve these delightful red velvet cookies alongside milk or coffee, and savor every delicious bite!
Cookie Tips for Soft Centers and Crunchy Bits
Creative Ways to Switch Up Cookie Flavors
Serving Cookies for Every Occasion
Storage Tips for Cookies and Cream Cookies
FAQs
Creaming helps incorporate air into the mixture, creating a lighter, fluffier texture and ensuring the sugar dissolves properly for a smoother cookie.
Yes, but reduce or eliminate the added salt in the recipe to prevent the cookies from becoming too salty. Unsalted butter gives you more control over the overall salt content.
Look for set edges and slightly soft centers. The cookies will continue to firm up as they cool, so avoid overbaking to maintain a soft, chewy texture.
You can substitute with melted dark chocolate, but you’ll need to adjust the liquid content and reduce other wet ingredients to maintain the right cookie consistency.
Print
Red Velvet Cookies and Cream Recipe
- Total Time: 32 minutes
- Yield: 24 1x
Description
Red velvet cookies with creamy oreo-inspired filling merge classic Southern dessert charm with modern indulgence. Rich cocoa notes and velvety texture invite cookie enthusiasts to savor each delightful bite.
Ingredients
Primary Ingredients:
- 2 1/2 cups all-purpose flour
- 1/4 cup cocoa powder
- 1 cup unsalted butter, softened
- 1 1/2 cups white chocolate chips
- 1 1/2 cups coarsely chopped Oreo cookies (about 10–12 cookies)
Sweeteners:
- 1 cup granulated sugar
- 1/2 cup light brown sugar, packed
Binding and Flavoring Ingredients:
- 2 large eggs
- 1 teaspoon vanilla extract
- 1 teaspoon red food coloring (more if needed for desired color)
- 1 teaspoon baking soda
- 1/2 teaspoon salt
Instructions
- Prepare the oven at 350F (175C) and line baking sheets with parchment paper, creating a non-stick surface for perfect cookie formation.
- In a spacious mixing bowl, thoroughly blend softened butter with granulated and brown sugars until the mixture becomes airy and pale, creating a smooth base.
- Incorporate eggs individually, then mix in vanilla extract and vibrant red food coloring, ensuring a uniform crimson hue throughout the batter.
- Separately combine flour, cocoa powder, baking soda, and salt, whisking to eliminate potential lumps and create a consistent dry mixture.
- Gently fold dry ingredients into the wet mixture, stirring minimally to prevent overworking the dough, which could result in tough cookies.
- Delicately integrate white chocolate chips and crushed Oreo cookies, distributing them evenly to guarantee a balanced flavor profile in each bite.
- Utilize a cookie scoop to form uniform dough balls, positioning them approximately 2 inches apart on prepared baking sheets to allow proper spreading.
- Bake for 10-12 minutes, watching for set edges and slightly soft centers, which indicate optimal texture and moisture retention.
- Allow cookies to rest on baking sheets momentarily, then transfer to wire cooling racks, enabling complete cooling and optimal texture development.
- Serve alongside a chilled milk or steaming coffee, embracing the decadent combination of red velvet and cookies and cream flavors.
Notes
- Soften butter at room temperature for easier creaming and smoother cookie texture, ensuring even mixing without overmixing.
- Control food coloring intensity by adding gradually to achieve desired vibrant red color without altering cookie flavor.
- Chill dough for 30 minutes before baking to prevent excessive spreading and maintain thick, chewy cookie shape.
- Substitute regular flour with gluten-free blend for celiac-friendly version, maintaining similar texture and taste profile.
- Prep Time: 20 minutes
- Cook Time: 12 minutes
- Category: Desserts, Snacks
- Method: Baking
- Cuisine: American
Nutrition
- Serving Size: 24
- Calories: 210
- Sugar: 16 g
- Sodium: 100 mg
- Fat: 10 g
- Saturated Fat: 6 g
- Unsaturated Fat: 4 g
- Trans Fat: 0 g
- Carbohydrates: 29 g
- Fiber: 1 g
- Protein: 2 g
- Cholesterol: 30 mg
Marcus Reed
Founder & Food Content Creator
Expertise
Single-recipe development, Seasonal and local ingredient utilization, Food photography and styling, Culinary writing and content creation
Education
Culinary Arts Certificate, Blue Ridge Community and Technical College, WV
Focus: Fundamentals of culinary techniques, emphasizing hands-on experience in small-scale kitchen settings.
Marcus’s story begins in Asheville, where good food and family kitchens shaped his earliest memories. After hands-on culinary training and a lot of trial (and a little error), he realized that real cooking isn’t about perfection, it’s about connection.
At Pan and Oven, Marcus crafts recipes that are easy to follow, packed with flavor, and built for real kitchens.