Fluffy Red Velvet Cinnamon Rolls Recipe: A Sweet Morning Delight
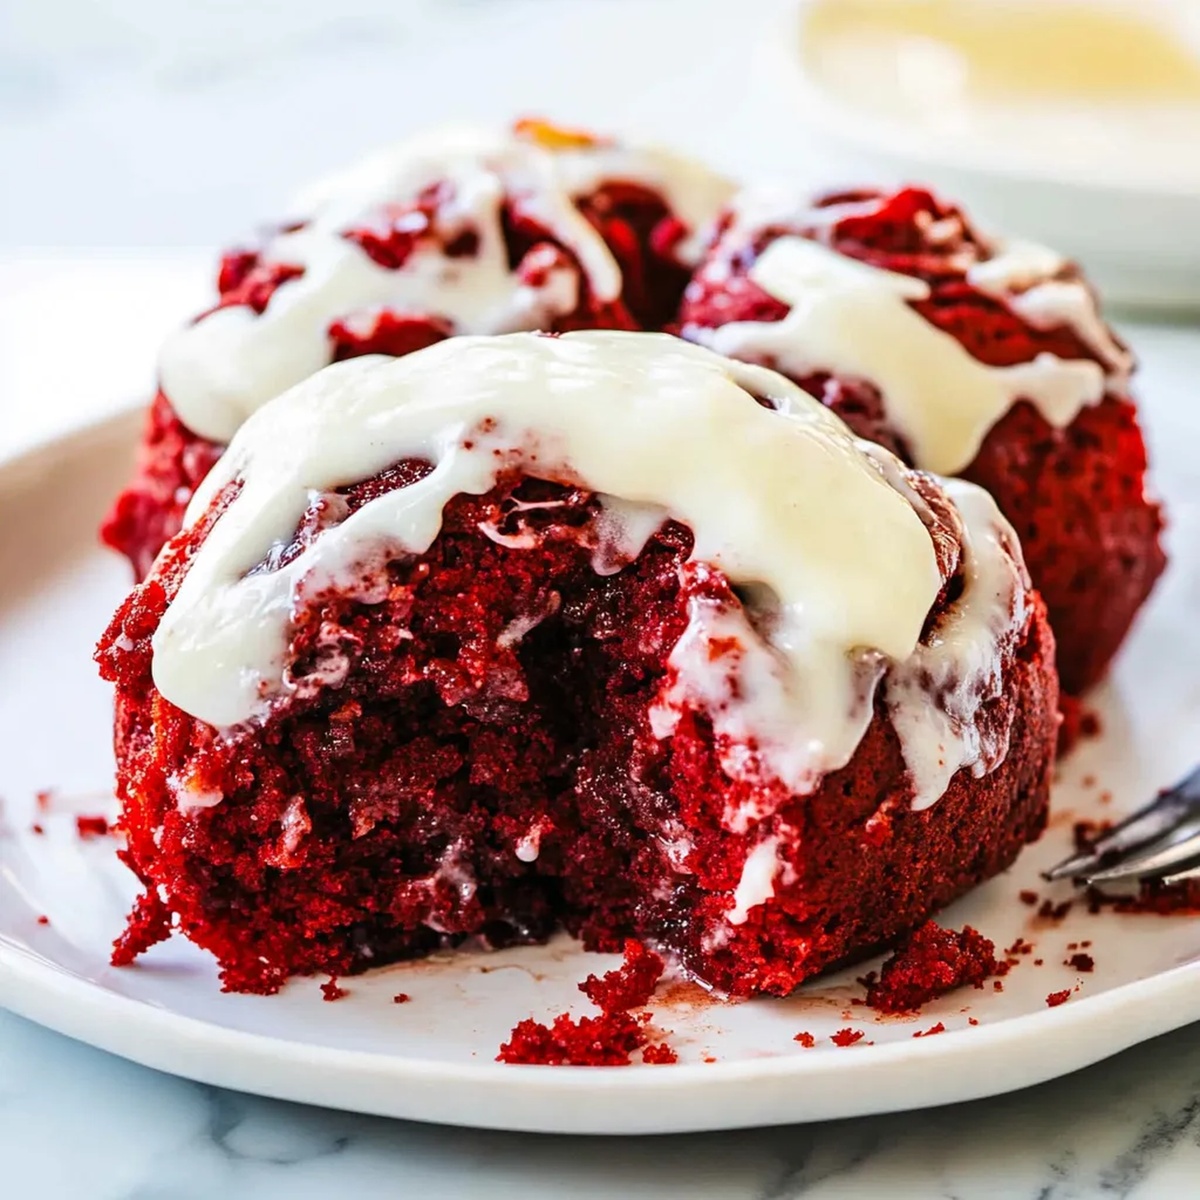
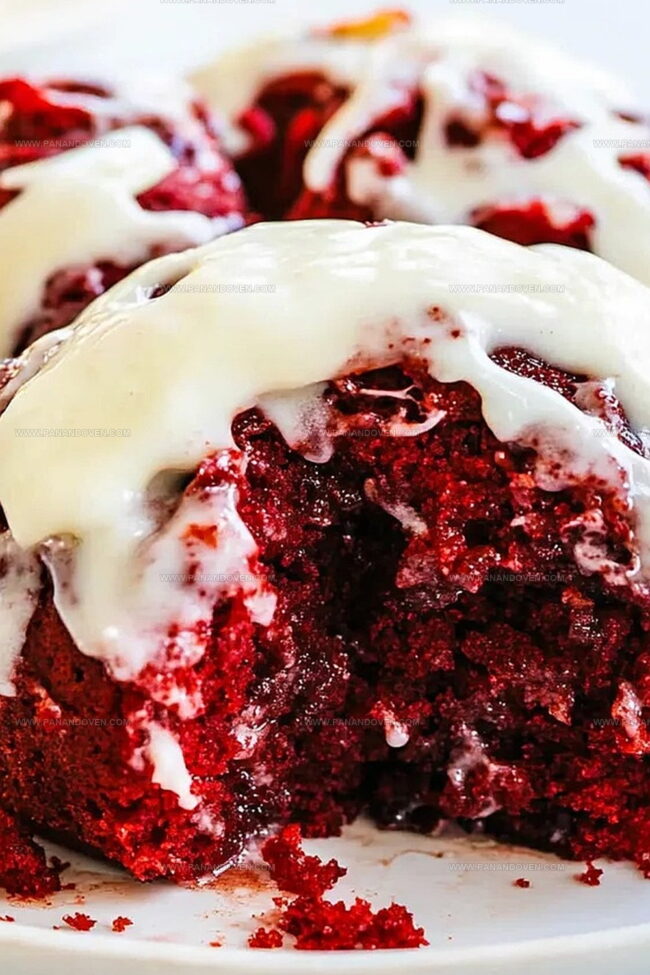
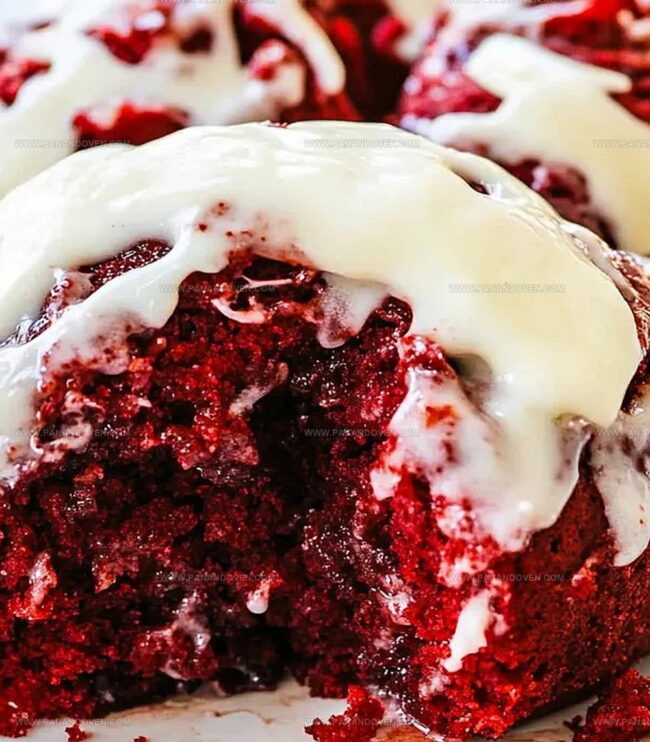
Soft, pillowy dough swirled with a decadent red velvet cinnamon rolls recipe promises pure breakfast bliss.
These crimson-hued spirals combine the classic comfort of cinnamon rolls with a romantic velvet twist.
Rich cream cheese frosting melts luxuriously over warm, tender pastry.
Deep cocoa notes dance through each delightful bite, creating an irresistible treat.
Bakery-worthy rolls emerge straight from your home kitchen with minimal effort.
Weekend brunch just got an elegant upgrade that will leave everyone craving another slice.
You’ll want to savor every single sweet, crimson-kissed moment.
Red Velvet Cinnamon Rolls – Best Bits
Red Velvet Cinnamon Roll Ingredient Picks
Dough Ingredients:Filling Ingredients:Icing Ingredients:Gear to Make Red Velvet Cinnamon Rolls at Home
Red Velvet Cinnamon Roll How-To
Step 1: Create Magical Dough
Grab your cake mix, flour, and yeast.
Pour them into a mixing bowl and add water.
Beat the mixture on medium speed for two minutes.
Switch to a dough hook and gradually mix in remaining flour until you have a soft, slightly sticky dough.
Transfer the dough to a greased bowl, turning it to coat all sides.
Cover and let the dough rise in a warm spot until it doubles in size, which takes about 1½ hours.
Step 2: Craft Delectable Filling
In a separate bowl, blend brown sugar and cinnamon until well combined.
Step 3: Prepare Baking Surface
Generously grease a 9×13 inch baking dish using cooking spray or butter.
Step 4: Roll and Spread Deliciousness
On a lightly floured surface, roll out the dough into a rectangular shape.
Spread softened butter evenly across the surface, then sprinkle the cinnamon-sugar mixture generously.
Step 5: Shape Heavenly Rolls
Carefully roll the dough from the long edge toward the bottom.
Slice into 1½ inch thick rolls and arrange them in the prepared baking pan.
Cover and let rise for another 30 minutes until they puff up beautifully.
Step 6: Bake to Perfection
Heat the oven to 350°F.
Bake the rolls for 20 minutes or until they turn a gorgeous golden brown.
Step 7: Whip Up Creamy Icing
While the rolls are baking, prepare the icing by combining ingredients and beating with an electric mixer until smooth and fluffy.
Step 8: Final Touch of Yumminess
Once the rolls are out of the oven, generously spread the icing while they’re still warm, letting it melt into every delicious crevice.
Tricks for the Softest Red Velvet Cinnamon Rolls
Cinnamon Roll Swaps for Red Velvet Fans
Red Velvet Cinnamon Roll Plating and Serving
Cinnamon Roll Storage Tips for Red Velvet Fans
FAQs
Cake mix adds softness, extra flavor, and helps create a tender texture that makes these cinnamon rolls uniquely delicious and foolproof.
Yes, you can prepare the dough the night before. After the first rise, cover and refrigerate overnight. Let it come to room temperature and continue with rolling and shaping before baking.
The dough should double in size and look puffy. When you gently press your finger into the dough, the indentation should slowly spring back but remain slightly visible.
Add flour gradually, one tablespoon at a time, while kneading. The dough should remain soft but manageable. Avoid adding too much flour, which can make rolls dense.
Print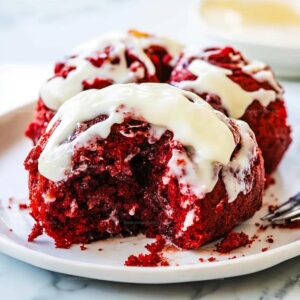
Red Velvet Cinnamon Rolls Recipe
- Total Time: 2 hours 20 minutes
- Yield: 12 1x
Description
Indulgent red velvet cinnamon rolls combine classic Southern charm with a modern twist. Rich cream cheese frosting and deep crimson dough create an irresistible morning treat you’ll crave again and again.
Ingredients
Main Ingredients:
- 1 box red velvet cake mix
- 2 1/2 cups (312.5 grams) all-purpose flour
- 1 1/4 cups (296 milliliters) warm water
- 2 teaspoons instant yeast
Baking Enhancers and Filling:
- 1 cup (220 grams) packed brown sugar
- 1 tablespoon ground cinnamon
- 1/3 cup (76 milliliters) melted butter
Icing Components:
- 6 tablespoons unsalted butter, softened
- 1 1/2 cups (180 grams) powdered sugar
- 1/4 cup (56 grams) cream cheese, at room temperature
- 1/2 teaspoon vanilla extract
- 1/8 teaspoon salt
Instructions
- In a mixing bowl, blend cake mix, 1 cup flour, and yeast. Pour water and beat at medium speed for 2 minutes. Switch to dough hook and gradually incorporate remaining flour until a soft, slightly sticky dough forms.
- Transfer dough to a greased bowl, rotating to coat surface. Cover and allow to rise in a warm environment until volume doubles, approximately 1½ hours.
- Create filling by whisking brown sugar and cinnamon together in a separate bowl.
- Coat a 9×13 inch baking dish with cooking spray or butter.
- On a floured surface, roll dough into a rectangular shape measuring roughly 16×12 inches and ¼ inch thick. Evenly spread butter across the surface, then distribute sugar-cinnamon mixture uniformly.
- Carefully roll dough from the long edge toward the bottom, creating a tight log. Slice into 1½ inch sections and arrange in prepared baking pan.
- Allow rolls to rise again for 30 minutes, or until they’ve nearly doubled in size.
- Preheat oven to 350°F. Bake for 20 minutes or until rolls achieve a golden-brown color.
- During baking, prepare icing by combining ingredients and whipping with an electric mixer until light and fluffy.
- Once baked, immediately spread warm icing generously over the rolls while still hot.
Notes
- Customize the dough texture by gradually adding flour to achieve a soft, slightly sticky consistency that’s easy to work with.
- Ensure optimal rising by placing the dough in a warm, draft-free area like a turned-off oven with a pan of hot water nearby.
- Slice rolls precisely using dental floss or a sharp serrated knife for clean, even cuts that maintain the roll’s shape.
- Adapt the recipe for dietary needs by substituting gluten-free cake mix and using dairy-free butter alternatives for a more inclusive treat.
- Prep Time: 2 hours
- Cook Time: 20 minutes
- Category: Breakfast, Snacks, Desserts
- Method: Baking
- Cuisine: American
Nutrition
- Serving Size: 12
- Calories: 290
- Sugar: 16 g
- Sodium: 210 mg
- Fat: 9 g
- Saturated Fat: 5 g
- Unsaturated Fat: 3 g
- Trans Fat: 0 g
- Carbohydrates: 46 g
- Fiber: 1 g
- Protein: 3 g
- Cholesterol: 25 mg
Clara Thompson
Recipe Developer & Food Educator
Expertise
Plant-based and vegetarian recipe development, Nutritional analysis and meal planning, Culinary education and workshop facilitation, Content writing with a focus on healthy living
Education
Diploma in Culinary Arts, Mt. San Jacinto College, CA
Focus: Comprehensive culinary training with an emphasis on sustainable cooking practices.
Certificate in Nutrition and Healthy Living, Cornell University (Online Program)
Focus: Understanding the principles of nutrition to create balanced and health-conscious recipes.
Clara lives where fresh ideas and fresh ingredients meet. She pairs her culinary know-how with her passion for healthy, planet-friendly cooking.
For Clara, good food should taste great, nourish your body, and feel easy to make. Her recipes highlight whole foods, colorful produce, and a deep respect for seasonal eating.