The Sweet Symphony of Homemade Raisin Pie Recipe
Sweet memories of grandma’s kitchen come flooding back with this classic raisin pie that whispers comfort and tradition.
Packed with nostalgia, this raisin pie recipe brings warmth to any gathering.
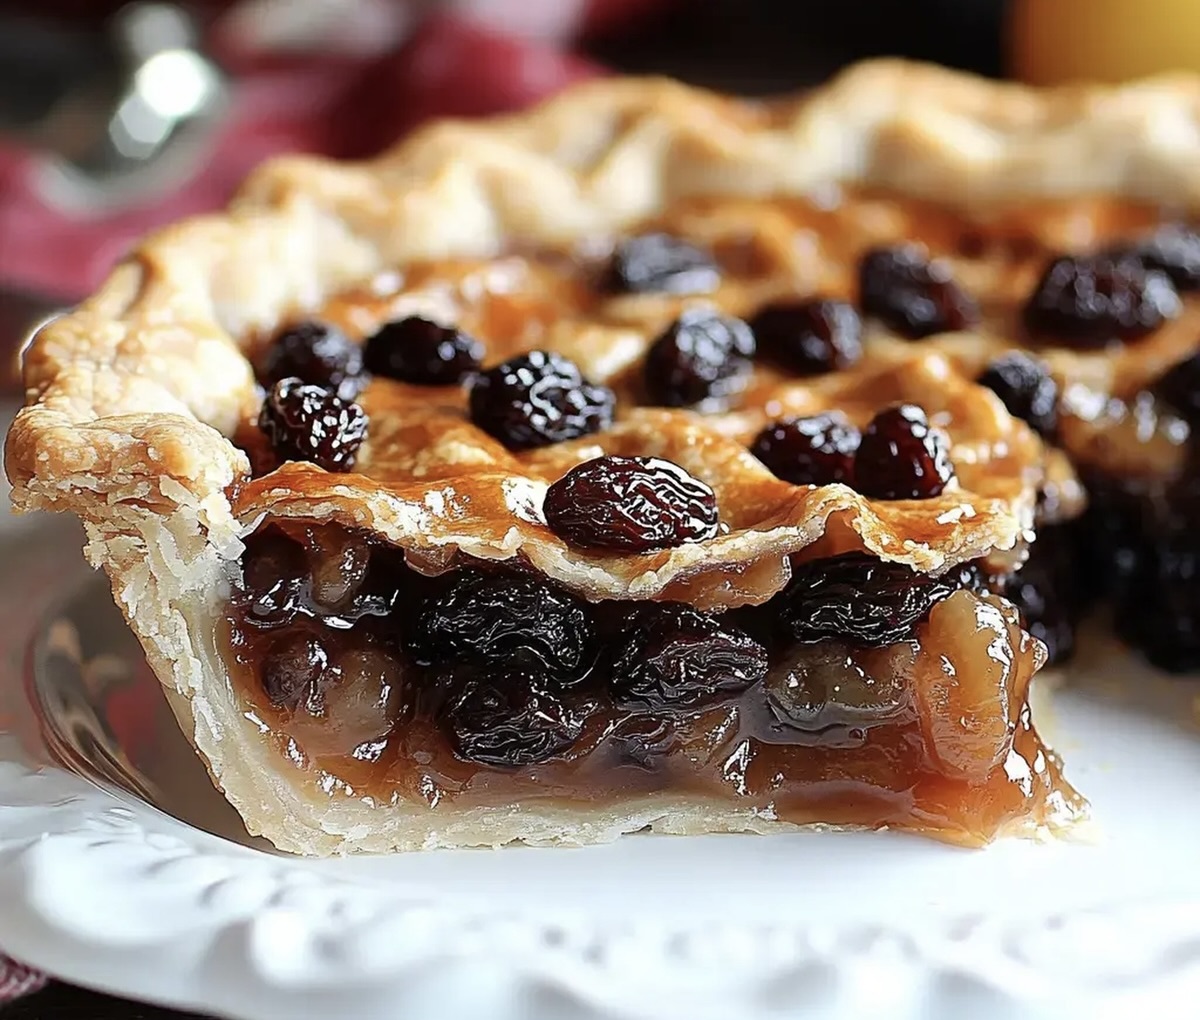
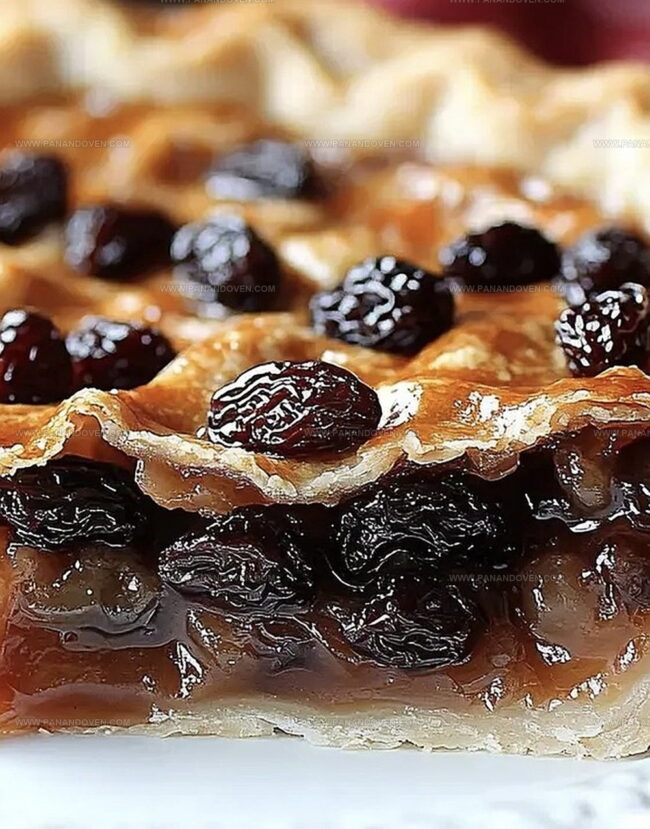
Dark, plump raisins nestled in a buttery, flaky crust create a dessert that speaks to simple pleasures.
The rich, caramelized filling promises a delightful balance of sweetness and depth.
Each slice tells a story of home-cooked love and time-honored baking techniques.
You’ll savor every bite of this timeless treat that connects generations through its delectable simplicity.
Prepare to fall in love with a pie that feels like a warm embrace from the past.
Old Fashioned Raisin Pie Nostalgic Reasons to Try It
Raisin Pie Ingredients for a Classic Bake
Core Ingredients:Sweetening and Thickening Ingredients:Flavor Enhancers and Seasonings:Liquid Ingredient:Kitchen Tools for Homemade Raisin Pie
Steps for Baking Old Fashioned Raisin Pie
Step 1: Boil Raisins
Toss raisins and water into a medium pot.
Bring the mixture to a rolling boil and let it simmer for 5 minutes, allowing the raisins to plump up and soften.
Step 2: Combine Dry Ingredients
In a separate mixing bowl, whisk together:Gradually fold this spiced mixture into the hot raisin liquid, stirring consistently.
Step 3: Create Thick Syrup
Continue cooking and stirring until the liquid transforms into a glossy, thick syrup.
This process happens quickly, so keep a close eye on the pot.
Step 4: Enhance Flavor Profile
Remove the pot from heat.
Gently stir in:Let the filling cool down slightly to develop deeper flavors.
Step 5: Assemble Pie
Pour the fragrant raisin filling into one pie shell.
Carefully drape the second pie crust over the top, crimping the edges to seal in all the deliciousness.
Step 6: Prepare For Baking
Use a sharp knife to create a few strategic steam vents across the top crust, allowing excess moisture to escape during baking.
Step 7: Bake To Golden Perfection
Slide the pie into a preheated oven at 425F (220C).
Bake for 30-35 minutes until the crust turns a beautiful golden brown and looks irresistibly crisp.
Pie Tips for Juicy Raisin Filling
Raisin Pie Variations to Suit Your Mood
How to Serve Raisin Pie Warm or Cold
Raisin Pie Storage for Lasting Flavor
FAQs
Raisins are dried grapes with a sweet, concentrated flavor. They add natural sweetness, chewy texture, and rich depth to the pie, making it a classic comfort dessert with historical roots.
Yes, you can use golden, black, or mixed raisins. Each variety will bring a slightly different flavor and sweetness level to the pie, so choose based on your preference.
Cooking raisins helps soften them, release their natural sugars, and create a thick, rich syrup. This process intensifies their flavor and ensures a smooth, cohesive filling for the pie.
Print
Raisin Pie Recipe
- Total Time: 55 minutes
- Yield: 8 1x
Description
Grandma’s classic raisin pie brings nostalgic comfort from her rustic kitchen. Sweet raisins nestled in a flaky crust promise warm memories you’ll savor with each delightful bite.
Ingredients
Main Ingredients:
- 4 cups raisins
- 4 cups water
- 1 cup light brown sugar
- 2, 9-inch (22.86 cm) deep dish pie shells
Thickening and Seasoning Ingredients:
- 5 tablespoons cornstarch
- 1/2 teaspoon cinnamon
- 1/2 teaspoon salt
- 2 teaspoons lemon juice
Flavor Enhancers:
- 3 tablespoons butter (not margarine)
- 1 teaspoon vanilla extract
Instructions
- Simmer raisins in water over medium heat for 5 minutes until they plump and soften, creating a rich base for the pie filling.
- In a separate mixing bowl, thoroughly combine brown sugar, cornstarch, cinnamon, and salt to create a smooth dry ingredient blend.
- Gradually whisk the dry ingredient mixture into the hot raisin liquid, stirring constantly to prevent lumps and ensure even distribution.
- Continue cooking the mixture until it transforms into a thick, glossy syrup, which typically occurs within 2-3 minutes of active stirring.
- Remove the raisin mixture from heat and incorporate lemon juice, melted butter, and vanilla extract, stirring until fully integrated and fragrant.
- Allow the filling to cool and slightly thicken for about 10 minutes, which helps stabilize the consistency.
- Transfer the prepared filling into a bottom pie crust, spreading evenly to create a uniform layer.
- Carefully drape the top pie crust over the filling, trimming excess edges and crimping to seal the pie completely.
- Create 3-4 decorative vents on the top crust using a sharp knife to allow steam escape during baking.
- Bake in a preheated 425°F (220°C) oven for 30-35 minutes until the crust achieves a golden-brown, crispy texture.
Notes
- Cold Butter Works Best for Flaky Crust: Use chilled butter when making the pie dough to ensure a tender, flaky texture that melts in your mouth.
- Prevent Soggy Bottom: Sprinkle a thin layer of breadcrumbs or ground nuts on the bottom crust before adding the raisin filling to absorb excess moisture.
- Adjust Sweetness Carefully: Taste the raisin mixture before filling the pie and adjust sugar levels based on the natural sweetness of your raisins to avoid an overly sweet dessert.
- Dietary Modifications: Swap traditional wheat flour for gluten-free alternatives and use coconut sugar or a sugar substitute for those with dietary restrictions.
- Prep Time: 20 minutes
- Cook Time: 35 minutes
- Category: Desserts
- Method: Baking
- Cuisine: American
Nutrition
- Serving Size: 8
- Calories: 280
- Sugar: 34 g
- Sodium: 100 mg
- Fat: 10 g
- Saturated Fat: 6 g
- Unsaturated Fat: 4 g
- Trans Fat: 0 g
- Carbohydrates: 44 g
- Fiber: 2 g
- Protein: 2 g
- Cholesterol: 15 mg
Marcus Reed
Founder & Food Content Creator
Expertise
Single-recipe development, Seasonal and local ingredient utilization, Food photography and styling, Culinary writing and content creation
Education
Culinary Arts Certificate, Blue Ridge Community and Technical College, WV
Focus: Fundamentals of culinary techniques, emphasizing hands-on experience in small-scale kitchen settings.
Marcus’s story begins in Asheville, where good food and family kitchens shaped his earliest memories. After hands-on culinary training and a lot of trial (and a little error), he realized that real cooking isn’t about perfection, it’s about connection.
At Pan and Oven, Marcus crafts recipes that are easy to follow, packed with flavor, and built for real kitchens.