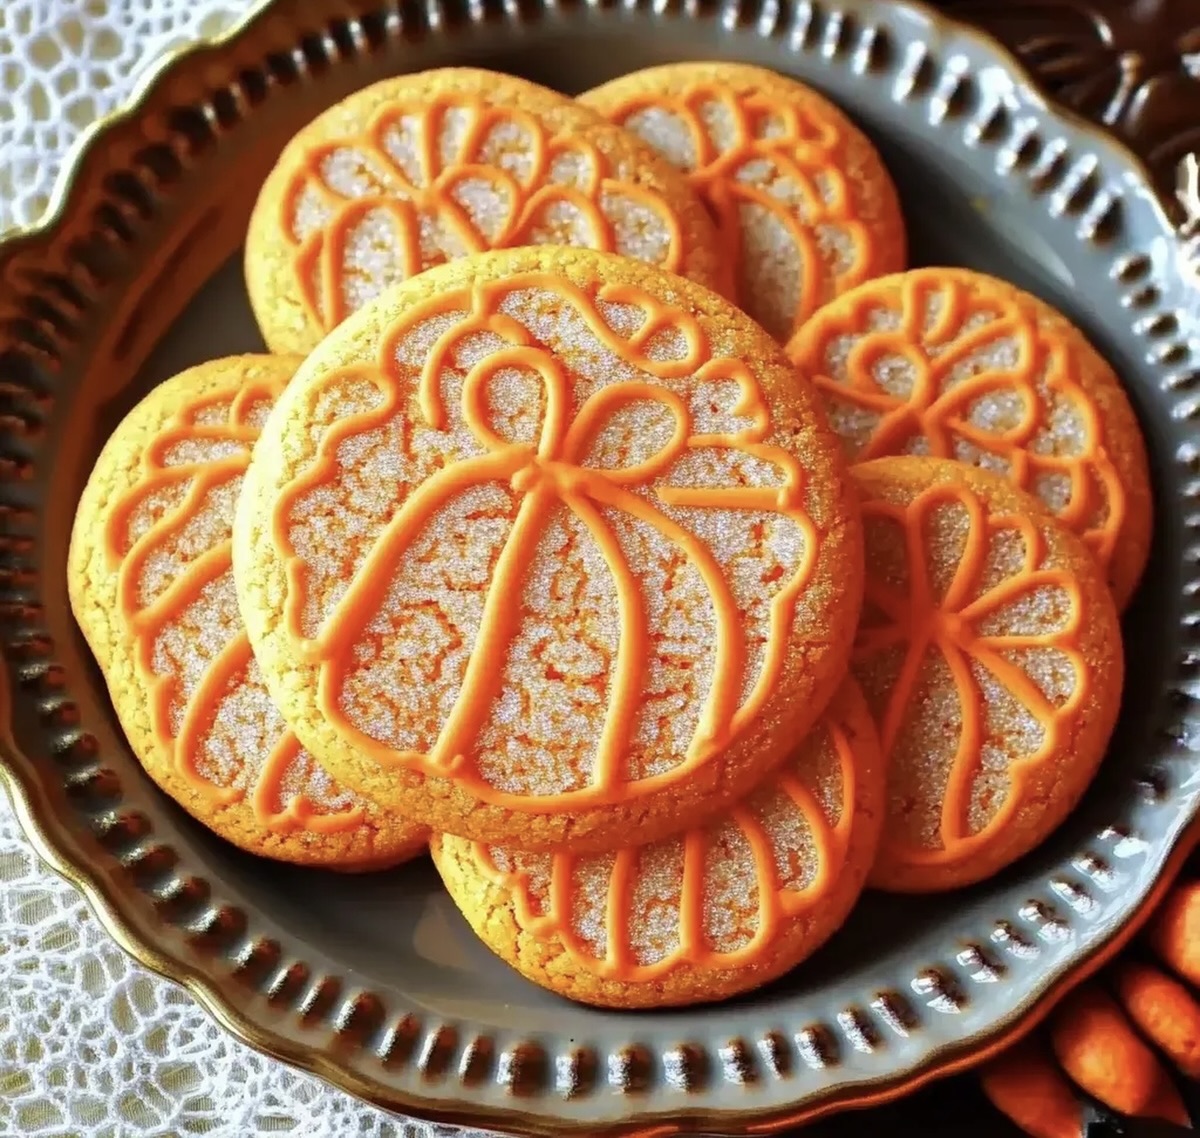
Adorable Pumpkin-Shaped Sugar Cookies Recipe for Fall Magic
When autumn whispers its golden secrets, these delightful pumpkin-shaped sugar cookies become the sweetest celebration of seasonal joy.
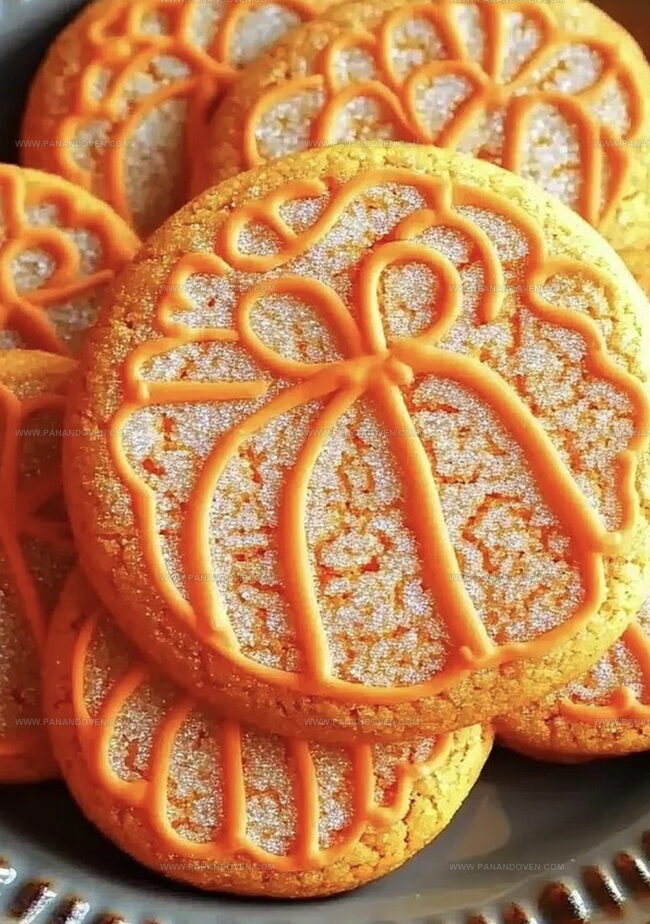
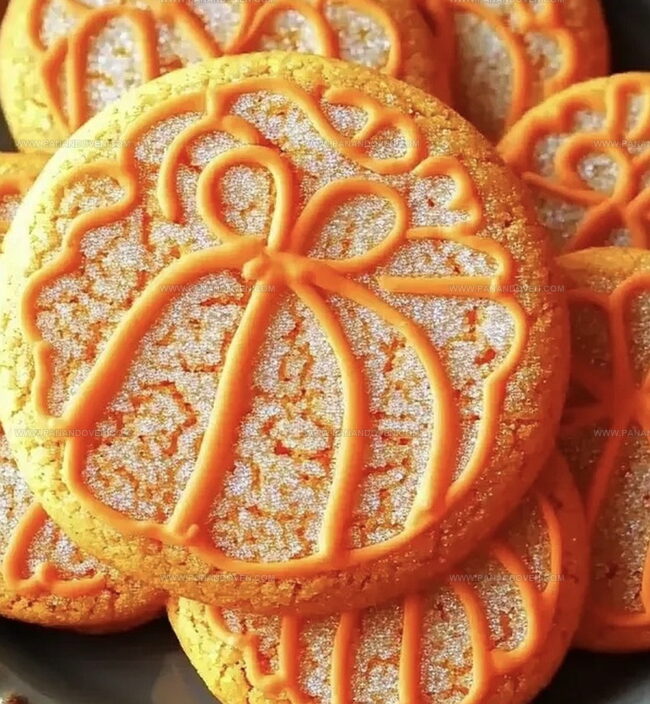
Crisp edges and soft centers define these charming treats that capture fall’s essence perfectly.
Bakers love how simple ingredients merge into delectable rounds that look just like miniature pumpkins.
Delicate orange frosting and clever decorating techniques make each cookie a miniature work of art.
Chocolate stems and green fondant leaves add whimsical touches that transform ordinary sugar cookies into festive masterpieces.
Sharing these adorable cookies will spark smiles and create delightful memories around your dessert table.
Bake a batch and watch the magic unfold.
Pumpkin-Shaped Sugar Cookies: Sweet Appeal
Ingredients List for Festive Pumpkin Cookies
Must-Have Tools for Pumpkin Sugar Cookies
Baking Pumpkin-Shaped Sugar Cookies Easily
Step 1: Warm Up The Oven
Turn your oven to 350 degrees Fahrenheit, creating the perfect cozy baking environment.
Step 2: Combine Dry Ingredients
Grab a medium bowl and whisk together:Set this magical mix aside for later.
Step 3: Create Creamy Base
In a large bowl, whip the softened butter and sugars until they transform into a fluffy cloud.
Crack in the egg and blend smoothly.
Pour in vanilla extract for an extra flavor punch.
Step 4: Marry Wet And Dry Ingredients
Gently fold the dry ingredients into the butter mixture.
Stir just until everything comes together, avoiding overmixing.
Step 5: Divide Cookie Canvas
Split the cookie dough into two equal portions, preparing for a colorful transformation.
Step 6: Add Vibrant Colors
Infuse one dough portion with orange gel food color for pumpkin magic.
Tint the second portion green for adorable stems.
Step 7: Shape Pumpkin Bases
Roll orange dough into round balls.
Place them on parchment-lined baking sheets.
Dip a glass in sugar and press each ball into a flat disc.
Create a small indent on top for the stem.
Use a paring knife to carve gentle pumpkin lines.
Step 8: Craft Cute Stems
Form tiny green cones for stems.
Nestle the narrow end into the pumpkin’s top indent.
Step 9: Bake To Perfection
Slide the cookie sheets into the oven.
Bake for 12-15 minutes until bottoms turn a light golden brown.
Step 10: Cool And Set
Transfer cookies to a wire rack, letting them cool completely and firm up.
Step 11: Add Extra Details
Optional: Use a paring knife to add subtle texture to the stems.
Step 12: Continue The Cookie Adventure
Repeat the entire process with remaining dough, creating a delightful batch of pumpkin-shaped treats.
Top Tips for Perfect Pumpkin Cookies
Fun Variations for Pumpkin Sugar Cookies
Presenting Pumpkin Sugar Cookies for Events
Storing Pumpkin Sugar Cookies the Right Way
FAQs
Gel food coloring is recommended because it provides vibrant colors without adding extra liquid to the dough, which could affect the cookie texture and consistency.
While cream of tartar helps create a softer texture, you can substitute it with 1 teaspoon of white vinegar or lemon juice mixed into the wet ingredients to achieve similar results.
Chill the dough for 30 minutes before shaping and baking. This helps the cookies maintain their shape and prevents excessive spreading in the oven.
Print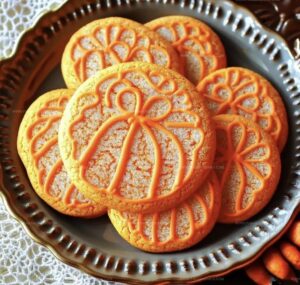
Pumpkin-Shaped Sugar Cookies Recipe
- Total Time: 1 hour
- Yield: 24 1x
Description
Festive pumpkin-shaped sugar cookies bring autumn charm to holiday gatherings. Delicate orange-glazed treats delight guests with their whimsical design and sweet maple undertones you’ll savor.
Ingredients
Main Ingredients:
- 2 sticks (16 tablespoons) salted butter
- 1 large egg
- 2 cups all-purpose flour
- 1/2 cup brown sugar
- 3/4 cup granulated sugar, divided
Leavening Agents and Seasonings:
- 1 teaspoon baking soda
- 1 teaspoon cream of tartar
- 1 teaspoon kosher salt
- 1 teaspoon pure vanilla extract
Decorative Ingredients:
- orange gel food color
- green gel food color
Instructions
- Preheat the oven to 350°F, ensuring the rack is positioned in the center.
- In a medium bowl, thoroughly combine flour, baking soda, cream of tartar, and kosher salt using a whisk. Set the dry mixture aside.
- Using an electric mixer, cream butter and sugars until fluffy and pale. Incorporate the egg, blending until smooth. Mix in vanilla extract.
- Gradually fold dry ingredients into the butter mixture, stirring until just incorporated. Avoid overmixing to maintain cookie texture.
- Separate the dough into two equal portions.
- Transform one dough portion into a vibrant orange using gel food coloring. Color the second portion green for pumpkin stems.
- Roll orange dough into uniform balls, placing them on parchment-lined baking sheets. Flatten each ball with a sugar-dipped glass, creating smooth discs. Indent the top of each cookie and carve four gentle curved lines to mimic pumpkin ridges.
- Craft small green cone-shaped stems. Gently press these into the indentation of each orange cookie.
- Bake for 12-15 minutes until cookie edges turn light golden and bottoms are slightly browned.
- Transfer cookies to a wire rack, allowing complete cooling to maintain structural integrity.
- Optional: Enhance stem details by carefully etching two tiny lines using a sharp paring knife.
- Repeat the entire process with remaining dough until all cookies are crafted.
Notes
- Customize Color Intensity experiment with different shades of orange and green gel food coloring to create unique, vibrant pumpkin cookie designs.
- Prevent Sticking generously coat the bottom of the glass with granulated sugar when flattening cookie dough to ensure smooth, easy release and prevent sticking.
- Make Gluten-Free swap regular flour with a 1:1 gluten-free baking blend to accommodate those with wheat sensitivities without compromising cookie texture.
- Enhance Flavor consider adding a pinch of ground cinnamon or nutmeg to the dough for a warm, autumnal spice profile that complements the pumpkin theme.
- Prep Time: 45 minutes
- Cook Time: 15 minutes
- Category: Desserts, Snacks
- Method: Baking
- Cuisine: American
Nutrition
- Serving Size: 24
- Calories: 150
- Sugar: 8 g
- Sodium: 70 mg
- Fat: 6 g
- Saturated Fat: 4 g
- Unsaturated Fat: 2 g
- Trans Fat: 0 g
- Carbohydrates: 22 g
- Fiber: 0 g
- Protein: 2 g
- Cholesterol: 20 mg
Marcus Reed
Founder & Food Content Creator
Expertise
Single-recipe development, Seasonal and local ingredient utilization, Food photography and styling, Culinary writing and content creation
Education
Culinary Arts Certificate, Blue Ridge Community and Technical College, WV
Focus: Fundamentals of culinary techniques, emphasizing hands-on experience in small-scale kitchen settings.
Marcus’s story begins in Asheville, where good food and family kitchens shaped his earliest memories. After hands-on culinary training and a lot of trial (and a little error), he realized that real cooking isn’t about perfection, it’s about connection.
At Pan and Oven, Marcus crafts recipes that are easy to follow, packed with flavor, and built for real kitchens.