
Quick & Creamy Pumpkin Cheesecake Recipe: A Fall Favorite
Autumn’s golden hues bring a delightful pumpkin cheesecake recipe that whispers comfort and warmth.
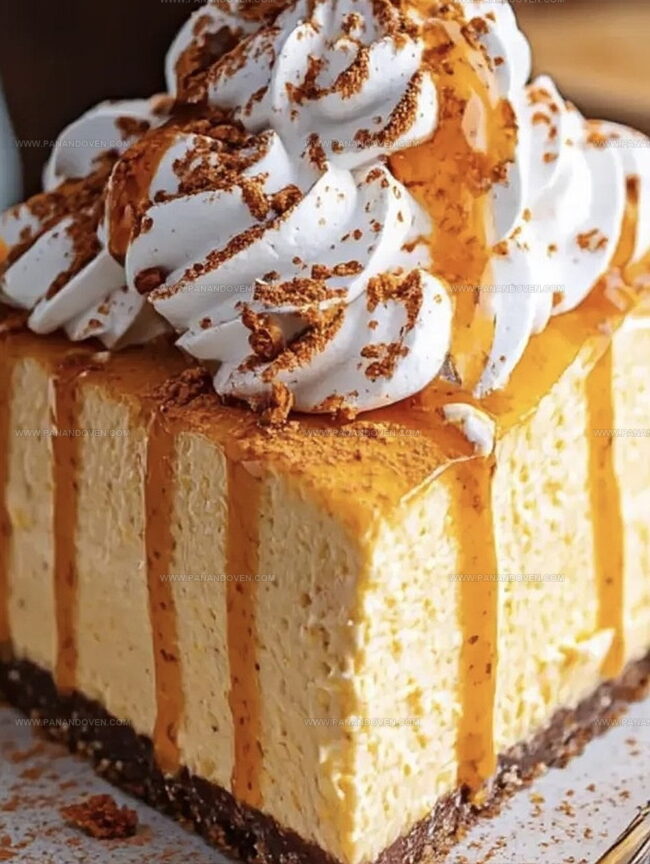
creamy layers of rich texture melt softly on your palate with each decadent bite.
This dessert captures the essence of cozy seasonal gatherings and sweet memories.
Silky smooth cream cheese blends perfectly with warm spices that dance across your taste buds.
The graham cracker crust adds a delightful crunch that complements the velvety filling.
Spiced with cinnamon, nutmeg, and a hint of vanilla, this cheesecake transforms an ordinary evening into a celebration.
Savor every moment and indulge in this irresistible fall treat that promises to delight and comfort.
Creamy No-Bake Pumpkin Cheesecake Wonders
Everything Needed for No-Bake Pumpkin Cheesecake Bliss
Crust Components:Filling Ingredients:Topping and Finishing Ingredients:Best Tools for a Silky Pumpkin Cheesecake Finish
How to Make No-Bake Pumpkin Cheesecake at Home
Step 1: Crush Cookie Base
Grab your food processor and toss in Nilla Wafers with a sprinkle of pumpkin pie spice.
Pulse until you have fine, sandy crumbs.
Set aside a small portion of these crumbs for later garnishing.
Step 2: Bind Cracker Mixture
Drizzle melted butter over the cookie crumbs.
Give it a quick pulse in the food processor until the mixture looks like wet sand and holds together perfectly.
Step 3: Form Crust Foundation
Press the buttery crumb mixture into the bottom of a springform pan, creating an even, compact layer.
Pop it in the freezer to firm up while you prepare the filling.
Step 4: Whip Cream Cheese Base
In a stand mixer, beat cream cheese with dark brown sugar until the mixture becomes light, airy, and silky smooth.
This should take around 4-5 minutes of mixing.
Step 5: Blend Pumpkin Essence
Add these ingredients to the cream cheese mixture:Blend until the filling looks completely smooth and integrated.
Step 6: Fold Creamy Topping
Gently incorporate whipped topping into the pumpkin mixture.
Use a soft folding motion to keep the filling light and fluffy.
Step 7: Spread Filling
Pour the pumpkin cheesecake filling into the chilled crust.
Smooth the top with an offset spatula for a perfect finish.
Step 8: Chill And Set
Cover the cheesecake and refrigerate overnight or for a minimum of 6 hours to allow it to set completely.
Step 9: Decorate Magnificently
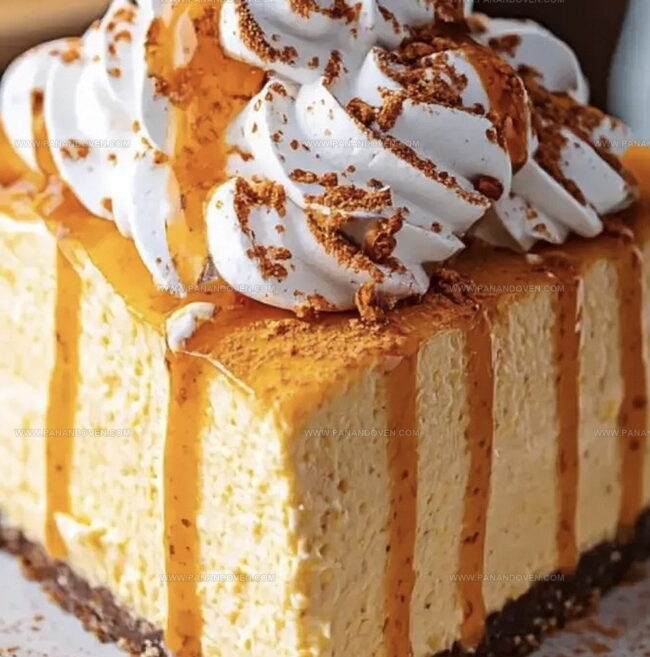
When ready to serve, add a layer of whipped topping.
Sprinkle the reserved crumbs and an extra dash of pumpkin pie spice for a gorgeous presentation.
Step 10: Slice And Enjoy
Remove the springform pan’s rim, slice the cheesecake, and serve.
For extra indulgence, drizzle some caramel sauce on top.
No-Bake Pumpkin Cheesecake Pro Tips for Creaminess
Fun Ways to Vary Your No-Bake Pumpkin Cheesecake

Ideas to Serve No-Bake Pumpkin Cheesecake in Style
How to Store No-Bake Pumpkin Cheesecake for Freshness
FAQs
The crust uses Nilla Wafers mixed with pumpkin pie spice, creating a flavorful and aromatic base that complements the creamy pumpkin filling perfectly.
Graham crackers are an excellent alternative to Nilla Wafers. You can swap them in a 1:1 ratio while maintaining the same delicious texture and flavor profile.
While a stand mixer makes mixing easier and more consistent, you can use a hand mixer or even mix by hand with a bit more effort. The key is to ensure the cream cheese is smooth and well-combined.
Print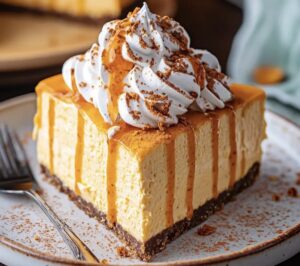
Pumpkin Cheesecake Recipe
- Total Time: 6 hours 20 minutes
- Yield: 8 1x
Description
Creamy pumpkin cheesecake blends autumn’s warmth with rich cream cheese on a graham cracker crust. Spices like cinnamon and nutmeg elevate this classic dessert, inviting you to savor seasonal comfort in each delightful slice.
Ingredients
Crust Ingredients:
- 11 ounces (311 grams) Nilla Wafers
- 8 tablespoons (113 grams) salted butter, melted
- 0.5 teaspoon pumpkin pie spice
Filling Ingredients:
- 12 ounces (340 grams) cream cheese, softened
- 1/3 cup dark brown sugar, packed
- 1 cup (240 grams) pumpkin puree
- 16 ounces (454 grams) whipped topping
- 0.5 teaspoon vanilla extract
- 1 teaspoon pumpkin pie spice
Optional Toppings:
- 1 teaspoon pumpkin pie spice
- 1/4 cup caramel sauce
- Whipped cream
Instructions
- Pulverize Nilla Wafers and pumpkin pie spice in a food processor until finely ground, setting aside 2 tablespoons of the mixture for garnish.
- Incorporate melted butter into the crumb mixture, pulsing until evenly distributed and cohesive.
- Compress the crumb blend into the base of a 9-inch springform pan, then refrigerate to solidify the crust.
- Whip cream cheese and dark brown sugar in a stand mixer until airy and smooth, approximately 4-5 minutes.
- Blend pumpkin puree, vanilla extract, and additional pumpkin pie spice into the cream cheese mixture until uniform and velvety.
- Delicately fold whipped topping into the pumpkin mixture, ensuring complete integration without deflating the volume.
- Carefully spread the filling across the chilled crust, creating an even surface using an offset spatula.
- Refrigerate the cheesecake for a minimum of 6 hours or ideally overnight to allow complete setting and flavor development.
- Prior to serving, embellish the top with remaining whipped topping, sprinkling reserved crumbs and a dusting of pumpkin pie spice for visual appeal.
- Liberate the cheesecake from the springform pan, slice, and optionally drizzle with caramel sauce for an extra indulgent touch.
Notes
- Crumb Consistency Matters: Pulse Nilla Wafers into fine, even crumbs for a smooth, compact crust that holds together perfectly without falling apart.
- Butter Temperature Tip: Use melted butter at room temperature to ensure even distribution and prevent clumping when mixing with cookie crumbs.
- Cream Cheese Technique: Beat cream cheese and brown sugar until ultra-smooth and fluffy, which prevents lumpy texture and ensures a silky cheesecake filling.
- Make-Ahead Magic: This no-bake dessert can be prepared up to 3 days in advance, making it ideal for stress-free entertaining and holiday gatherings.
- Prep Time: 20 minutes
- Cook Time: 6 hours
- Category: Desserts
- Method: Chilling
- Cuisine: American
Nutrition
- Serving Size: 8
- Calories: 350
- Sugar: 22 g
- Sodium: 250 mg
- Fat: 20 g
- Saturated Fat: 12 g
- Unsaturated Fat: 8 g
- Trans Fat: 0 g
- Carbohydrates: 36 g
- Fiber: 1 g
- Protein: 4 g
- Cholesterol: 40 mg
Marcus Reed
Founder & Food Content Creator
Expertise
Single-recipe development, Seasonal and local ingredient utilization, Food photography and styling, Culinary writing and content creation
Education
Culinary Arts Certificate, Blue Ridge Community and Technical College, WV
Focus: Fundamentals of culinary techniques, emphasizing hands-on experience in small-scale kitchen settings.
Marcus’s story begins in Asheville, where good food and family kitchens shaped his earliest memories. After hands-on culinary training and a lot of trial (and a little error), he realized that real cooking isn’t about perfection, it’s about connection.
At Pan and Oven, Marcus crafts recipes that are easy to follow, packed with flavor, and built for real kitchens.