
The Spooky Poison Apple Fudge Recipe Everyone Will Love
Dark and delightful, this poison apple fudge recipe weaves a spell of sweet enchantment that captures Halloween mysterious charm.
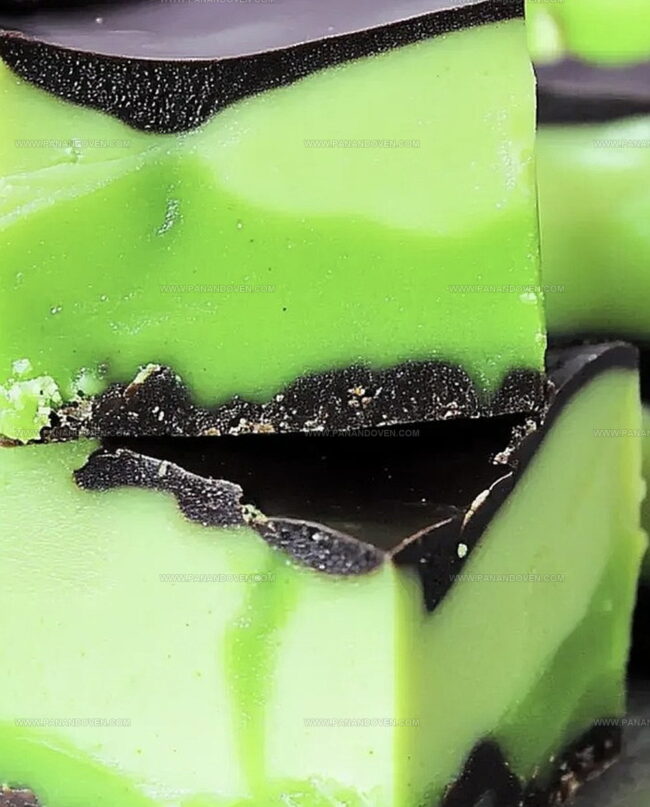
Layers of rich chocolate and tart apple intertwine to create a bewitching treat that stops people in their tracks.
The deep crimson hue hints at the dramatic flavor waiting to unfold.
Sharp apple notes dance against creamy fudge, creating a dessert that’s both playful and elegant.
Rich chocolate provides a luxurious backdrop for the tangy fruit essence.
Each bite promises a magical experience that transforms an ordinary moment into something extraordinary.
Prepare to cast a delicious spell with this wickedly good confection.
The Halloween Fudge Everyone Will Be Talking About
All the Ingredients for Wickedly Good Apple Fudge

Kitchen Equipment for Spooky Fudge-Making Success
Easy Steps for Halloween-Ready Poison Apple Fudge
Step 1: Prepare Baking Canvas
Line an 8×8 square baking pan with parchment paper, ensuring complete coverage of the bottom and sides for easy removal later.
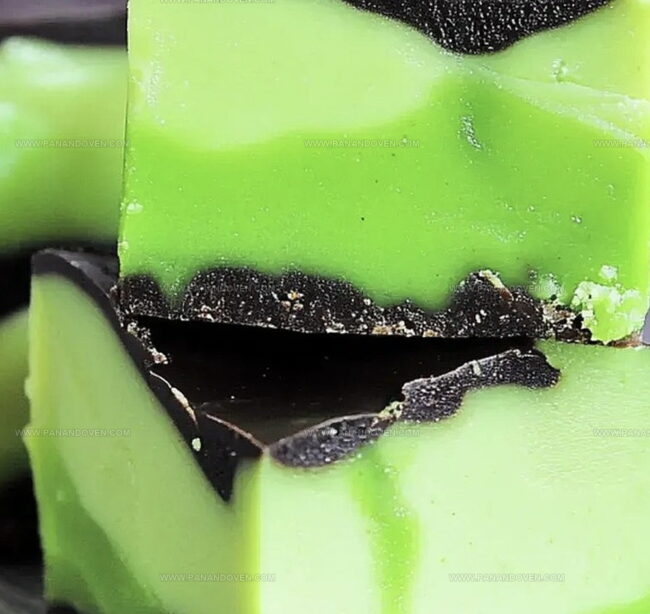
Step 2: Create Vibrant Green Base
Gather your ingredients:Open the sweetened condensed milk can and blend in the neon green food coloring until you achieve a vivid, spooky green hue that screams Halloween spirit.
Step 3: Craft Magical Melting Process
Combine these ingredients in a medium saucepan:Place the saucepan over low to medium heat, allowing the ingredients to melt and merge into a smooth, glossy mixture.
Step 4: Stir Enchanting Concoction
Continuously stir the mixture using a silicone spatula, ensuring no ingredients stick to the bottom of the pan.
Keep stirring until everything is completely melted and integrated.
Step 5: Infuse Magical Flavor
Add green apple extract to the melted mixture, stirring thoroughly to distribute the flavor evenly throughout the fudge.
Step 6: Set Supernatural Treat
Carefully pour the vibrant green fudge into the prepared parchment-lined pan, spreading it evenly with your spatula.
Allow the fudge to set and harden completely overnight in the refrigerator.
Step 7: Slice and Serve Spooky Dessert
Once fully set, lift the fudge out using the parchment paper edges.
Cut into small squares and serve at your Halloween party for a wickedly delicious treat.
Tips for Making Fudge with Perfect Texture and Flavor
Clever Ideas for Halloween-Themed Fudge Twists

Creative Fudge Serving Ideas for Haunted Gatherings

How to Store Halloween Fudge to Stay Fresh and Tasty
FAQs

Neon green food coloring is mixed into the sweetened condensed milk, creating the vibrant Halloween-themed green layer that makes this fudge visually striking.
Yes, the green apple extract provides the distinctive apple flavor that complements the fudge’s green color and gives the dessert its “poison apple” theme for Halloween parties.
White chocolate chips are crucial for creating the smooth, creamy texture of the fudge, so they are not recommended to be omitted from the recipe.
This fudge recipe is relatively simple, requiring basic cooking skills like melting ingredients and stirring, making it accessible for most home bakers, even those with limited cooking experience.
Print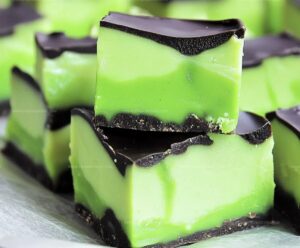
Poison Apple Fudge Recipe
- Total Time: 25 minutes
- Yield: 12 1x
Description
Sinister poison apple fudge blends Halloween’s dark charm with rich, creamy dessert magic. Crimson-glazed chocolate cubes deliver haunting flavors that enchant taste buds and spark spooky celebrations.
Ingredients
Main Ingredients:
- 6 cups white chocolate chips (3 cups for green layer, 3 cups for black layer)
- 2 – 14 ounces (396 grams) cans sweetened condensed milk (1 for green layer, 1 for black layer)
- 8 tablespoons unsalted butter (4 tablespoons for green layer, 4 tablespoons for black layer)
Flavoring and Coloring Ingredients:
- 4 teaspoons green apple extract (2 teaspoons for green layer, 2 teaspoons for black layer)
- 4 drops neon green food coloring
- 4 drops black gel food coloring
Instructions
- Prepare a square baking pan by lining it completely with parchment paper, ensuring edges are fully covered for easy removal.
- Open the sweetened condensed milk can and blend neon green food coloring thoroughly until achieving a vibrant emerald hue.
- Combine white chocolate chips, green-tinted sweetened condensed milk, and butter in a medium saucepan, heating gently over low temperature until ingredients melt smoothly.
- Continuously stir the mixture to prevent scorching, maintaining a consistent creamy texture.
- Incorporate green apple extract, mixing thoroughly to distribute the flavor evenly throughout the fudge base.
- Carefully transfer the molten green mixture into the prepared pan, spreading it evenly with a silicone spatula.
- Allow the fudge to set completely at room temperature for approximately 4-6 hours, or refrigerate overnight for faster solidification.
- Once fully hardened, lift the fudge from the pan using parchment paper edges and slice into precise, bite-sized squares for serving.
Notes
- Customize Color Intensity Adjust the amount of neon green food coloring to achieve your desired shade of spooky green, ranging from subtle pastel to vibrant Halloween hue.
- Enhance Flavor Depth Add a tiny pinch of salt to the fudge mixture to balance the sweetness and intensify the green apple extract’s complexity.
- Storage Hack Store the fudge in an airtight container in the refrigerator for up to a week, ensuring maximum freshness and maintaining its creamy texture.
- Dietary Modification Swap white chocolate chips with dairy-free alternatives and use vegan condensed milk to create a plant-based version of this festive treat.
- Prep Time: 15 minutes
- Cook Time: 10 minutes
- Category: Desserts, Snacks
- Method: Frying
- Cuisine: American
Nutrition
- Serving Size: 12
- Calories: 344
- Sugar: 40 g
- Sodium: 36 mg
- Fat: 16 g
- Saturated Fat: 10 g
- Unsaturated Fat: 6 g
- Trans Fat: 0 g
- Carbohydrates: 46 g
- Fiber: 0 g
- Protein: 2 g
- Cholesterol: 30 mg
Marcus Reed
Founder & Food Content Creator
Expertise
Single-recipe development, Seasonal and local ingredient utilization, Food photography and styling, Culinary writing and content creation
Education
Culinary Arts Certificate, Blue Ridge Community and Technical College, WV
Focus: Fundamentals of culinary techniques, emphasizing hands-on experience in small-scale kitchen settings.
Marcus’s story begins in Asheville, where good food and family kitchens shaped his earliest memories. After hands-on culinary training and a lot of trial (and a little error), he realized that real cooking isn’t about perfection, it’s about connection.
At Pan and Oven, Marcus crafts recipes that are easy to follow, packed with flavor, and built for real kitchens.