Easy Pineapple Pecan Cheese Ball Recipe for Sweet-Savory Bliss
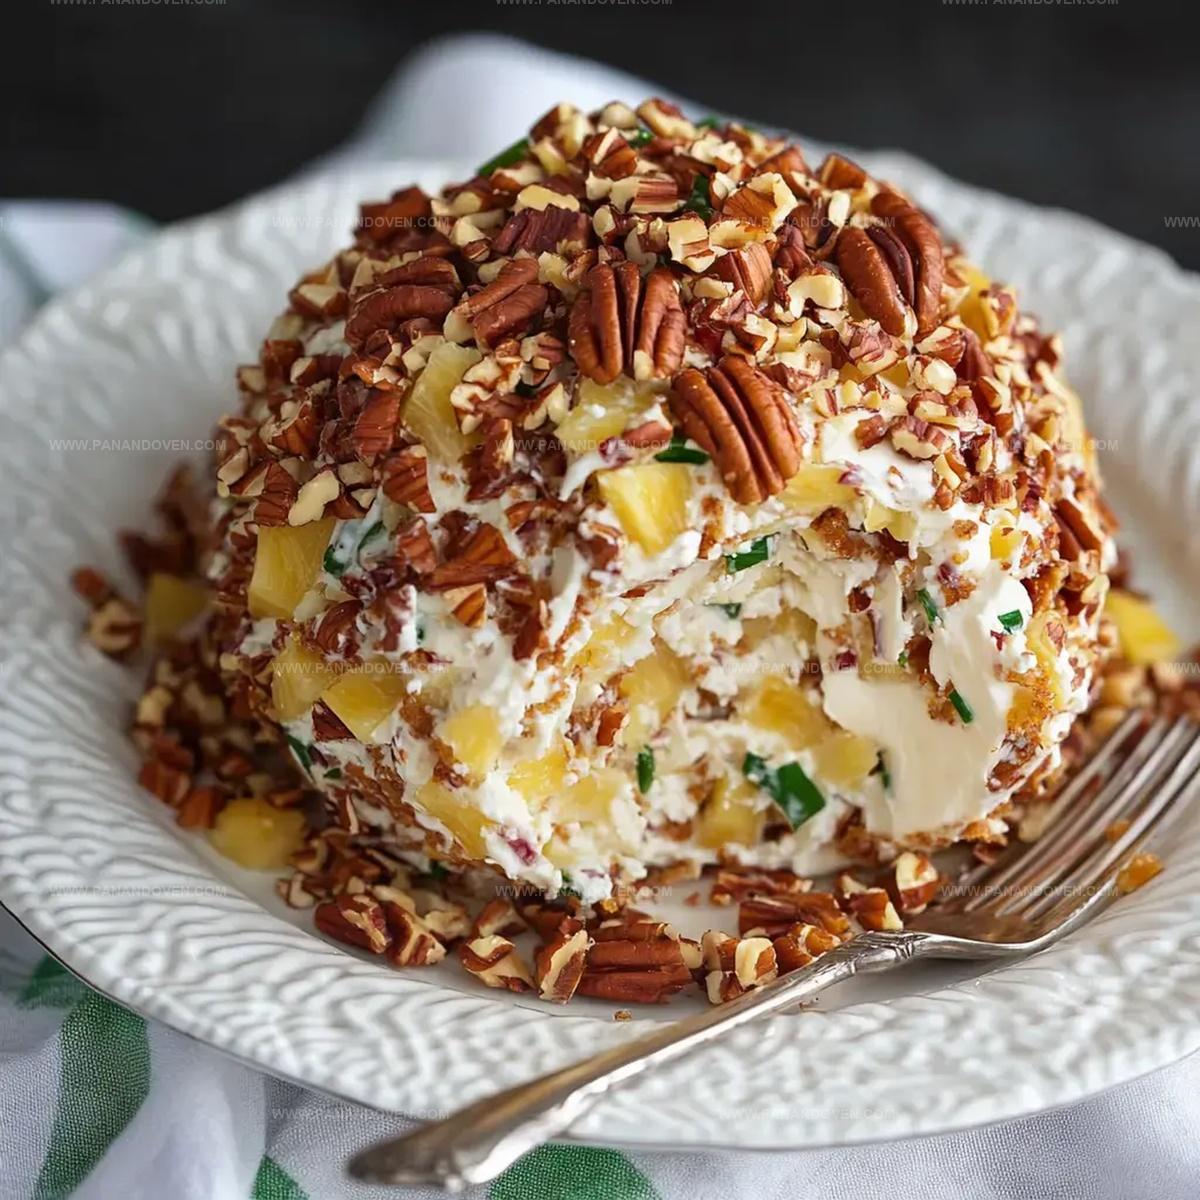
Creamy and decadent, this pineapple pecan cheese ball brings a burst of tropical flavor to any gathering.
Smooth cream cheese blends seamlessly with tangy pineapple chunks and crunchy pecans.
The combination creates a delightful appetizer that sparks conversation and tempts taste buds.
Nutty and sweet notes dance across your palate with each delectable bite.
Perfectly balanced and incredibly easy to prepare, this cheese ball serves as a crowd-pleasing starter for parties or casual get-togethers.
Serve with crisp crackers or fresh vegetables to enhance the experience.
You’ll want to make this recipe again and again for every social occasion.
Pineapple Pecan Cheese Ball Why It’s a Holiday Hit
Ingredient List for Pineapple Pecan Cheese Ball
Main Ingredients:Flavor Enhancers:Coating and Serving:Tools for Crafting a Perfect Cheese Ball
Cheese Ball Assembly and Chilling Steps
Step 1: Blend Creamy Goodness
In a spacious mixing bowl, combine the softened cream cheese with finely chopped red pepper, green onions, dried pineapple pieces, a dash of salt, and a splash of Worcestershire sauce.
Use a sturdy spatula or wooden spoon to mix everything until the ingredients are evenly distributed and create a smooth, tangy base.
Step 2: Incorporate Nutty Crunch
Add half of the crushed pecans into the cheese mixture.
Gently fold the nuts into the creamy blend, ensuring they’re well integrated but not overmixed.
Step 3: Form and Chill the Delight
Shape the mixture into a perfect round ball using clean hands.
Wrap the cheese ball tightly in plastic wrap, creating a secure seal.
Refrigerate for at least 8 hours or ideally overnight to allow the flavors to meld and the texture to firm up.
Step 4: Give It a Nutty Coat
Just before serving, roll the chilled cheese ball in the remaining crushed pecans.
Rotate and press gently to ensure an even, crunchy exterior that adds texture and visual appeal.
Step 5: Present and Enjoy
Transfer the beautifully coated cheese ball to a serving plate.
Surround it with an assortment of crisp crackers, allowing guests to scoop and spread the creamy, nutty delicacy.
This appetizer is perfect for gatherings, game days, or as a delightful snack.
Tips for Sweet and Nutty Cheese Balls
Cheese Ball Flavor Variations to Try
Serving Up Pineapple Cheese Balls for Parties
Storage Guidance for Cheese Balls
FAQs
Yes, you can substitute pecans with other nuts like almonds or walnuts. Just make sure to crush them finely for the best texture and coating.
Absolutely! You can prepare the cheese ball up to 3 days in advance. Keep it wrapped tightly in plastic wrap in the refrigerator until ready to serve.
Butter crackers, wheat crackers, or water crackers are excellent choices. They provide a good base that complements the creamy and nutty flavors of the cheese ball.
Print
Pineapple Pecan Cheese Ball Recipe
- Total Time: 15 minutes
- Yield: 12 1x
Description
Creamy pineapple pecan cheese ball brings Southern hospitality to party appetizers. Zesty cream cheese mixed with sweet pineapple and crunchy pecans creates an irresistible spread you’ll love serving at gatherings.
Ingredients
Main Ingredients:
- 16 ounces (454 grams) soft cream cheese
- 2 cups (240 grams) crushed pecans
- 2 cans (8 ounces/227 grams each) crushed pineapple, squeezed dry
Flavor Enhancers:
- 2 tablespoons seasoned salt
- 2 tablespoons Worcestershire sauce
Vegetable Additions:
- 1/3 cup (50 grams) cut-up red pepper
- 1/4 cup (40 grams) sliced green onion
Instructions
- Blend cream cheese with diced red pepper, finely chopped green onion, dried pineapple, salt, and Worcestershire sauce in a spacious mixing bowl until ingredients are thoroughly combined.
- Incorporate half of the crushed pecans into the cheese mixture, ensuring even distribution.
- Carefully mold the mixture into a compact, spherical shape using gentle hand pressure.
- Tightly encase the cheese ball in plastic wrap, securing all edges to prevent air exposure.
- Refrigerate for a minimum of 8 hours or preferably overnight to allow flavors to meld and texture to firm.
- Prior to serving, unwrap the cheese ball and generously coat its exterior with remaining crushed pecans, rotating to ensure complete coverage.
- Transfer the pecan-encrusted cheese ball to a decorative serving platter, accompanied by an assortment of crisp crackers for guests to enjoy.
Notes
- Experiment with different nut varieties like almonds or walnuts for unique flavor profiles and added crunch.
- For a lighter version, use low-fat cream cheese and reduce the amount of nuts while maintaining the delicious taste.
- Toast the pecans briefly before crushing to enhance their nutty flavor and add depth to the cheese ball’s overall taste.
- Prepare this appetizer up to 2 days in advance for convenient party planning and to allow flavors to meld together perfectly.
- Prep Time: 15 minutes
- Cook Time: 0 minutes
- Category: Appetizer, Snacks
- Method: None
- Cuisine: American
Nutrition
- Serving Size: 12
- Calories: 204
- Sugar: 2 g
- Sodium: 140 mg
- Fat: 19 g
- Saturated Fat: 3 g
- Unsaturated Fat: 16 g
- Trans Fat: 0 g
- Carbohydrates: 6 g
- Fiber: 1 g
- Protein: 4 g
- Cholesterol: 30 mg
Marcus Reed
Founder & Food Content Creator
Expertise
Single-recipe development, Seasonal and local ingredient utilization, Food photography and styling, Culinary writing and content creation
Education
Culinary Arts Certificate, Blue Ridge Community and Technical College, WV
Focus: Fundamentals of culinary techniques, emphasizing hands-on experience in small-scale kitchen settings.
Marcus’s story begins in Asheville, where good food and family kitchens shaped his earliest memories. After hands-on culinary training and a lot of trial (and a little error), he realized that real cooking isn’t about perfection, it’s about connection.
At Pan and Oven, Marcus crafts recipes that are easy to follow, packed with flavor, and built for real kitchens.