The Best Pepperoni Rolls Recipe for Cozy Homemade Snacking
West Virginia’s beloved pepperoni rolls weave a delicious story of immigrant miners and hearty comfort food.
These portable snacks emerged from the coal mining regions with a rich cultural heritage.
Coal workers needed convenient, filling meals that could withstand long underground shifts.
The classic pepperoni rolls combine soft, pillowy bread with spicy, savory pepperoni in a handheld delight.
Generations of families have perfected this simple yet irresistible recipe passed down through decades of tradition.
Each bite connects you to the hardworking roots of Appalachian cuisine.
Prepare to savor a piece of culinary history that continues to warm hearts and satisfy hunger.
Why Pepperoni Rolls Are Always a Hit
Ingredients for Classic Pepperoni Rolls
Dough Base:Protein and Cheese:Seasoning and Finish:Miscellaneous:Kitchen Tools for Baking Rolls
How to Bake the Best Pepperoni Rolls
Step 1: Warm Up the Oven
Fire up your oven to a toasty 375F (190C).
Grab a baking sheet and line it with parchment paper or give it a quick spray of cooking oil to prevent sticking.
Step 2: Flatten the Dough
Dust your work surface with a light sprinkle of flour.
Take your pizza dough and roll it out into a generous rectangle that’s ready for delicious toppings.
Step 3: Create a Pepperoni Blanket
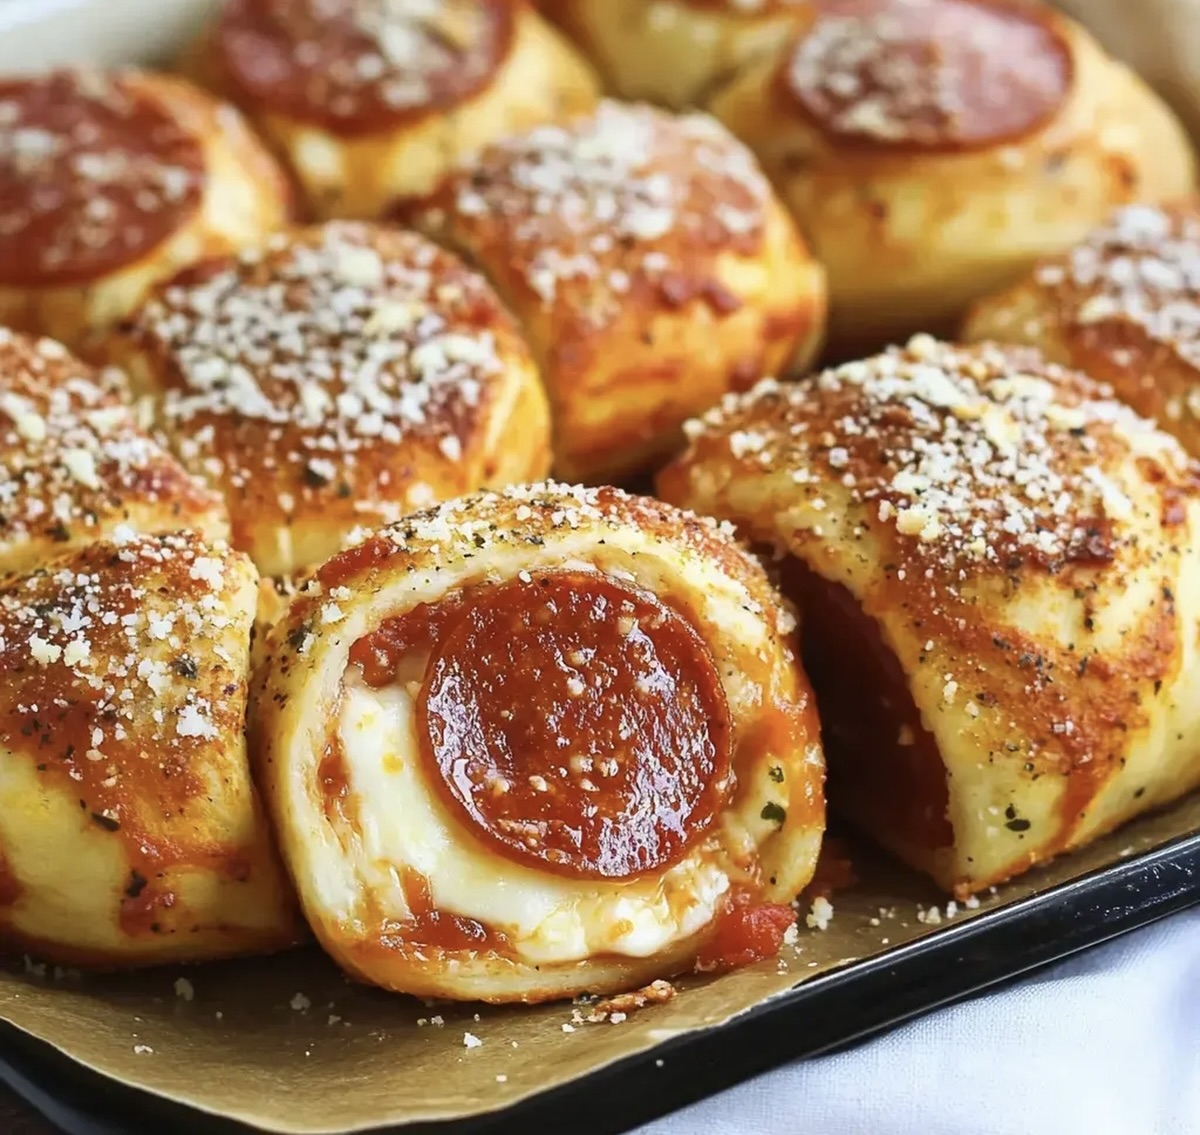
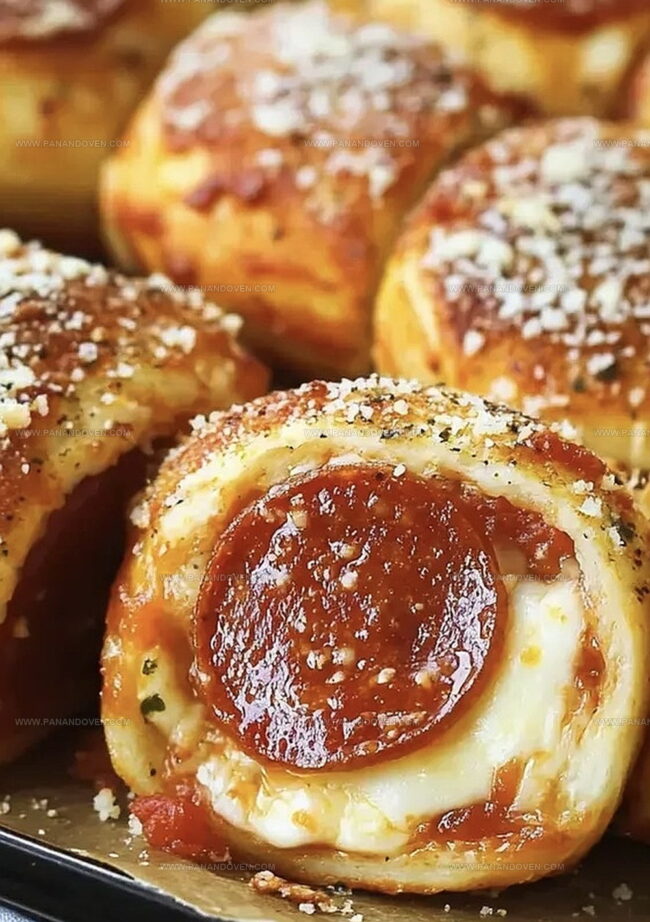
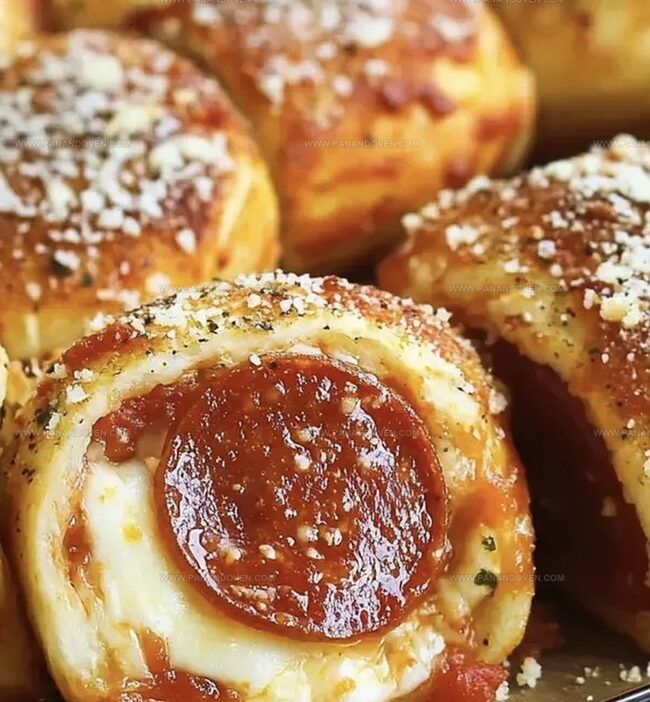
Arrange pepperoni slices across the dough, leaving a small naked border around the edges to help seal in all the goodness.
Step 4: Cheese It Up
Shower the pepperoni with a delightful mix of:Spread the cheese evenly to ensure maximum flavor in every bite.
Step 5: Roll into a Tasty Log
Starting from one long edge, tightly roll the dough into a compact log.
Pinch the seams closed to lock in all those mouthwatering ingredients.
Step 6: Slice and Arrange
Cut the log into bite-sized pieces about 1 inch thick.
Place each roll cut-side down on your prepared baking sheet, giving them a little breathing room.
Step 7: Add Flavor Boost
Brush the tops of the rolls with melted butter.
Sprinkle generously with:Step 8: Bake to Golden Perfection
Slide the baking sheet into the oven and bake for 15-18 minutes.
Look for a golden-brown color and bubbling cheese that signals they’re ready to devour.
Step 9: Serve and Enjoy
Pull out the rolls and serve them piping hot.
Set out a bowl of marinara sauce for dipping and watch them disappear!
Tips for Hot, Cheesy Pepperoni Rolls
Roll Variations for Pizza Lovers
Serving Ideas for Pepperoni Rolls
Storing Pepperoni Rolls for Game Day
FAQs
Pepperoni rolls originated in West Virginia during the early 1900s, created by Italian immigrant coal miners who needed a convenient, portable lunch that didn’t require refrigeration.
Yes, homemade pizza dough works perfectly. Just ensure it’s rolled out thin and evenly to create the best pepperoni rolls.
Use thin-sliced, regular pepperoni. Avoid thick-cut or turkey pepperoni as they might not melt and integrate as well with the cheese and dough.
Pinch the seams tightly when rolling and place the rolls seam-side down on the baking sheet to help them maintain their shape during baking.
Print
Pepperoni Rolls Recipe
- Total Time: 40 minutes
- Yield: 4 1x
Description
Hearty pepperoni rolls originated in West Virginia’s mining communities as portable, filling lunches. Miners appreciated these simple, satisfying bread rolls packed with spicy meat and melted cheese. Workers love these classic regional treasures.
Ingredients
Main Ingredients:
- 1 can refrigerated pizza dough
- 1 package (8 ounces / 226 grams) sliced pepperoni
- 1 1/2 cups shredded mozzarella cheese
Cheese and Seasonings:
- 1/2 cup grated Parmesan cheese
- 1 teaspoon garlic powder
- 1 teaspoon dried Italian seasoning
Finishing Ingredients:
- 2 tablespoons unsalted butter, melted
- Marinara sauce, for dipping
Instructions
- Heat oven to 375F (190C) and prepare a baking sheet with parchment paper or light grease.
- Stretch pizza dough into a rectangular shape on a flour-dusted surface, ensuring even thickness.
- Arrange pepperoni slices across the dough, maintaining a small empty border around the edges.
- Distribute mozzarella and Parmesan cheese evenly over the pepperoni layer, covering the surface completely.
- Carefully roll the dough from the longer side, creating a compact cylindrical log, and seal the edges firmly to prevent filling from escaping.
- Cut the rolled log into uniform 1-inch sections, positioning each piece cut-side down on the prepared baking sheet.
- Enhance flavor by brushing roll tops with melted butter, then generously sprinkle with garlic powder and Italian seasoning.
- Transfer baking sheet to preheated oven and cook for 15-18 minutes until the rolls turn golden brown and cheese becomes bubbly and slightly crisp.
- Remove from oven and let cool briefly, then serve alongside marinara sauce for a delicious dipping experience.
Notes
- Customize pepperoni choices by using spicy, turkey, or vegetarian pepperoni alternatives for diverse dietary preferences.
- Create gluten-free version by substituting regular pizza dough with cauliflower or gluten-free dough options.
- Enhance flavor profiles by adding dried herbs like oregano or red pepper flakes before rolling for extra zest.
- Prevent soggy bottoms by allowing rolls to cool slightly on a wire rack, which helps maintain crispy texture and prevents moisture buildup.
- Prep Time: 20 minutes
- Cook Time: 20 minutes
- Category: Snacks, Appetizer, Lunch
- Method: Baking
- Cuisine: American
Nutrition
- Serving Size: 4
- Calories: 430
- Sugar: 1 g
- Sodium: 950 mg
- Fat: 28 g
- Saturated Fat: 14 g
- Unsaturated Fat: 10 g
- Trans Fat: 0 g
- Carbohydrates: 30 g
- Fiber: 1 g
- Protein: 17 g
- Cholesterol: 55 mg
Marcus Reed
Founder & Food Content Creator
Expertise
Single-recipe development, Seasonal and local ingredient utilization, Food photography and styling, Culinary writing and content creation
Education
Culinary Arts Certificate, Blue Ridge Community and Technical College, WV
Focus: Fundamentals of culinary techniques, emphasizing hands-on experience in small-scale kitchen settings.
Marcus’s story begins in Asheville, where good food and family kitchens shaped his earliest memories. After hands-on culinary training and a lot of trial (and a little error), he realized that real cooking isn’t about perfection, it’s about connection.
At Pan and Oven, Marcus crafts recipes that are easy to follow, packed with flavor, and built for real kitchens.