
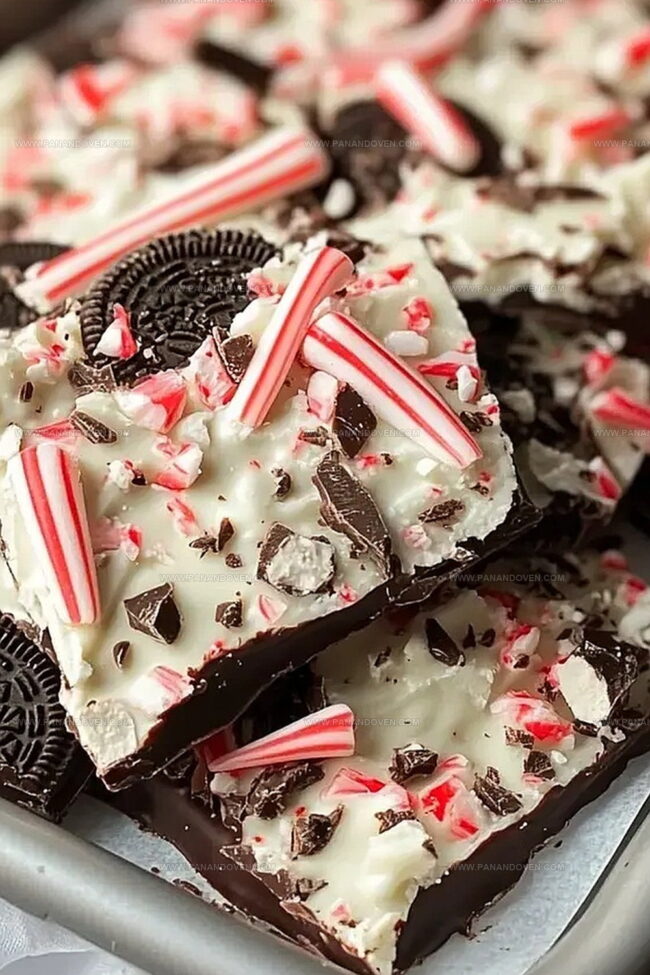
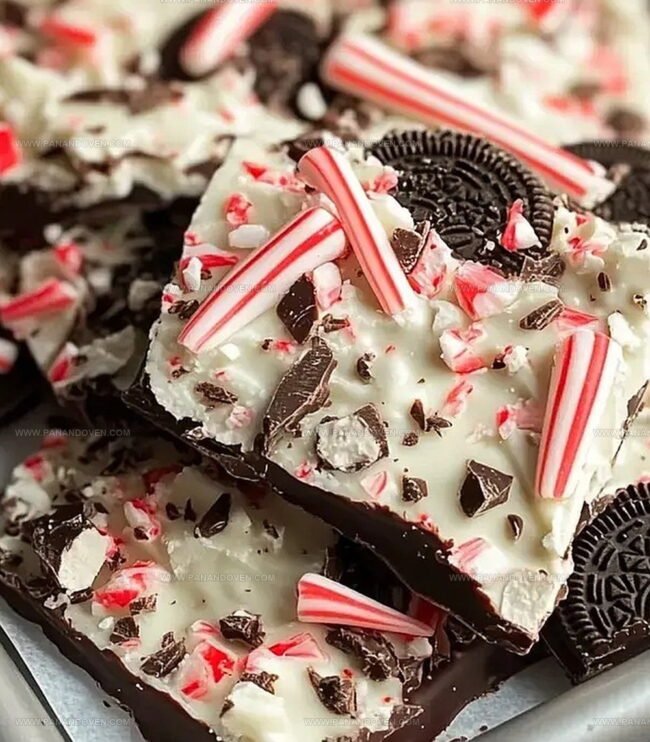
Magical Peppermint Oreo Bark Recipe for Holiday Sweetness
Sweet and decadent peppermint Oreo bark brings festive cheer to any holiday gathering.
Chocolate lovers rejoice as this simple treat combines classic Oreo cookies with smooth melted chocolate.
Crushed peppermint candies add a delightful crunch and refreshing minty twist to the dessert.
Each bite delivers a perfect balance of rich chocolate and cool peppermint flavors.
You’ll love how quickly this bark comes together with just a few ingredients.
Minimal effort yields maximum deliciousness in this crowd-pleasing seasonal confection.
Prepare to wow everyone at your next celebration with this irresistible peppermint Oreo bark.
Peppermint Oreo Bark Wintery Flavor Perks
Peppermint Oreo Bark Ingredients to Gather
Chocolate Base:Crunchy Mix-Ins:Festive Toppings:Tools for Peppermint Bark Creation
How to Make Oreo Bark Easily
Step 1: Prepare Parchment Paper
Line a baking sheet with parchment paper, ensuring the entire surface is covered smoothly and evenly.
Step 2: Crush Oreo Cookies
Place Oreo cookies in a resealable plastic bag and crush them into small, uneven pieces using a rolling pin or meat mallet.
Step 3: Melt White Candy Coating
Place white candy melts in a microwave-safe bowl and heat in 30-second intervals, stirring between each interval until completely smooth and glossy.
Step 4: Combine White Coating and Cookies
Gently fold crushed Oreo pieces into the melted white candy coating, ensuring even distribution throughout the mixture.
Step 5: Create Bark Base
Pour the white chocolate and Oreo mixture onto the prepared parchment-lined baking sheet, spreading it evenly to create a thin, consistent layer about 1/4-inch thick.
Step 6: Prepare Dark Candy Coating
Melt chocolate candy melts in a separate microwave-safe bowl using the same interval method as the white coating.
Step 7: Decorate with Toppings
Sprinkle remaining crushed Oreo pieces and peppermint pieces over the white chocolate base.
Step 8: Drizzle Chocolate Design
Using a spoon or piping bag, drizzle the melted dark chocolate in a zigzag pattern across the bark’s surface.
Step 9: Chill and Set
Place the baking sheet in the refrigerator for 15-20 minutes until the bark is completely firm and set.
Step 10: Break Into Pieces
Remove the bark from the refrigerator and break into irregular, rustic pieces using your hands or a sharp knife.
Peppermint Bark Melting Tips
Flavor Add Ins for Peppermint Bark Fans
Creative Ways to Serve Peppermint Bark
Storage for Peppermint Bark All Season
FAQs
Candy melts are special chocolate-like confectionery coating that melts easily and hardens quickly, perfect for creating smooth chocolate layers and decorations.
While you can use regular chocolate, candy melts provide a smoother texture and are easier to melt without tempering, making them ideal for bark recipes.
Crush Oreos into small, uneven pieces – some should be fine crumbs, while others are chunky, which creates more texture and visual interest in the bark.
When stored in an airtight container in the refrigerator, the bark will stay fresh for up to two weeks, maintaining its crisp texture and flavor.
Print
Peppermint Oreo Bark Recipe
- Total Time: 35 minutes
- Yield: 16 1x
Description
Homemade peppermint oreo bark delights chocolate and candy cane enthusiasts with its festive crunch. Sweet layers of melted chocolate and crushed oreos create a simple holiday treat you will savor with pure delight.
Ingredients
Main Ingredients:
- 30 ounces (850 grams) white vanilla candy melts
- 20 Oreo cookies, crushed and divided
Complementary Ingredients:
- 1/2 cup (120 milliliters) chocolate candy melts
- 1/4 cup (60 milliliters) crushed peppermint candies
Instructions
- Cover a baking sheet with parchment paper, ensuring a smooth, flat surface for even chocolate spreading.
- Microwave white candy melts in 30-second intervals, stirring between each interval until completely smooth and glossy.
- In a separate bowl, melt chocolate candy melts using the same microwave technique, stirring until completely liquid.
- Gently fold 3/4 of the crushed Oreos into the melted white chocolate, creating a speckled, textured mixture.
- Pour the white chocolate-Oreo blend onto the prepared baking sheet, using a spatula to spread it evenly, approximately 1/4-inch thick.
- Artfully scatter the remaining crushed Oreos and peppermint pieces across the surface, pressing lightly to ensure they adhere.
- Using a spoon or piping bag, drizzle the melted chocolate in delicate, zigzag patterns over the bark.
- Refrigerate for 15-20 minutes until the chocolate is completely firm and set.
- Once chilled, break the bark into irregular, rustic pieces using hands or a sharp knife.
Notes
- Crush Oreos finely for smoother texture and even distribution throughout the bark.
- Use room temperature ingredients to prevent chocolate from seizing or becoming grainy.
- Experiment with different Oreo flavors like mint or chocolate for unique variations.
- Store bark in airtight container in refrigerator to maintain crisp texture and prevent melting.
- Prep Time: 15 minutes
- Cook Time: 20 minutes
- Category: Snacks, Desserts
- Method: Baking
- Cuisine: American
Nutrition
- Serving Size: 16
- Calories: 220
- Sugar: 20 g
- Sodium: 50 mg
- Fat: 10 g
- Saturated Fat: 6 g
- Unsaturated Fat: 3 g
- Trans Fat: 0 g
- Carbohydrates: 32 g
- Fiber: 1 g
- Protein: 2 g
- Cholesterol: 0 mg
Clara Thompson
Recipe Developer & Food Educator
Expertise
Plant-based and vegetarian recipe development, Nutritional analysis and meal planning, Culinary education and workshop facilitation, Content writing with a focus on healthy living
Education
Diploma in Culinary Arts, Mt. San Jacinto College, CA
Focus: Comprehensive culinary training with an emphasis on sustainable cooking practices.
Certificate in Nutrition and Healthy Living, Cornell University (Online Program)
Focus: Understanding the principles of nutrition to create balanced and health-conscious recipes.
Clara lives where fresh ideas and fresh ingredients meet. She pairs her culinary know-how with her passion for healthy, planet-friendly cooking.
For Clara, good food should taste great, nourish your body, and feel easy to make. Her recipes highlight whole foods, colorful produce, and a deep respect for seasonal eating.