
Irresistible Peanut Butter Fudge Puddles Recipe for Sweet Lovers
Decadent chocolate and creamy peanut butter dance together in these irresistible peanut butter fudge puddles that promise pure indulgence.
Sweet treats like these never fail to spark joy at gatherings and celebrations.
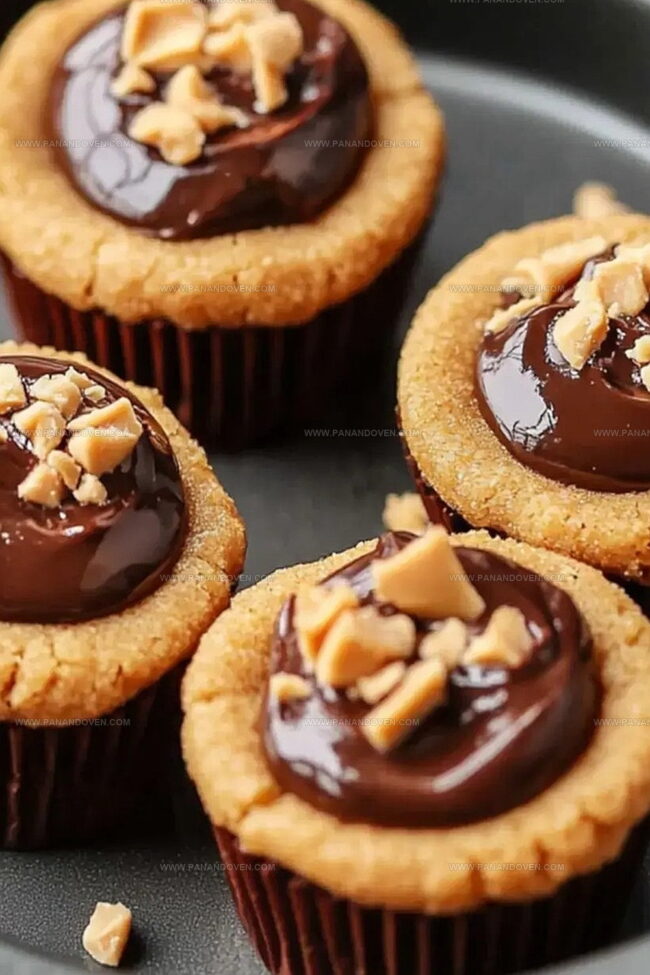
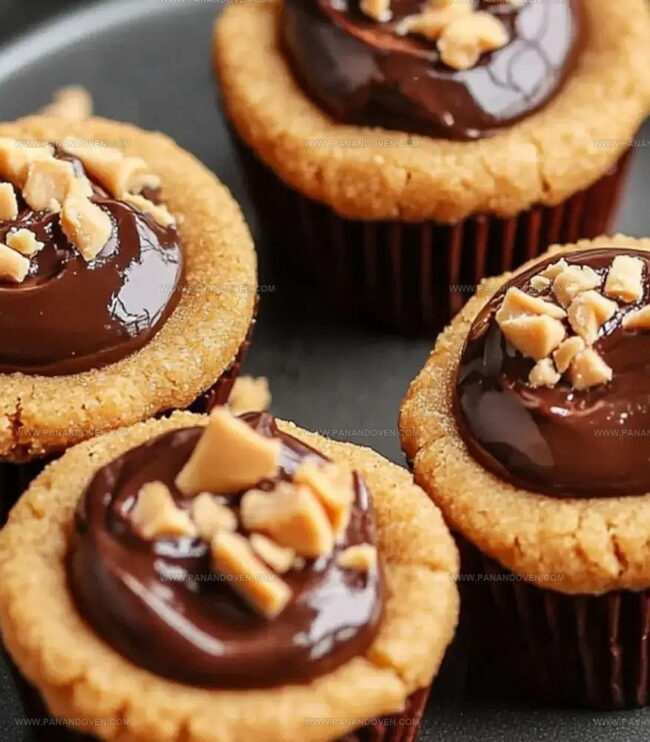
Chocolate cookie shells cradle a luxurious peanut butter filling that melts effortlessly on your tongue.
The contrast between rich chocolate and smooth peanut butter creates a symphony of flavors that will delight dessert enthusiasts.
Every bite offers a perfect balance of textures and tastes that feels like a warm culinary embrace.
These delightful little morsels are surprisingly simple to prepare, requiring minimal ingredients and effort.
Prepare to fall in love with a dessert that transforms ordinary moments into extraordinary memories.
Peanut Butter Fudge Puddles – What Makes Them Irresistible
All About Peanut Butter Fudge Puddles Ingredients
Dough Ingredients:Dry Ingredients:Filling and Topping Ingredients:Equipment for Peanut Butter Fudge Puddles Success
Making Peanut Butter Fudge Puddles Step by Step
Step 1: Create Dreamy Cookie Dough
Grab your mixer and cream together butter and sugars until they become light and fluffy.
Crack in an egg, then swirl in peanut butter and vanilla extract.
Gradually fold in the dry ingredients until a soft, tempting dough forms.
Step 2: Chill and Relax the Dough
Wrap the dough securely and send it for a cool rest in the refrigerator.
Let it hang out for at least an hour to firm up and develop deeper flavors.
Step 3: Warm Up the Oven
Fire up your oven to a toasty 325 degrees Fahrenheit.
Generously spray mini muffin pans with non-stick cooking spray to ensure easy release.
Step 4: Shape Adorable Cookie Cups
Roll the chilled dough into small balls, about a tablespoon each.
Nestle these little gems into the muffin pan cavities.
Use your thumb or the back of a spoon to create a cozy indentation in the center of each dough ball.
Step 5: Bake to Golden Perfection
Slide the pan into the oven and bake for 14-15 minutes.
Look for delicate golden-brown edges that signal they’re ready to be transformed.
Step 6: Reshape Warm Cups
Fresh from the oven, gently press down the centers again while the cookies are still warm and pliable.
Let them cool in the pan for 5-10 minutes to set their shape.
Step 7: Craft Decadent Chocolate Filling
Melt chocolate with a touch of oil until silky smooth.
Gently fold in creamy mascarpone cheese, creating a luxurious filling that will make taste buds dance.
Step 8: Fill and Embellish
Carefully spoon the rich chocolate mixture into the cooled cookie cups.
For an extra touch of elegance, sprinkle chopped nuts on top if you’re feeling fancy.
Pro Moves for Peanut Butter Fudge Puddles
Switch Up Your Peanut Butter Fudge Puddles
Peanut Butter Fudge Puddles – Perfect for Serving
Peanut Butter Fudge Puddles – Storage Tips
FAQs
Yes, you can substitute almond butter or cashew butter for a different flavor profile. Just ensure it has a similar consistency to peanut butter.
A mini muffin tin is essential. If you don’t have one, you can use a regular muffin tin, but the size and shape will be different.
Generously grease the mini muffin tin with butter or cooking spray. You can also use non-stick baking spray with flour for extra insurance.
If you can’t find mascarpone, you can substitute cream cheese. The texture will be slightly different, but the flavor will still be rich and creamy.
Print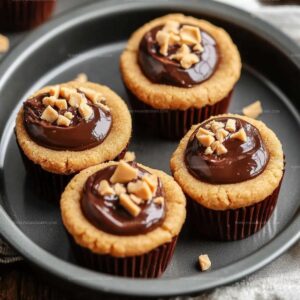
Peanut Butter Fudge Puddles Recipe
- Total Time: 1 hour 30 minutes
- Yield: 12 1x
Description
Chocolate-drizzled peanut butter fudge puddles highlight creamy peanut butter nestled in crisp cookie shells with rich chocolate centers. Chocolate lovers will savor these irresistible miniature desserts perfect for sharing at gatherings.
Ingredients
Wet Ingredients:
- 1/2 cup (113 grams) unsalted butter, softened
- 1/2 cup (100 grams) brown sugar
- 1/2 cup (100 grams) granulated sugar
- 1 large egg, room temperature
- 2/3 cup creamy peanut butter
- 1 teaspoon vanilla extract
- 8 ounces (226 grams) mascarpone cheese, room temperature
Dry Ingredients:
- 1 1/4 cups (156 grams) all-purpose flour
- 1/2 teaspoon baking soda
- 1/2 teaspoon salt
Chocolate and Topping:
- 8 ounces (226 grams) semi-sweet chocolate, chopped
- 1 teaspoon vegetable oil
- 1/2 cup toffee bits or chopped peanuts for topping
Instructions
- Cream softened butter and sugars until light and fluffy using an electric mixer.
- Incorporate egg, peanut butter, and vanilla extract, blending until smooth and well combined.
- Gently fold in dry ingredients until a consistent dough forms.
- Wrap dough in plastic and refrigerate for minimum 60 minutes to firm up.
- Preheat oven to 325°F and thoroughly grease mini muffin tin cavities.
- Portion dough into small tablespoon-sized spheres, placing each into muffin cups.
- Create a gentle indentation in the center of each dough ball using your thumb or back of a spoon.
- Bake for 14-15 minutes until edges turn golden brown and surfaces appear set.
- Remove from oven and immediately re-press centers to maintain cup shape while still warm.
- Allow cookie cups to cool in pan for 7-8 minutes to stabilize structure.
- Melt chocolate chips with neutral oil, creating a smooth glossy mixture.
- Gently fold mascarpone cheese into melted chocolate until fully integrated.
- Carefully spoon chocolate filling into cooled cookie cups.
- Optional: Sprinkle chopped nuts on top for added texture and flavor.
Notes
- Chill the dough thoroughly to prevent spreading and ensure perfect cookie cup shape during baking.
- Use room temperature ingredients for smoother, more uniform cookie texture that blends easily.
- Experiment with different nut butters like almond or cashew for unique flavor variations and dietary alternatives.
- Press centers gently when warm to create deeper wells for maximum filling capacity, ensuring each bite is packed with chocolatey goodness.
- Prep Time: 1 hour 15 minutes
- Cook Time: 15 minutes
- Category: Desserts, Snacks
- Method: Baking
- Cuisine: American
Nutrition
- Serving Size: 12
- Calories: 250
- Sugar: 18 g
- Sodium: 150 mg
- Fat: 14 g
- Saturated Fat: 7 g
- Unsaturated Fat: 6 g
- Trans Fat: 0 g
- Carbohydrates: 30 g
- Fiber: 1 g
- Protein: 4 g
- Cholesterol: 25 mg
Clara Thompson
Recipe Developer & Food Educator
Expertise
Plant-based and vegetarian recipe development, Nutritional analysis and meal planning, Culinary education and workshop facilitation, Content writing with a focus on healthy living
Education
Diploma in Culinary Arts, Mt. San Jacinto College, CA
Focus: Comprehensive culinary training with an emphasis on sustainable cooking practices.
Certificate in Nutrition and Healthy Living, Cornell University (Online Program)
Focus: Understanding the principles of nutrition to create balanced and health-conscious recipes.
Clara lives where fresh ideas and fresh ingredients meet. She pairs her culinary know-how with her passion for healthy, planet-friendly cooking.
For Clara, good food should taste great, nourish your body, and feel easy to make. Her recipes highlight whole foods, colorful produce, and a deep respect for seasonal eating.