
Irresistible Peanut Butter Cookie Bars Recipe for Sweet Cravings
Indulgent and irresistible, these peanut butter cookie bars deliver a mouthwatering punch of classic comfort.
Packed with creamy peanut butter flavor, each square promises a delightful sweet treat that melts in your mouth.
The simple ingredients blend together effortlessly, creating a dessert that’s both nostalgic and exciting.
Crumbly yet soft, these bars offer the perfect balance of richness and texture.
Every bite brings a warm, homemade sensation that connects you to cherished memories.
The recipe transforms basic pantry staples into a crowd-pleasing dessert you’ll want to share.
Prepare to be swept away by this decadent, nutty sensation that’s sure to become a household favorite.
Peanut Butter Chocolate Chip Cookie Bars Why You’ll Bake These Again
Ingredients Needed for Cookie Bar Bliss
Base Ingredients:Sweeteners:Mix-Ins:Binding and Flavor Ingredients:Leavening and Seasoning:Tools for Bar Baking Success
How to Prepare Peanut Butter Chocolate Chip Cookie Bars
Step 1: Prep Your Baking Station
Get your oven warmed up to 375F (190C).
Take a 9×13 inch baking pan and line it completely with parchment paper, making sure the paper covers the bottom and sides for easy removal later.
Step 2: Create Dry Ingredient Base
Grab a large mixing bowl and combine:Whisk these ingredients together until they’re evenly mixed and set the bowl aside.
Step 3: Blend Creamy Bases
In a separate bowl, combine softened butter and peanut butter.
Use a hand mixer or whisk to blend until the mixture looks smooth and creamy with no lumps.
Step 4: Build Sweet Foundation
Gradually add white and brown sugar to the butter mixture.
Beat continuously until the mixture becomes light, fluffy, and looks almost like a soft cloud.
Step 5: Introduce Binding Elements
Crack eggs into the mixture one at a time, mixing thoroughly after each addition.
Pour in vanilla extract and blend until everything is well incorporated.
Step 6: Merge Wet and Dry Worlds
Slowly fold the dry ingredient mixture into the wet ingredients.
Mix gently until just combined – avoid overmixing to keep the bars tender.
Step 7: Sprinkle Delicious Surprises
Carefully fold in:Distribute them evenly throughout the dough.
Step 8: Smooth Into Position
Transfer the dough to the prepared pan.
Use a spatula or your hands to press the dough evenly, creating a smooth, uniform layer.
Step 9: Bake to Golden Perfection
Slide the pan into the preheated oven.
Bake for 25-30 minutes until the edges turn a beautiful golden brown.
A toothpick inserted in the center should come out mostly clean with just a few moist crumbs.
Step 10: Cool and Slice
Allow the bars to cool completely in the pan.
Once cooled, use the parchment paper to lift the entire batch out.
Cut into squares using a sharp knife, creating perfect, delectable treats.
Pro Tips for Gooey Cookie Bars
Cookie Bar Variations for Your Cravings
Serving Up Cookie Bars with a Twist
Keeping Cookie Bars Fresh for Snacking
FAQs
Yes, you can use natural or crunchy peanut butter. Just ensure it’s at room temperature and well-mixed before adding to the recipe.
Look for golden edges and a toothpick that comes out with a few moist crumbs. The center should look slightly underbaked but will set as it cools.
Absolutely! Prepare the dough, wrap it tightly in plastic wrap, and freeze for up to 3 months. Thaw in the refrigerator before baking.
Print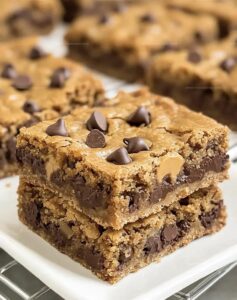
Peanut Butter Cookie Bars Recipe
- Total Time: 50 minutes
- Yield: 12 1x
Description
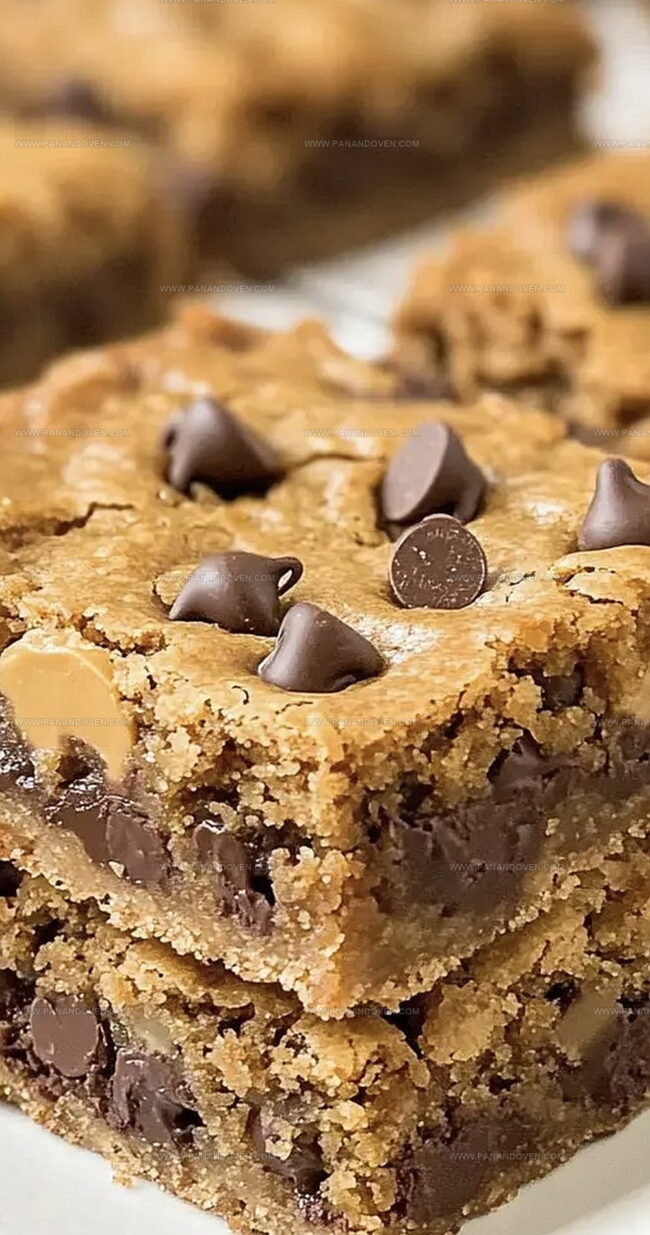
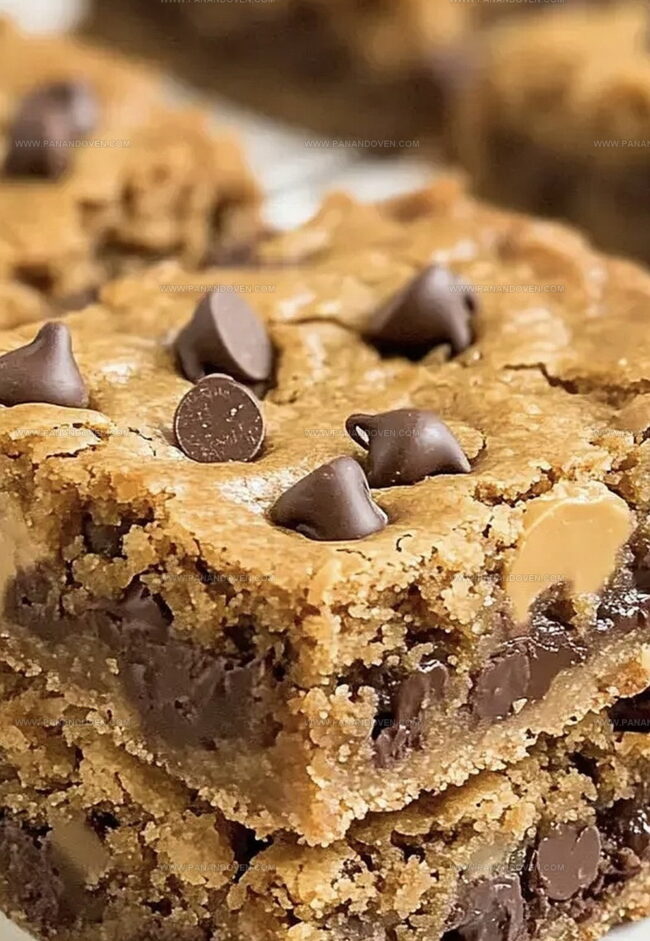
Homemade peanut butter cookie bars blend classic comfort with irresistible sweetness from creamy peanut butter and rich chocolate chips. Crisp edges and chewy centers make these bars a delightful treat you’ll crave again and again.
Ingredients
Main Ingredients:
- 2 1/4 cups (281 g) all-purpose flour
- 1/2 cup (128 g) creamy peanut butter
- 1/2 cup (113 g) unsalted butter, softened
- 2 large eggs
Sugars:
- 3/4 cup (150 g) granulated sugar
- 3/4 cup (165 g) light brown sugar, packed
Flavor Enhancers and Chips:
- 1 teaspoon vanilla extract
- 1 teaspoon baking powder
- 1/2 teaspoon fine sea salt
- 1 1/2 cups (255 g) peanut butter chips
- 1 1/2 cups (255 g) semi-sweet chocolate chips
Instructions
- Prepare the oven at 375F (190C) and line a 9×13 inch baking pan with parchment paper for easy removal.
- Whisk together flour, baking powder, and sea salt in a mixing bowl, creating a uniform dry mixture.
- In a separate large bowl, cream softened butter and peanut butter until smooth and well-integrated.
- Gradually incorporate white and brown sugars, beating until the mixture becomes light and airy with a fluffy texture.
- Introduce eggs individually, mixing thoroughly after each addition, then blend in vanilla extract for depth of flavor.
- Gently fold dry ingredients into the wet mixture, stirring until just combined to maintain a tender texture.
- Fold in peanut butter chips and chocolate chips, distributing them evenly throughout the dough.
- Transfer the dough to the prepared pan, using a spatula to spread it uniformly and create an even surface.
- Bake for 25-30 minutes, watching for golden-brown edges and a nearly clean toothpick test, indicating perfect doneness.
- Allow the bars to cool completely in the pan, then lift out using parchment paper and slice into square portions.
Notes
- Swap out peanut butter for almond or sunflower seed butter to make the recipe nut-free and allergy-friendly.
- Use gluten-free flour blend for those with wheat sensitivities to ensure everyone can enjoy these delicious bars.
- Reduce sugar by using monk fruit sweetener or stevia for a lower-carb, diabetic-friendly version that still tastes amazing.
- Chill the dough for 30 minutes before baking to prevent excessive spreading and create thicker, chewier bars with crisp edges.
- Prep Time: 20 minutes
- Cook Time: 30 minutes
- Category: Desserts, Snacks
- Method: Baking
- Cuisine: American
Nutrition
- Serving Size: 12
- Calories: 300
- Sugar: 20g
- Sodium: 150mg
- Fat: 15g
- Saturated Fat: 7g
- Unsaturated Fat: 8g
- Trans Fat: 0g
- Carbohydrates: 36g
- Fiber: 2g
- Protein: 6g
- Cholesterol: 40mg
Marcus Reed
Founder & Food Content Creator
Expertise
Single-recipe development, Seasonal and local ingredient utilization, Food photography and styling, Culinary writing and content creation
Education
Culinary Arts Certificate, Blue Ridge Community and Technical College, WV
Focus: Fundamentals of culinary techniques, emphasizing hands-on experience in small-scale kitchen settings.
Marcus’s story begins in Asheville, where good food and family kitchens shaped his earliest memories. After hands-on culinary training and a lot of trial (and a little error), he realized that real cooking isn’t about perfection, it’s about connection.
At Pan and Oven, Marcus crafts recipes that are easy to follow, packed with flavor, and built for real kitchens.