Heavenly Peanut Butter Balls With Rice Krispies Recipe
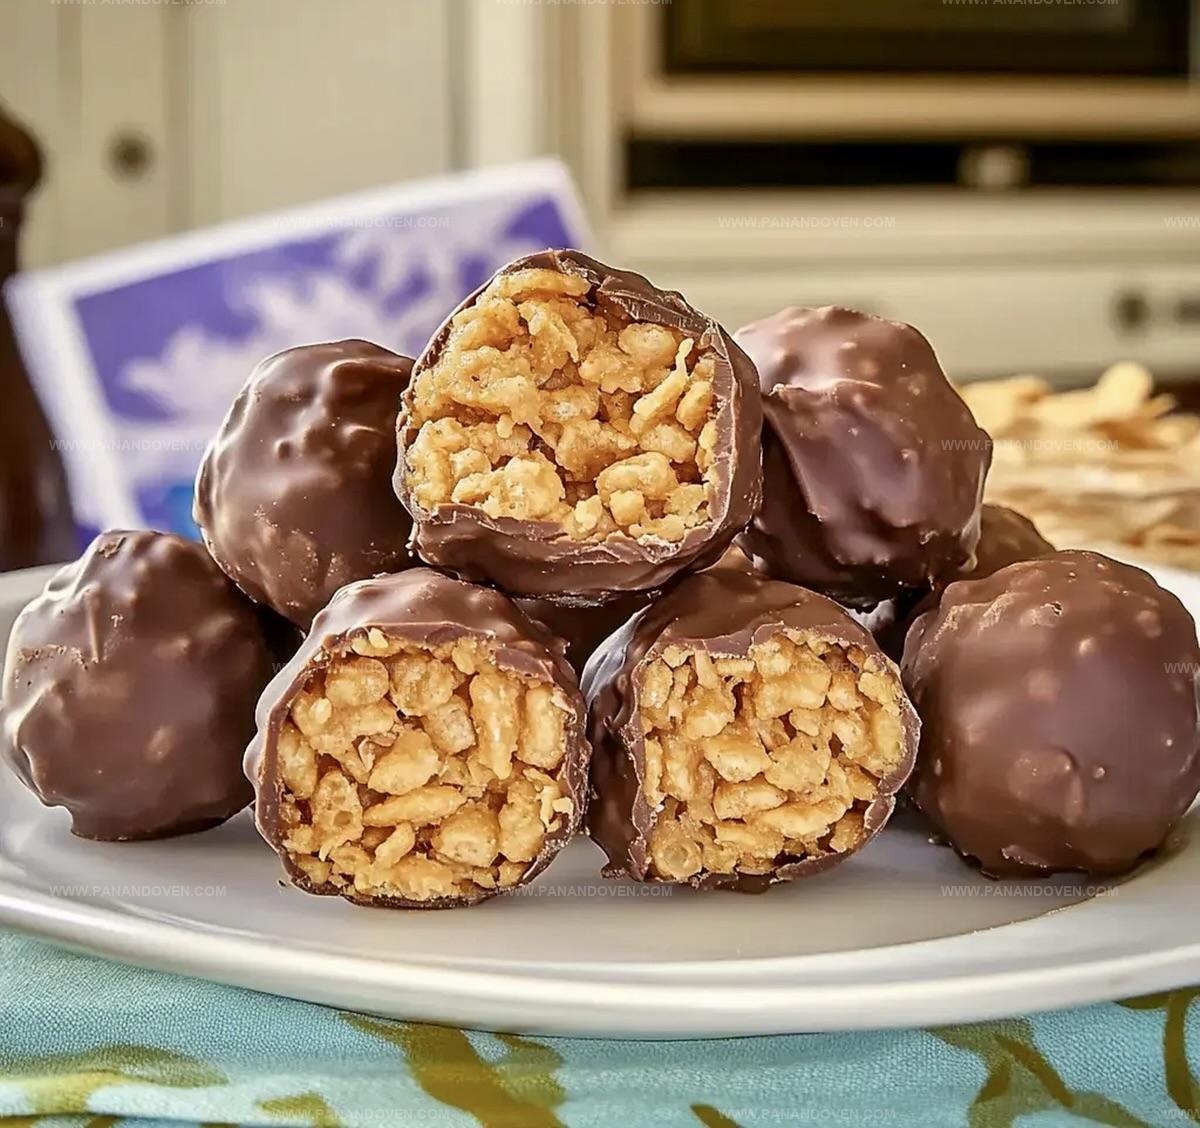
Creamy peanut butter balls with rice krispies have been a sweet sensation in my kitchen for years.
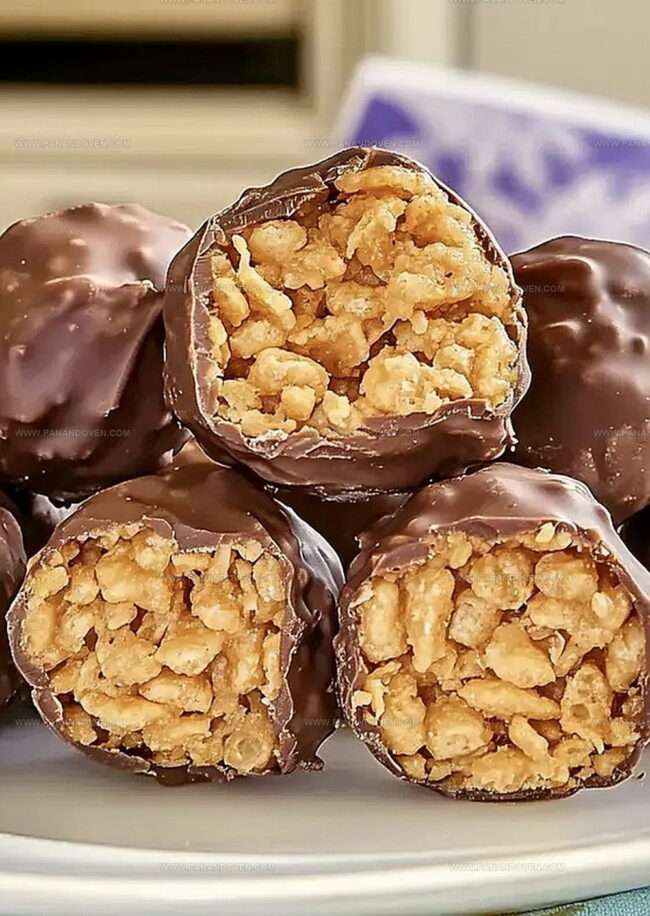
These delectable treats combine smooth peanut butter and crispy rice cereal into bite-sized morsels of pure delight.
No baking required means you can whip up these irresistible snacks in minutes.
The perfect balance of sweet and crunchy makes them a crowd-pleasing dessert for any occasion.
Kids and adults alike go crazy for these simple yet addictive little spheres of happiness.
Each ball delivers a satisfying crunch that melts into rich, nutty goodness.
Just one bite and you’ll understand why these peanut butter balls are an absolute game-changer in the world of no-bake desserts.
Why Peanut Butter Krispie Balls Delight
Peanut Butter Krispie Ball Ingredient Checklist
Peanut Butter Base:Dry Ingredients:Coating and Garnish:Tools for Peanut Butter Krispie Balls
Making Peanut Butter Krispie Balls Easily
Step 1: Set Up Workspace
Grab a baking sheet and cover it with parchment paper, creating a clean surface for your delicious treats.
Step 2: Create Creamy Base
In a mixing bowl, whip together:Blend these ingredients using an electric mixer until they transform into a silky smooth mixture.
Step 3: Sweeten the Blend
Gradually introduce powdered sugar into the creamy mixture, stirring until everything combines perfectly.
Step 4: Add Crunchy Texture
Gently fold Rice Krispies into the mixture, ensuring an even distribution.
Want extra crunch?
Toss in more cereal.
Step 5: Shape Delightful Bites
Using a small scoop or spoon, craft 1-inch balls by rolling the mixture between your palms.
Aim for smooth, uniform spheres.
Step 6: Quick Chill
Place the freshly formed balls onto the prepared baking sheet and slide them into the freezer for a quick 15-minute firming session.
Step 7: Chocolate Transformation
Melt chocolate wafers with coconut oil in a microwave-safe bowl or double boiler.
Stir until the mixture becomes completely smooth and glossy.
Step 8: Chocolate Dipping
Retrieve the chilled balls from the freezer.
Using a fork, delicately dip each ball into the melted chocolate, allowing excess to drip off before returning to the parchment paper.
Step 9: Final Touch
Sprinkle a pinch of sea salt atop each chocolate-covered ball.
Refrigerate for 10 minutes to help the chocolate set.
Step 10: Decorate and Serve
For an extra flourish, drizzle remaining chocolate over the balls and add another light dusting of sea salt before serving.
Tips for Peanut Butter Rice Krispie Balls
Tasty Twists for Krispie Ball Lovers
Serving Ideas for Peanut Butter Balls
Storage for Peanut Butter Krispie Balls
FAQs
Lightly coat your hands with cooking spray or powdered sugar before rolling the balls to minimize sticking and make the process smoother.
Yes, you can substitute Rice Krispies with similar crispy cereals like cornflakes or graham cracker crumbs for a similar texture and crunch.
Keep the peanut butter balls in an airtight container in the refrigerator for up to a week, or freeze them for up to a month for longer storage.
Print
Peanut Butter Balls With Rice Krispies Recipe
- Total Time: 45 minutes
- Yield: 24 1x
Description
Irresistible peanut butter balls with rice krispies blend creamy textures and sweet-salty notes into a perfect no-bake treat. Crunchy cereal and smooth peanut butter create an addictive snack you cannot resist.
Ingredients
Main Ingredients:
- 1 cup creamy peanut butter
- 2 cups Rice Krispies
- 1 1/4 cups powdered sugar
Binding and Flavor Ingredients:
- 1/4 cup butter, softened
- 1/2 teaspoon vanilla extract
Coating and Garnish Ingredients:
- 10 ounces (280 grams) semi-sweet chocolate melting wafers
- 1 teaspoon coconut oil
- Flake sea salt
Instructions
- Prepare a parchment-lined baking sheet for easy release and clean-up.
- Combine peanut butter, softened butter, and vanilla extract in a medium bowl, using an electric mixer to create a smooth, homogeneous mixture.
- Gradually incorporate powdered sugar, mixing thoroughly until the consistency becomes uniform and well-blended.
- Gently fold Rice Krispies into the mixture, ensuring even distribution and adjusting the quantity for desired crunchiness.
- Utilize a small scoop or spoon to shape the mixture into consistent 1-inch spheres, rolling between palms to achieve a smooth, compact form.
- Briefly freeze the formed balls for 15 minutes at 0°F to enhance structural integrity and facilitate chocolate coating.
- Melt semi-sweet chocolate wafers with coconut oil in a microwave-safe bowl or double boiler, stirring until achieving a glossy, completely liquid state.
- Extract chilled balls from freezer and delicately immerse each one in melted chocolate using a fork, allowing excess chocolate to drip off before placement on parchment paper.
- Sprinkle a light dusting of sea salt atop each chocolate-enrobed ball, then refrigerate for 10 minutes to solidify the coating.
- For an elegant finish, optionally drizzle remaining chocolate over the balls and garnish with additional sea salt before serving.
Notes
- Ensure butter and peanut butter are at room temperature for smoother mixing and easier blending.
- Use creamy peanut butter for a more consistent texture and easier ball formation.
- Add extra Rice Krispies for more crunch if you prefer a more textured treat.
- Consider using dark chocolate or white chocolate for different flavor variations.
- Avoid overworking the mixture to prevent the Rice Krispies from becoming soggy.
- Store in an airtight container in the refrigerator for up to a week to maintain freshness.
- For a gluten-free version, use gluten-free Rice Krispies or similar crispy cereal.
- Keep balls small and uniform for even coating and consistent chocolate coverage.
- Prep Time: 20 minutes
- Cook Time: 25 minutes
- Category: Snacks, Desserts
- Method: Blending
- Cuisine: American
Nutrition
- Serving Size: 24
- Calories: 158
- Sugar: 10 g
- Sodium: 56 mg
- Fat: 9 g
- Saturated Fat: 4 g
- Unsaturated Fat: 5 g
- Trans Fat: 0 g
- Carbohydrates: 17 g
- Fiber: 0.5 g
- Protein: 3 g
- Cholesterol: 8 mg




Marcus Reed
Founder & Food Content Creator
Expertise
Single-recipe development, Seasonal and local ingredient utilization, Food photography and styling, Culinary writing and content creation
Education
Culinary Arts Certificate, Blue Ridge Community and Technical College, WV
Focus: Fundamentals of culinary techniques, emphasizing hands-on experience in small-scale kitchen settings.
Marcus’s story begins in Asheville, where good food and family kitchens shaped his earliest memories. After hands-on culinary training and a lot of trial (and a little error), he realized that real cooking isn’t about perfection, it’s about connection.
At Pan and Oven, Marcus crafts recipes that are easy to follow, packed with flavor, and built for real kitchens.