
Irresistible Oreo Mud Pie Recipe for Sweet-Tooth Delight
Decadent chocolate and creamy layers dance together in this irresistible Oreo mud pie that promises pure dessert bliss.
Cool and rich, this pie delivers a knockout punch of indulgence with every single bite.
Chocolate cookie crumbs form a perfect foundation for the silky smooth filling that will make taste buds sing.
Crushed Oreo cookies weave their magic throughout the dessert, creating textural wonder and deep chocolate intensity.
Each slice promises a delightful journey through creamy, crunchy, and utterly satisfying flavors.
The combination of ingredients transforms a simple pie into a show-stopping dessert that sparks joy and excitement.
No gathering is complete without this crowd-pleasing treat that leaves everyone craving another slice.
Oreo Mud Pie: The Ultimate Indulgence
Mud Pie Ingredients—Oreo Edition
Pudding Base:Creamy Elements:Crunchy Topping:Tools Needed for Oreo Mud Pie
How to Build an Oreo Mud Pie
Step 1: Whip Up Chocolate Pudding
Grab your chocolate pudding mix and whole milk.
Vigorously whisk the mixture until it transforms into a silky, smooth chocolate dream.
Let the pudding set and become wonderfully thick.
Step 2: Fold In Creamy Clouds
Take your Cool Whip containers and gently fold them into the pudding.
Watch as the mixture becomes light, airy, and incredibly fluffy.
The creamy texture will make your dessert feel like a cloud.
Step 3: Crush And Incorporate Oreos
Take one sleeve of Oreo cookies and crush them into delightful crumbly pieces.
Stir these chocolatey morsels throughout the pudding mixture, ensuring every spoonful will have a perfect cookie crunch.
Step 4: Create A Crunchy Topping
Grab the second sleeve of Oreos and crush them again.
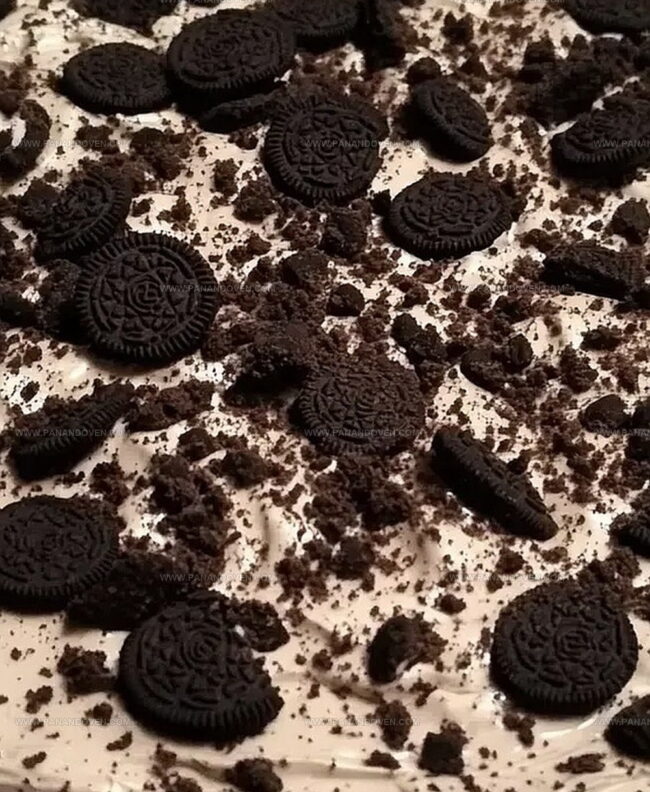
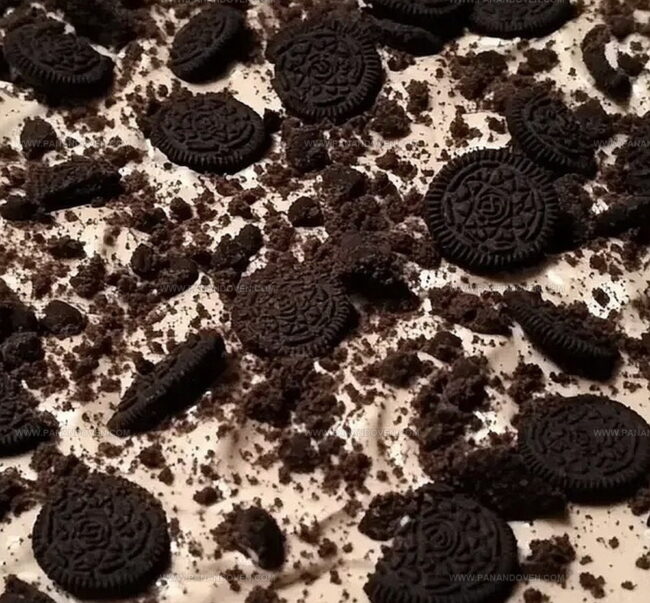
Sprinkle these cookie crumbs generously across the top of your dessert, creating a beautiful and tempting textured layer.
Step 5: Chill And Devour
Slide your Oreo Mud Pie into the refrigerator.
Let it cool and set for at least two hours.
When ready, grab a spoon and dive into this decadent, creamy, cookie-packed dessert that’s sure to make taste buds dance with joy.
Oreo Mud Pie: Winning Tips
Creative Mud Pie Ideas & Swaps
Ways to Present Oreo Mud Pie
Keeping Mud Pie Chilled & Fresh
FAQs
While you can use low-fat milk, whole milk provides a richer, creamier texture that enhances the pudding’s consistency and flavor.
Crush the Oreos into small, uneven pieces – some larger chunks and some finer crumbs create a more interesting texture in the dessert.
Absolutely! This dessert is super easy to make and has simple ingredients that kids love, making it a great recipe to prepare together.
Yes, you can prepare the Oreo Mud Pie up to 2 days in advance and keep it refrigerated, which actually allows the flavors to meld together even more deliciously.
Print
Oreo Mud Pie Recipe
- Total Time: 2 hours 15 minutes
- Yield: 8 1x
Description
Creamy Oreo mud pie delights dessert enthusiasts with its rich chocolate layers and cookie crunch. Cookie lovers will savor this indulgent treat that promises pure bliss in each cool, luxurious bite.
Ingredients
Main Ingredients:
- 2 sleeves of crushed Oreos
- 2 cups of whole milk
- 1 box of chocolate pudding mix
Topping:
- 2 containers of Cool Whip
Instructions
- Whisk chocolate pudding mix with whole milk until smooth and free of lumps, following package instructions.
- Allow pudding to set completely, reaching a thick, creamy consistency.
- Gently fold both containers of Cool Whip into the pudding, creating a light and airy texture.
- Crush one sleeve of Oreos into small, uneven pieces using a rolling pin or food processor.
- Incorporate the first batch of crushed Oreos into the pudding mixture, ensuring even distribution.
- Transfer the mixed dessert into a serving dish, spreading it evenly.
- Sprinkle the remaining sleeve of crushed Oreos across the top, creating a crunchy, textured layer.
- Refrigerate the Oreo Mud Pie for a minimum of 2 hours to allow flavors to meld and dessert to firm up.
- Remove from refrigerator just before serving, letting it sit at room temperature for 5 minutes to soften slightly.
Notes
- Swap whole milk for almond or oat milk to make the dessert dairy-free and suitable for lactose-intolerant individuals.
- Use sugar-free pudding mix and low-fat Cool Whip to reduce overall calories and create a lighter version of the dessert.
- Crush Oreos coarsely to maintain more texture and provide a satisfying crunch in each bite of the mud pie.
- Experiment with different Oreo flavors like mint, peanut butter, or birthday cake to add unique twists to the classic recipe.
- Prep Time: 15 minutes
- Cook Time: 2 hours
- Category: Desserts, Snacks
- Method: Chilling
- Cuisine: American
Nutrition
- Serving Size: 8
- Calories: 250
- Sugar: 20 g
- Sodium: 200 mg
- Fat: 12 g
- Saturated Fat: 7 g
- Unsaturated Fat: 3 g
- Trans Fat: 0 g
- Carbohydrates: 35 g
- Fiber: 1 g
- Protein: 3 g
- Cholesterol: 10 mg
Marcus Reed
Founder & Food Content Creator
Expertise
Single-recipe development, Seasonal and local ingredient utilization, Food photography and styling, Culinary writing and content creation
Education
Culinary Arts Certificate, Blue Ridge Community and Technical College, WV
Focus: Fundamentals of culinary techniques, emphasizing hands-on experience in small-scale kitchen settings.
Marcus’s story begins in Asheville, where good food and family kitchens shaped his earliest memories. After hands-on culinary training and a lot of trial (and a little error), he realized that real cooking isn’t about perfection, it’s about connection.
At Pan and Oven, Marcus crafts recipes that are easy to follow, packed with flavor, and built for real kitchens.