
Dreamy Oreo Frosting Recipe: Creamy Bliss for Every Dessert
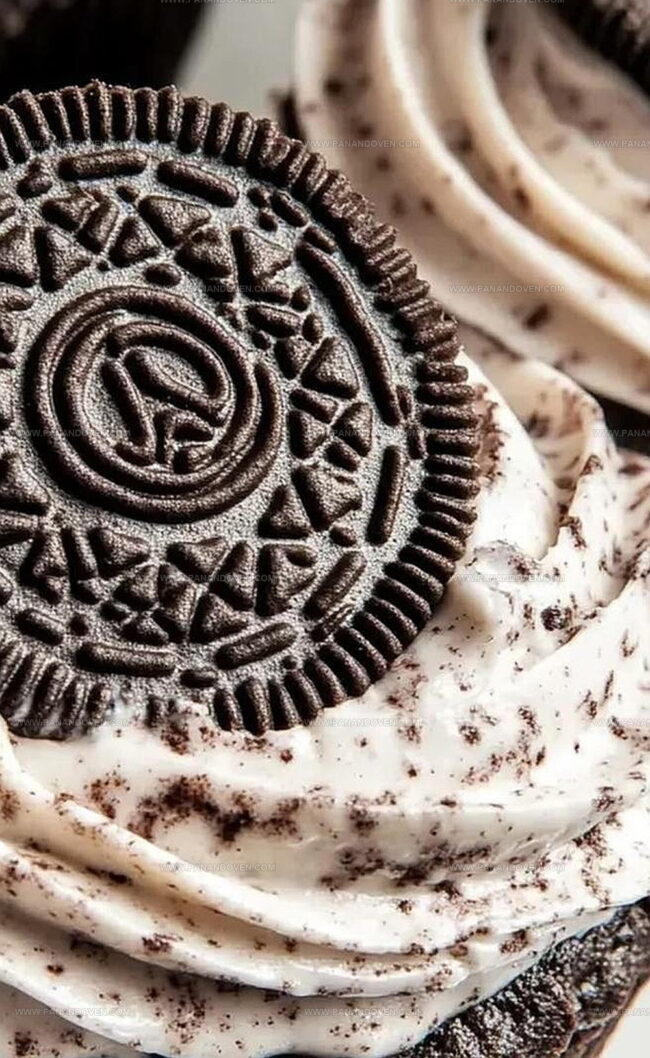
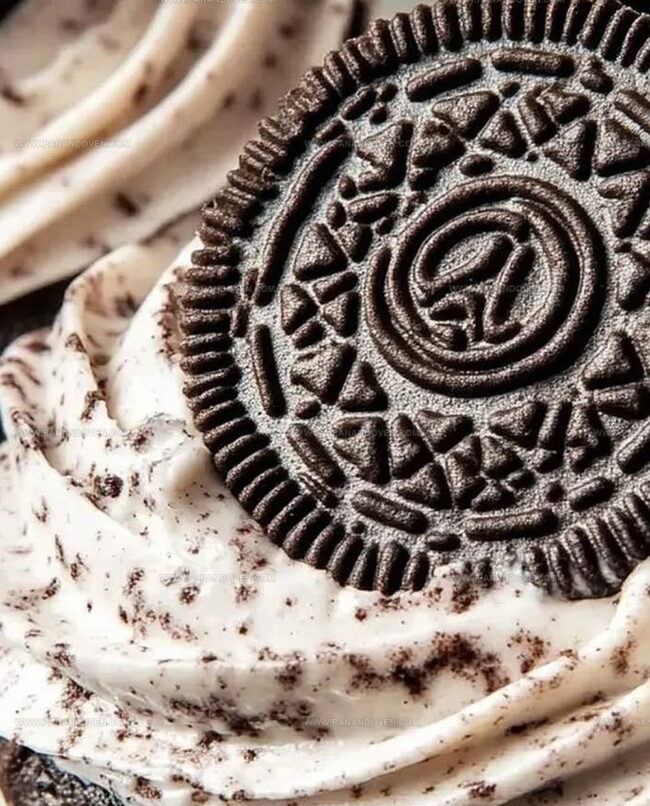
Creamy and decadent Oreo frosting brings a delightful twist to any dessert with its rich, chocolate-cookie crunch.
The classic sandwich cookie becomes a smooth, indulgent spread that elevates cakes and cupcakes.
Chocolate lovers rejoice as this simple recipe promises pure bliss in every bite.
Each spoonful delivers a nostalgic burst of familiar flavor that reminds you of childhood treats.
Whipping up this frosting takes mere minutes and requires just a handful of ingredients.
Soft, pillowy, and irresistibly delicious, this Oreo frosting will have everyone asking for seconds.
Prepare to dazzle your taste buds with this crowd-pleasing confection that turns ordinary desserts into extraordinary delights.
Oreo Frosting What Makes This Topping a Fan Favorite
Ingredients for Dreamy Oreo Frosting
Main Ingredients:Flavor Enhancers:Texture Modifiers:Mixing Tools for Fluffy Frosting
How to Whip Up Oreo Frosting Fast
Step 1: Crush Oreo Cookies
Grab your food processor and toss in the Oreo cookies.
Pulse and blend until the cookies transform into fine, delightful crumbs that will add incredible texture to your frosting.
Step 2: Whip Butter to Perfection
Grab a large mixing bowl and your hand mixer.
Beat the butter until it becomes incredibly light, airy, and fluffy.
This should take about 2-3 minutes of continuous mixing.
Step 3: Incorporate Powdered Sugar
Gradually add powdered sugar to the whipped butter.
Pour in one cup at a time, mixing thoroughly after each addition to create a smooth and creamy base for your frosting.
Step 4: Blend Flavor Enhancers
Introduce these delicious ingredients to your mixture:Beat these components together until they’re perfectly combined and create a rich, aromatic blend.
Step 5: Achieve Ideal Frosting Consistency
Slowly add cream to the mixture, beating on high speed.
Continue adding cream in small increments and mixing until the frosting reaches your desired texture – light, fluffy, and irresistibly creamy.
The key is to stop when the frosting looks smooth and holds its shape beautifully.
Tricks for Silky and Sweet Oreo Frosting
Ways to Flavor Oreo Frosting Your Way
Serving Suggestions for Oreo Frosting
Storing Oreo Frosting for Next Time
FAQs
Yes, you can substitute Oreos with similar chocolate sandwich cookies like chocolate graham crackers or chocolate wafer cookies for a similar texture and flavor.
Process the cookies until they become fine, almost powder-like crumbs. This ensures a smooth and even texture throughout the frosting.
Gradually add more cream, one tablespoon at a time, and mix until you reach the desired consistency. Be careful not to add too much cream at once.
Absolutely! This Oreo frosting is perfect for spreading, piping, and decorating cakes, cupcakes, and other desserts with its rich, creamy texture and chocolate cookie flavor.
Print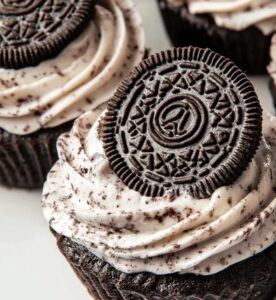
Oreo Frosting Recipe
- Total Time: 10 minutes
- Yield: 12 1x
Description
Creamy Oreo frosting blends crushed cookies with classic buttercream for an irresistible dessert topping. Sweet chocolate crumbles create a rich, indulgent texture you’ll crave on cakes and cupcakes.
Ingredients
Main Ingredients:
- 10 Oreo cookies
- 1 cup (226 grams) unsalted butter, room temperature
- 2 1/2 cups (300 grams) powdered sugar
Supporting Ingredients:
- 2 teaspoons vanilla extract
- 1 pinch salt
Liquid Ingredients:
- 2 tablespoons (30 milliliters) heavy whipping cream
Instructions
- Crush Oreo cookies in a food processor until they transform into fine, uniform crumbs, ensuring no large pieces remain.
- Using an electric mixer, whip butter in a spacious mixing bowl until it becomes airy and pale, approximately 2-3 minutes at medium-high speed.
- Gradually incorporate powdered sugar into the whipped butter, blending thoroughly after each addition to create a smooth, consistent mixture.
- Introduce vanilla extract, pulverized cookie crumbs, and a delicate touch of salt to the buttercream, mixing until all components are perfectly integrated.
- Incrementally pour in heavy cream while continuously beating the frosting at high speed, adjusting the volume until the texture achieves a luxurious, spreadable consistency that holds its shape elegantly.
Notes
- Crush Oreos Finely: Use a food processor for uniform, fine crumbs that blend seamlessly into the frosting without large chunks.
- Room Temperature Butter: Ensure butter is soft but not melted for the smoothest, most spreadable consistency that whips up beautifully.
- Gradual Sugar Addition: Incorporate powdered sugar slowly to prevent lumps and achieve a silky, cloud-like texture that’s perfect for spreading.
- Cream Consistency Control: Adjust cream amount carefully to reach your ideal frosting thickness – less cream for pipe-able decorations, more for a softer spread.
- Prep Time: 10 minutes
- Cook Time: 0 minutes
- Category: Desserts, Snacks
- Method: Blending
- Cuisine: American
Nutrition
- Serving Size: 12
- Calories: 198
- Sugar: 18 g
- Sodium: 120 mg
- Fat: 10 g
- Saturated Fat: 6 g
- Unsaturated Fat: 4 g
- Trans Fat: 0 g
- Carbohydrates: 26 g
- Fiber: 0.5 g
- Protein: 1 g
- Cholesterol: 30 mg
Marcus Reed
Founder & Food Content Creator
Expertise
Single-recipe development, Seasonal and local ingredient utilization, Food photography and styling, Culinary writing and content creation
Education
Culinary Arts Certificate, Blue Ridge Community and Technical College, WV
Focus: Fundamentals of culinary techniques, emphasizing hands-on experience in small-scale kitchen settings.
Marcus’s story begins in Asheville, where good food and family kitchens shaped his earliest memories. After hands-on culinary training and a lot of trial (and a little error), he realized that real cooking isn’t about perfection, it’s about connection.
At Pan and Oven, Marcus crafts recipes that are easy to follow, packed with flavor, and built for real kitchens.