
Quick & Dreamy No Bake Lucky Charms Cheesecake Bars Recipe
Creamy, dreamy cheesecake meets childhood nostalgia in these no bake lucky charms cheesecake bars that promise pure dessert magic.
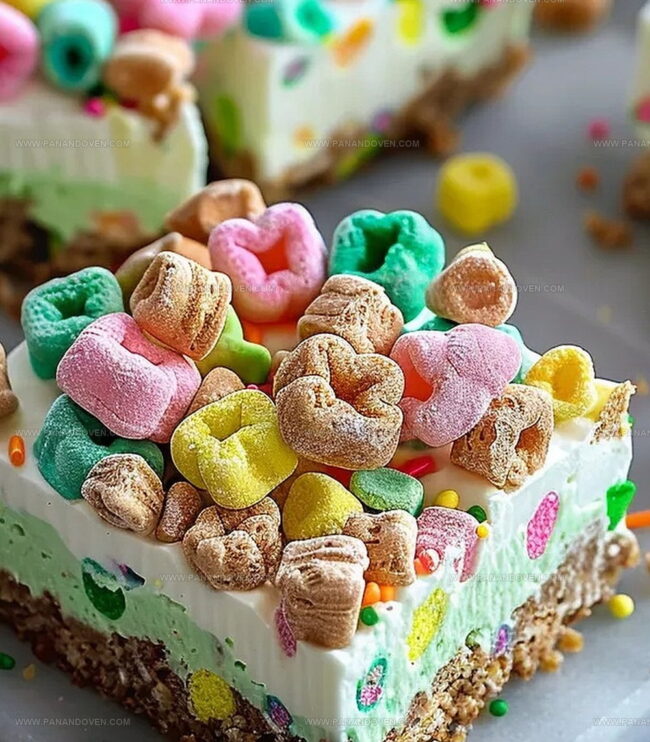
Marshmallow bits and crunchy cereal create an unexpected twist on the classic cheesecake treat.
Decadent layers of smooth cream cheese blend perfectly with the playful cereal crunch.
Each bite delivers a sweet symphony of textures that dance across your palate.
The no-bake method means minimal effort and maximum enjoyment for anyone craving a delightful dessert.
Whip up these bars and watch eyes light up with the first delicious taste.
Prepare to indulge in a dessert that’s both comforting and exciting.
Lucky Charms Cheesecake Bars: Why They Wow
Ingredients for No Bake Lucky Charms Bars
Cereal Base:Cheesecake Filling:Toppings:Equipment for Cheesecake Bar Success
Building Lucky Charms Bars, Step by Step
Step 1: Craft Magical Cereal Base
Grab a 9×9-inch square pan and line it with parchment paper.
Melt butter in a large saucepan over gentle heat.
Toss in marshmallows and stir until they transform into a silky smooth mixture.
Keep stirring for two minutes, then remove from heat.
Fold in Lucky Charms cereal, ensuring every piece gets coated in the gooey goodness.
Press the mixture into the pan, creating a firm, even layer.
Let this enchanting base cool completely before moving forward.
Step 2: Whip Up Dreamy Cheesecake Filling
In a mixing bowl, blend cream cheese and lemon juice until luxuriously smooth.
Grab an electric mixer and whip in heavy cream until it becomes thick and luscious.
Sprinkle in sugar and continue beating until the mixture forms stiff, cloud-like peaks.
Add a touch of green food coloring to give your cheesecake a magical hue.
Step 3: Layer the Magical Creation
Pour the creamy cheesecake mixture evenly over the cooled cereal base.
Slide the pan into the freezer and let it set for 4 hours or preferably overnight, allowing the flavors to mingle and the texture to become perfectly smooth.
Step 4: Decorate and Delight
Before serving, separate the colorful marshmallows from the remaining Lucky Charms cereal.
Scatter these magical marshmallow bits and any extra sprinkles across the top of the cheesecake.
Slice into squares and watch as your guests’ eyes light up with excitement.
Tips for No Bake Cheesecake Bars

Creative Twists on Lucky Charms Cheesecake Bars
How to Serve Lucky Charms Cheesecake Bars
No Bake Cheesecake Bars: How to Store ‘Em
FAQs
Marshmallows act as a sticky binding agent that helps the Lucky Charms cereal hold together, creating a sweet and crunchy foundation for the cheesecake bars.
Yes, you can use mascarpone cheese as an alternative to cream cheese, which will provide a similar creamy texture and mild flavor to the cheesecake filling.
The filling is ready when stiff peaks form and the mixture looks thick and stable, which typically happens after beating the ingredients for 3-5 minutes with an electric mixer.
Print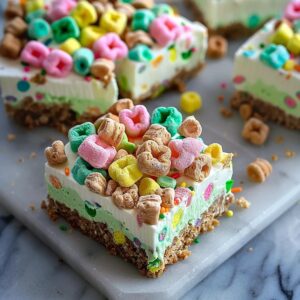
No Bake Lucky Charms Cheesecake Bars Recipe
- Total Time: 20 minutes
- Yield: 12 1x
Description
Lucky Charms cheesecake bars offer a playful twist on classic desserts with marshmallow magic. Colorful marshmallow pieces and creamy cheesecake blend perfectly for a delightful treat you’ll savor with each nostalgic bite.
Ingredients
Cereal Base:
- 4 cups Lucky Charms cereal
- 1/4 cup (57 grams) butter
- 4 cups mini marshmallows
Cheesecake Filling:
- 16 ounces (454 grams) cream cheese, room temperature
- 1/3 cup (67 grams) granulated sugar
- 2 cups (480 milliliters) heavy whipping cream
- 2 teaspoons lemon juice
- Green food coloring, to taste
Toppings:
- Lucky Charms cereal marshmallows
- Sprinkles
Instructions
- Prepare a 9×9-inch square pan by lining it with parchment paper for easy removal. This will ensure your bars come out cleanly.
- Melt butter in a large saucepan over low heat, then add marshmallows. Stir continuously until completely smooth and integrated, cooking for approximately two minutes.
- Remove marshmallow mixture from heat and fold in Lucky Charms cereal, ensuring every piece is thoroughly coated with the sticky mixture.
- Transfer the cereal mixture into the prepared pan, pressing firmly and evenly across the bottom using a spatula or clean hands to create a compact base.
- Allow the cereal base to cool completely at room temperature, which prevents moisture interference with the cheesecake layer.
- In a separate mixing bowl, blend cream cheese and lemon juice until smooth and creamy using an electric mixer.
- Gradually incorporate heavy whipping cream, beating until the mixture thickens and develops a luxurious texture.
- Gradually add sugar while continuing to mix, whipping until stiff, voluminous peaks form.
- Introduce green food coloring, mixing until the desired pastel shade is achieved.
- Carefully spread the cheesecake mixture over the cooled cereal base, ensuring an even distribution.
- Freeze the assembled dessert for 4-6 hours, preferably overnight, to allow complete setting.
- Before serving, separate marshmallow pieces from remaining cereal for topping.
- Garnish the chilled cheesecake with reserved marshmallows and optional sprinkles.
- Slice into neat squares and serve immediately for the best texture and flavor.
Notes
- Chill the pan beforehand to help the marshmallow base set faster and create a more compact crust.
- Use room temperature cream cheese to ensure a smoother, lump-free filling that blends seamlessly.
- Opt for vegetarian marshmallows if preparing for guests with dietary restrictions, ensuring inclusive enjoyment.
- Swap green food coloring with natural alternatives like matcha powder for a healthier, vibrant color option.
- Prep Time: 20 minutes
- Cook Time: 0 minutes
- Category: Desserts, Snacks
- Method: None
- Cuisine: American
Nutrition
- Serving Size: 12
- Calories: 290
- Sugar: 16 g
- Sodium: 150 mg
- Fat: 22 g
- Saturated Fat: 13 g
- Unsaturated Fat: 9 g
- Trans Fat: 0 g
- Carbohydrates: 26 g
- Fiber: 0 g
- Protein: 3 g
- Cholesterol: 70 mg
Clara Thompson
Recipe Developer & Food Educator
Expertise
Plant-based and vegetarian recipe development, Nutritional analysis and meal planning, Culinary education and workshop facilitation, Content writing with a focus on healthy living
Education
Diploma in Culinary Arts, Mt. San Jacinto College, CA
Focus: Comprehensive culinary training with an emphasis on sustainable cooking practices.
Certificate in Nutrition and Healthy Living, Cornell University (Online Program)
Focus: Understanding the principles of nutrition to create balanced and health-conscious recipes.
Clara lives where fresh ideas and fresh ingredients meet. She pairs her culinary know-how with her passion for healthy, planet-friendly cooking.
For Clara, good food should taste great, nourish your body, and feel easy to make. Her recipes highlight whole foods, colorful produce, and a deep respect for seasonal eating.