Heavenly Mom’s Russian Tea Cakes Recipe: A Sweet Family Tradition
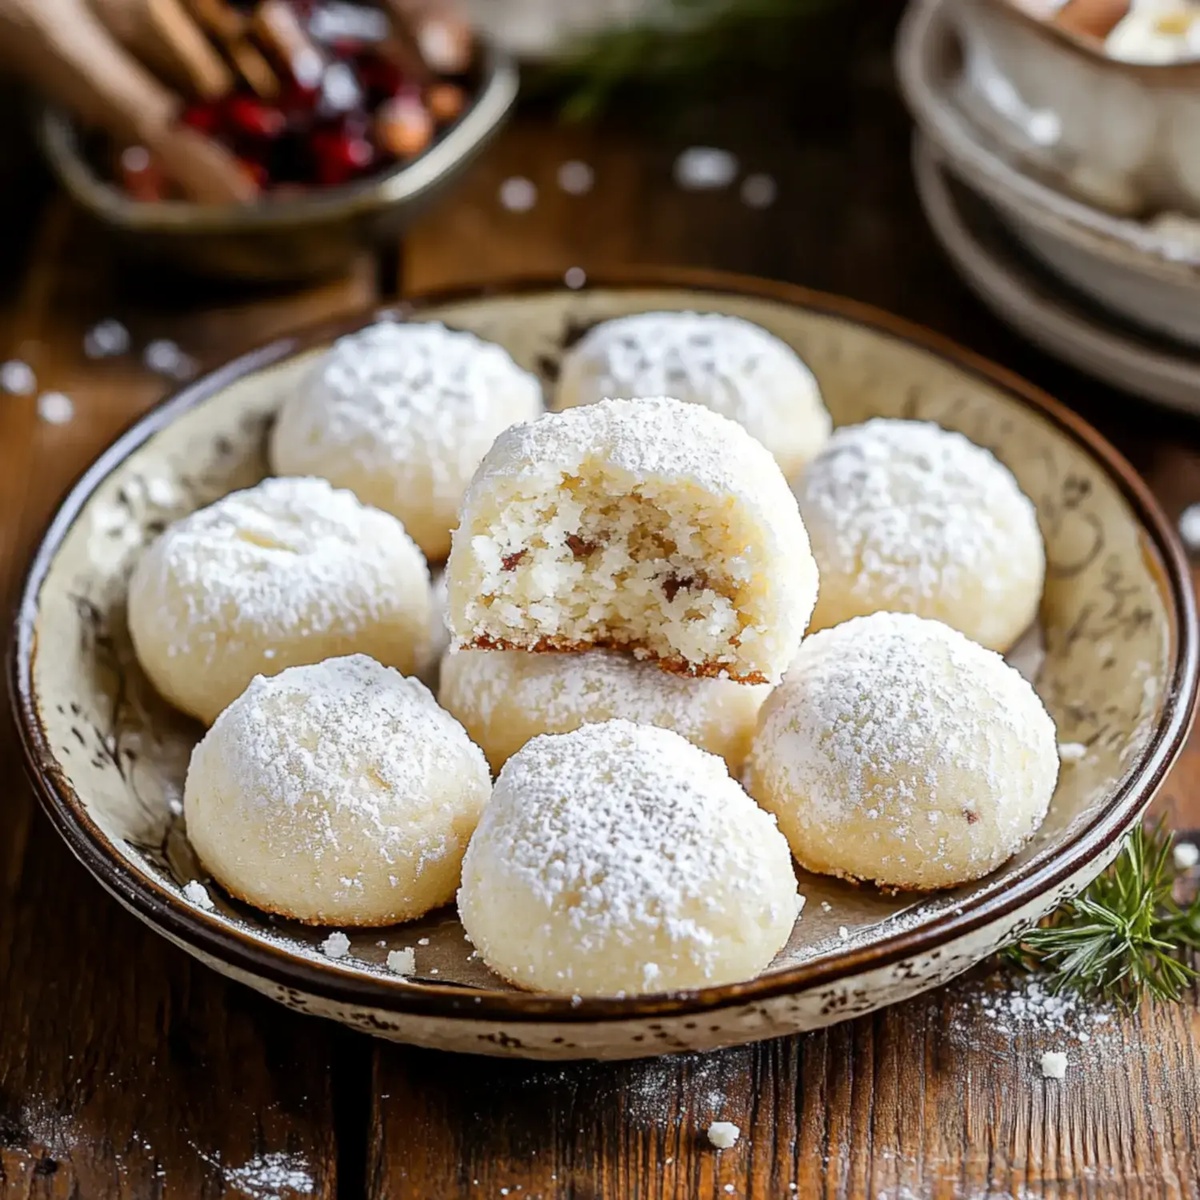
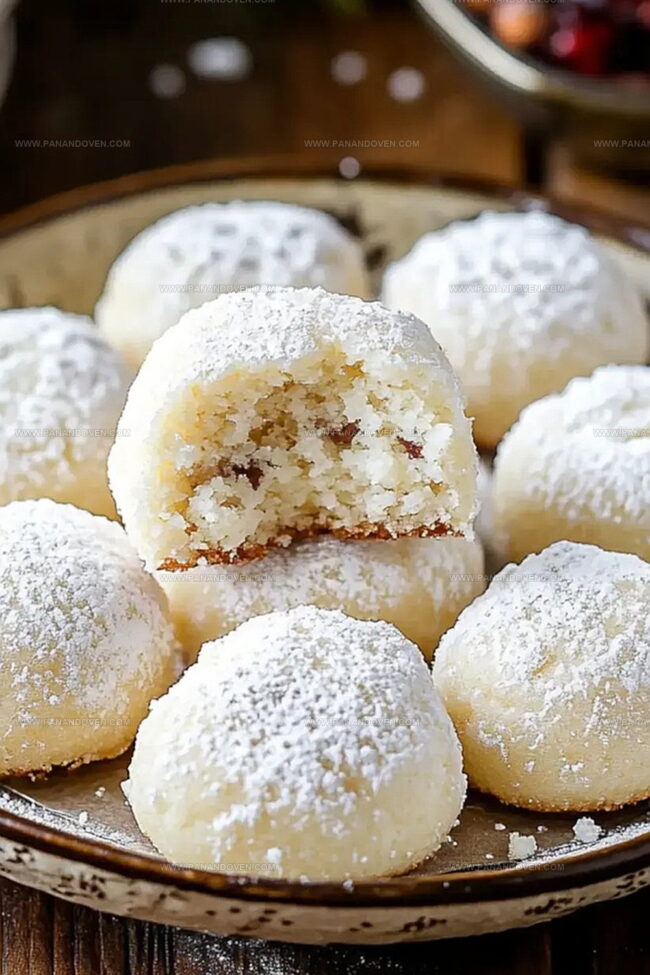
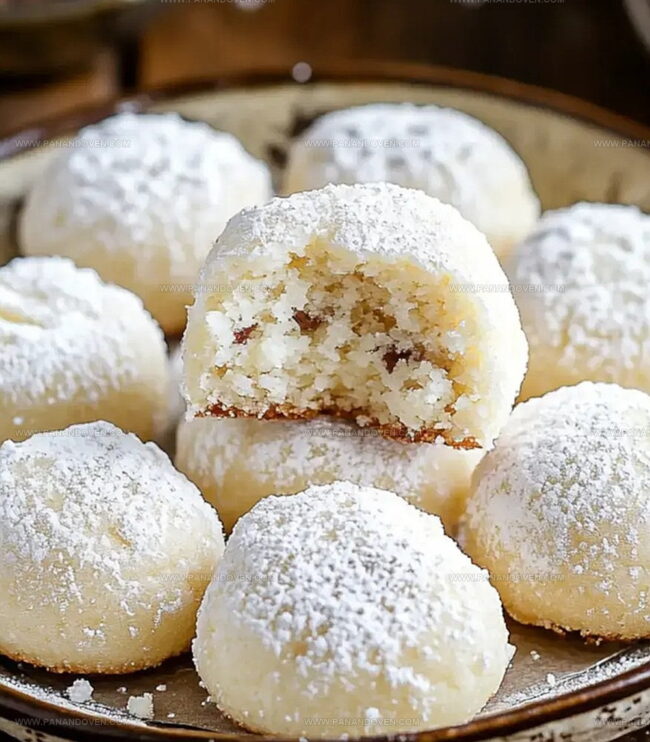
Delicate and powdery, these Russian tea cakes melt effortlessly on your tongue with a buttery richness that whispers nostalgia.
Generations of bakers have treasured this classic cookie passed down through family kitchens.
Each tender morsel carries the warmth of cherished memories and simple ingredients.
Delightfully crumbly and rolled generously in confectioners’ sugar, these cookies create moments of pure comfort.
Nutty undertones from chopped pecans add depth to their delicate texture.
Baking these treats transforms an ordinary afternoon into something magical.
You’ll find these little gems perfect for holiday gatherings or quiet moments of sweet indulgence.
Why Mom’s Russian Tea Cakes Are Always a Hit
Ingredient Guide for Mom’s Russian Tea Cakes
Dry Ingredients:Fat and Sweeteners:Mix-Ins:Kitchen Tools for Russian Tea Cakes
Stepwise Guide for Mom’s Russian Tea Cakes
Step 1: Warm Up The Oven
Preheat the oven to 375°F.
Cover your baking sheets with parchment paper for easy cleanup and perfect cookie release.
Step 2: Create Creamy Base
In a large mixing bowl, whip softened butter with powdered sugar and vanilla extract until the mixture becomes light and fluffy.
The goal is to create a smooth, creamy texture that will make your cookies melt in your mouth.
Step 3: Blend Dry Ingredients
Gently fold in flour and salt, mixing until everything combines into a soft, consistent dough.
The key is to mix just enough to bring the ingredients together without overworking the dough.
Step 4: Introduce Nutty Crunch
Carefully fold in chopped nuts, distributing them evenly throughout the dough.
If the mixture feels too soft, pop it in the refrigerator for a few minutes to firm up.
Step 5: Shape Delicate Cookies
Roll the dough into small, bite-sized balls using about a tablespoon of mixture for each cookie.
Place them carefully on the prepared baking sheets, leaving a little space between each cookie.
Step 6: Bake To Perfection
Slide the cookies into the preheated oven and bake for 7-8 minutes.
Look for a slight golden brown color on the bottom of the cookies, which signals they’re ready.
Step 7: First Sugar Coating
While the cookies are still warm, gently roll them in powdered sugar.
This first coating will create a delicate, sweet exterior.
Step 8: Cool And Final Dusting
Transfer the cookies to a cooling rack and let them come to room temperature completely.
Once cooled, roll them in powdered sugar once more for an extra-sweet, snow-like finish.
Expert Tips for Russian Tea Cakes
Fun Ways to Mix Up Mom’s Russian Tea Cakes
Serving Mom’s Russian Tea Cakes with Charm
Storing Mom’s Russian Tea Cakes
FAQs
These delicate cookies are also called Mexican Wedding Cookies or Snowball Cookies, depending on the region and family tradition.
Yes, while the classic recipe uses walnuts, you can easily substitute with pecans, almonds, or even hazelnuts for a unique flavor twist.
The first roll while warm helps the sugar stick better, and the second roll after cooling creates a beautiful, thick snow-like coating that gives the cookies their signature look.
Make sure to handle the cookies gently when rolling in sugar, and let them cool completely before the second sugar coating to help them hold their shape.
Print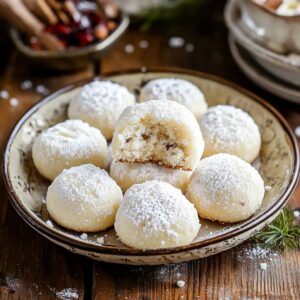
Mom’s Russian Tea Cakes Recipe
- Total Time: 28 minutes
- Yield: 24 1x
Description
Russian tea cakes transport dessert enthusiasts into a world of buttery, nutty bliss. Delicate powdered sugar-coated cookies melt effortlessly, revealing rich almond and walnut notes that connect you to cherished family traditions.
Ingredients
Dry Ingredients:
- 2 1/4 cups all-purpose flour
- 1/4 teaspoon salt
- 3/4 cup finely chopped nuts (pecans, walnuts or almonds)
Fat and Sweeteners:
- 1 cup unsalted butter, softened (226 grams)
- 1/2 cup powdered sugar (60 grams)
- Extra powdered sugar for rolling
Flavor Enhancers:
- 1 teaspoon vanilla extract
Instructions
- Prepare workspace by heating oven to 375°F and lining baking sheets with parchment paper for easy cookie removal.
- Create smooth dough by creaming butter with powdered sugar and vanilla until light and airy, then gently incorporate flour and salt until fully integrated.
- Enhance texture by folding in finely chopped nuts, ensuring even distribution; refrigerate mixture briefly if consistency feels too soft.
- Craft uniform cookies by rolling dough into compact, one-tablespoon spheres and positioning them evenly across prepared baking sheets.
- Bake cookies in preheated oven for 7-8 minutes, watching carefully until edges turn delicately golden and bottoms develop a subtle bronze hue.
- Immediately after removing from oven, while cookies remain warm, delicately coat each piece in a generous layer of powdered sugar for initial sweet coverage.
- Transfer cookies to wire cooling rack, allowing them to reach room temperature and set completely.
- Once fully cooled, perform final powdered sugar dusting, creating a luxurious, snow-like exterior that enhances visual appeal and adds extra sweetness.
Notes
- Chill the dough for 30 minutes to prevent spreading and ensure a compact, melt-in-your-mouth texture.
- Use room temperature butter for smoother mixing and better cookie consistency.
- Toast nuts beforehand to enhance their nutty flavor and add depth to the cookies.
- Customize by swapping pecans or walnuts with almonds or hazelnuts for a unique twist.
- Prep Time: 20 minutes
- Cook Time: 8 minutes
- Category: Desserts, Snacks
- Method: Baking
- Cuisine: Russian
Nutrition
- Serving Size: 24
- Calories: 120
- Sugar: 3 g
- Sodium: 30 mg
- Fat: 8 g
- Saturated Fat: 5 g
- Unsaturated Fat: 3 g
- Trans Fat: 0 g
- Carbohydrates: 13 g
- Fiber: 1 g
- Protein: 2 g
- Cholesterol: 30 mg
Clara Thompson
Recipe Developer & Food Educator
Expertise
Plant-based and vegetarian recipe development, Nutritional analysis and meal planning, Culinary education and workshop facilitation, Content writing with a focus on healthy living
Education
Diploma in Culinary Arts, Mt. San Jacinto College, CA
Focus: Comprehensive culinary training with an emphasis on sustainable cooking practices.
Certificate in Nutrition and Healthy Living, Cornell University (Online Program)
Focus: Understanding the principles of nutrition to create balanced and health-conscious recipes.
Clara lives where fresh ideas and fresh ingredients meet. She pairs her culinary know-how with her passion for healthy, planet-friendly cooking.
For Clara, good food should taste great, nourish your body, and feel easy to make. Her recipes highlight whole foods, colorful produce, and a deep respect for seasonal eating.