
Magical Merry Christmas Jam Recipe for Holiday Sweetness
This festive homemade merry Christmas jam bursts with seasonal warmth and delightful sweetness.
Families treasure traditional holiday recipes passed through generations.
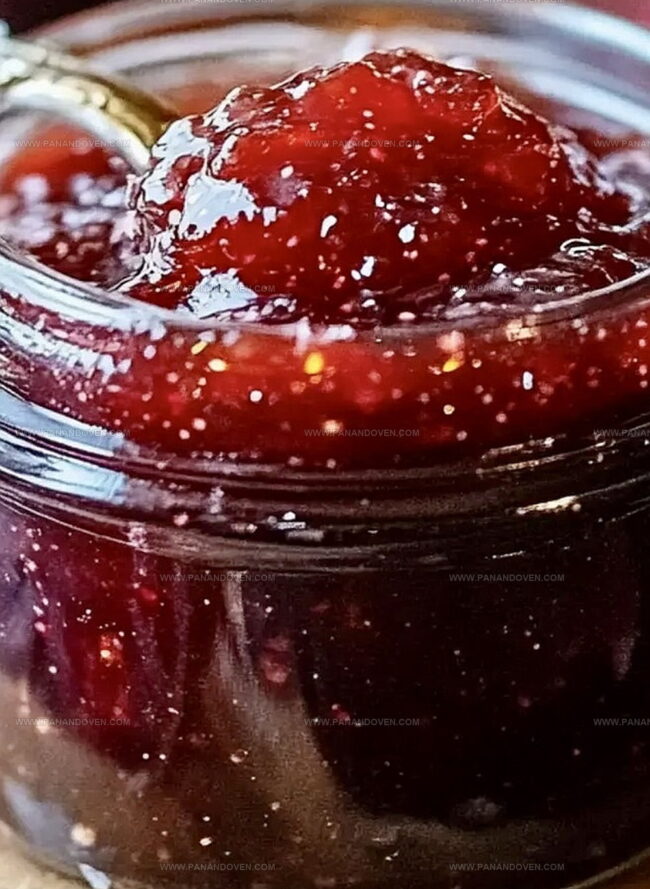
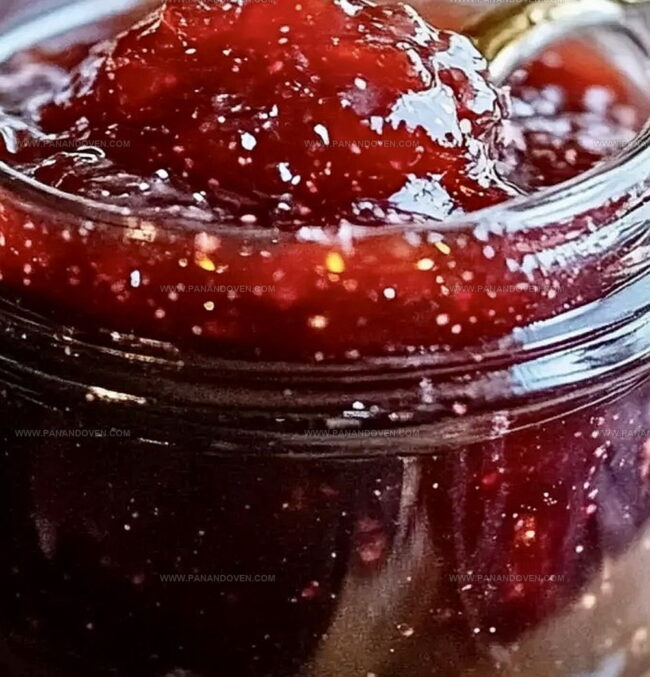
Bright red berries and subtle spices create a magical spread perfect for toast or gifting.
Crafting this jam requires minimal ingredients and simple techniques.
festive gatherings become more special with a jar of this delectable preserve.
You’ll love how simple yet impressive this recipe can be.
Spread joy and create delicious memories with every spoonful of this Christmas classic.
Christmas Jam That Adds Cheer to Every Breakfast
Everything Needed for Sweet Holiday Jam Success
Best Tools for Whipping Up Festive Christmas Jam
Christmas Jam Instructions for Gift-Worthy Batches
Step 1: Chill the Testing Plate
Tuck a small plate into the freezer.
This will be your secret weapon for checking the jam’s perfect consistency later in the cooking journey.
Step 2: Prepare Sparkling Clean Containers
Thoroughly wash and sterilize your jam jars.
Make sure they’re squeaky clean and ready to hold your delicious festive creation.
Step 3: Fruit Preparation Extravaganza
Carefully wash the fruits with care.
Leave the skins on for extra flavor and nutrition.
Remove the cores from plums and pears.
Chop the fruits into generous chunks, creating a colorful medley in your large cooking pot.
Step 4: Sugar Shower
Generously sprinkle sugar over the fruit chunks.
Stir enthusiastically to coat every piece with sweet crystals.
Step 5: Spice-Infused Boiling Magic
Bring your fruity mixture to a vigorous rolling boil.
Add your aromatic spices:Step 6: Simmer to Perfection
Reduce the heat to a gentle simmer.
Let the jam bubble softly for about 30 minutes.
Stir occasionally, watching the transformation happen before your eyes.
The jam is ready when it reaches 105°C/220°F.
Step 7: The Freezer Plate Test
Take your chilled plate and drop a small amount of hot jam onto it.
Watch how it behaves – it should set quickly without spreading too much.
Step 8: Smooth Out the Goodness
Remove the whole spices.
Use a hand blender to transform the jam into your desired texture – completely smooth or slightly chunky.
Step 9: Jar Filling Technique
Carefully pour the hot jam into your pristine jars, filling them right to the brim.
Step 10: Optional Boozy Protection
For an extra layer of preservation, add a splash of rum or whiskey to the jar lids.
Step 11: Seal and Secure
Tightly close the jars.
Quickly flip them upside down while piping hot to create a perfect vacuum seal.
Leave them inverted for 24 hours.
Step 12: Final Touches
Create beautiful labels with the jam’s name and creation date.
Store in a cool, dark place.
Once opened, keep refrigerated and enjoy within a few weeks.
Jam-Making Tips for Consistent Results Every Time
Holiday Jam Twists to Make Each Jar Unique
Festive Serving Ideas for Christmas Jam Toasts
Storing Homemade Jam for Maximum Shelf Life
FAQs
Plums and pears are ideal, offering a perfect balance of sweetness and tartness. Choose ripe, seasonal fruits for the most robust flavor.
These whole spices infuse deep, warming holiday flavors into the jam, creating a festive taste profile that captures the essence of Christmas. They add complexity and richness to the preserve.
The jam should reach 105C/220F and pass the frozen plate test, where a drop of jam quickly sets without running. The consistency should be thick and spreadable, with a glossy appearance.
Print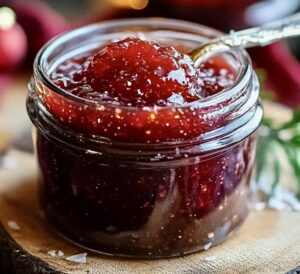
Merry Christmas Jam Recipe
- Total Time: 1 hour
- Yield: 12 1x
Description
Festive merry christmas jam celebrates holiday cheer with winter berries and warming spices. Crimson-red preserves spread seasonal joy across holiday tables, delighting guests with pure homemade comfort.
Ingredients
Main Fruits:
- 2.2 pounds (1 kilogram) mixed fruits: fresh pears, plums, figs, and dried raisins
Primary Sweetener:
- 3 cups (600 grams) sugar
Spices:
- 1 star anise
- 2 cinnamon sticks
- 12 green cardamom pods
Instructions
- Retrieve a small plate and place it in the freezer to later assess the jam’s consistency.
- Thoroughly cleanse and sanitize glass jars for preservation.
- Rinse fresh fruits meticulously. Extract cores from plums and pears without peeling. Chop fruits into substantial segments and transfer to a capacious cooking vessel.
- Generously distribute sugar across fruit chunks, ensuring comprehensive coating through thorough mixing.
- Elevate temperature to generate vigorous boiling. Incorporate aromatic spices – star anise, cinnamon sticks, and cracked cardamom pods – to infuse complex flavor profiles.
- Reduce heat to gentle simmer. Maintain low temperature for approximately 30 minutes, periodically stirring. Monitor jam’s progression until reaching precise setting temperature of 105°C/220°F.
- Validate jam’s readiness by depositing a minute droplet onto frozen plate. Observe whether mixture quickly solidifies without excessive liquid dispersal.
- Extract whole spices. Utilize hand blender to transform jam into desired texture – smooth or slightly chunky.
- Carefully decant hot jam into sterilized containers, filling to container’s uppermost edge.
- Enhance preservation by introducing minimal rum or whiskey quantities into jar lids, creating additional antimicrobial protection.
- Swiftly seal jars tightly. Immediately invert containers while maintaining elevated temperature to establish natural vacuum seal. Maintain inverted position for complete 24-hour duration.
- Affix descriptive labels indicating product name and preparation date. Store in cool, darkness-protected environment. Refrigerate immediately after initial opening.
Notes
- Freeze a plate beforehand to quickly test jam’s consistency without guessing.
- Sterilize jars thoroughly to prevent bacterial growth and extend shelf life.
- Use whole fruits with skins intact for maximum flavor and natural pectin content.
- Smash cardamom pods gently to release intense aromatic compounds during cooking.
- Stir jam occasionally while simmering to prevent burning and ensure even cooking.
- Use a digital thermometer for precise jam setting temperature at 105C/220F.
- Hand blend to desired texture, leaving some fruit chunks for rustic homemade feel.
- Add alcohol like rum or whiskey for enhanced preservation and subtle flavor depth.
- Turn jars upside down immediately after filling to create natural vacuum seal.
- Store in cool, dark place to maintain jam’s vibrant taste and color.
- Prep Time: 30 minutes
- Cook Time: 30 minutes
- Category: Snacks, Desserts
- Method: Boiling
- Cuisine: American
Nutrition
- Serving Size: 12
- Calories: 175
- Sugar: 24g
- Sodium: 1mg
- Fat: 0g
- Saturated Fat: 0g
- Unsaturated Fat: 0g
- Trans Fat: 0g
- Carbohydrates: 43g
- Fiber: 2g
- Protein: 1g
- Cholesterol: 0mg
Marcus Reed
Founder & Food Content Creator
Expertise
Single-recipe development, Seasonal and local ingredient utilization, Food photography and styling, Culinary writing and content creation
Education
Culinary Arts Certificate, Blue Ridge Community and Technical College, WV
Focus: Fundamentals of culinary techniques, emphasizing hands-on experience in small-scale kitchen settings.
Marcus’s story begins in Asheville, where good food and family kitchens shaped his earliest memories. After hands-on culinary training and a lot of trial (and a little error), he realized that real cooking isn’t about perfection, it’s about connection.
At Pan and Oven, Marcus crafts recipes that are easy to follow, packed with flavor, and built for real kitchens.