
The Dreamy Martha Washington Candies Recipe You’ll Adore
Sweet and creamy Martha Washington candies dance between nostalgia and pure indulgence.
These classic confections capture the essence of homemade treats with their rich, decadent flavor.
Generations of home bakers have treasured this beloved recipe passed down through family kitchens.
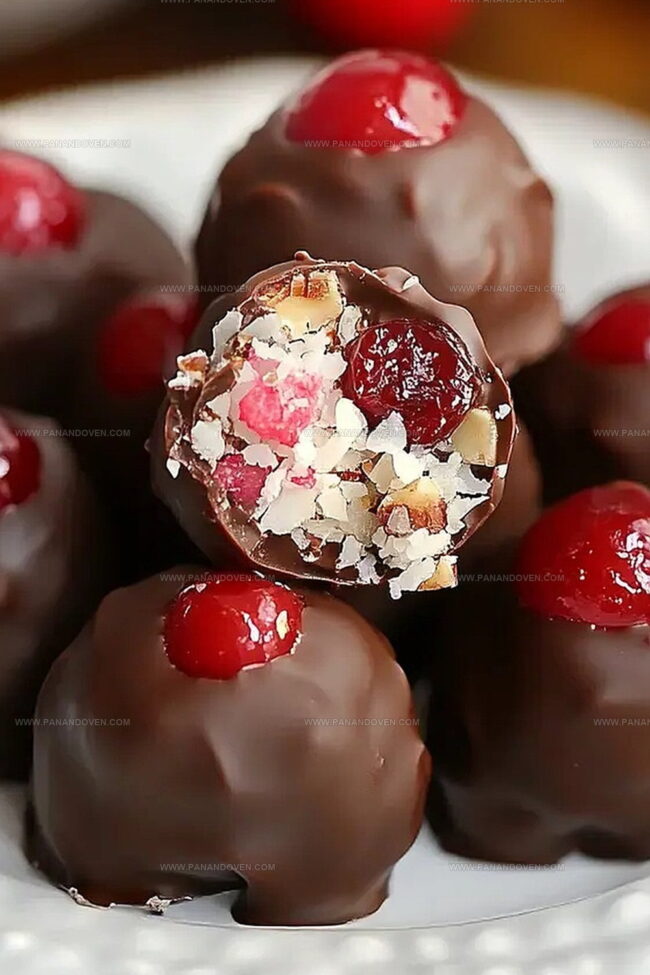
Chocolate and coconut meld together in a delightful harmony that melts in your mouth.
Each bite tells a story of traditional American dessert craftsmanship.
You’ll love how simple ingredients create such an extraordinary confection.
Prepare to transform your kitchen into a sweet paradise with these irresistible candies that promise pure delectable joy.
Martha Washington Candies Why They’re Iconic
What You Need for Martha Washington Sweets
Main Ingredients:Binding Ingredients:Coating Ingredients:Candy Making Tools for Martha Washington Bites
Directions for Martha Washington Candy Perfection
Step 1: Finely Chop Cherries
Grab your sharp knife and carefully chop maraschino cherries into tiny pieces.
Spread the chopped cherries on paper towels and pat them completely dry to remove excess moisture.
Step 2: Create Candy Base
In a large mixing bowl, combine these delightful ingredients:Step 3: Mix Into Sticky Delight
Stir all ingredients together using a sturdy wooden spoon or spatula.
Keep mixing until everything blends into a cohesive, slightly sticky mixture that holds together nicely.
Step 4: Chill Filling
Transfer the mixture to the refrigerator and let it rest for at least 2 hours.
This cooling time helps the filling become firm and easier to handle.
Step 5: Roll Candy Balls
Take the chilled mixture and roll it between your palms, creating small balls approximately the size of a walnut.
Work quickly to keep the mixture cool.
Step 6: Quick Chill
Place the formed candy balls on a tray lined with parchment paper.
Return them to the refrigerator for an additional 20 minutes to firm up.
Step 7: Prepare Dipping Station
Line a baking sheet with fresh parchment paper.
This will be your landing spot for the finished candies.
Step 8: Melt Chocolate Coating
Carefully melt your chocolate coating following the package instructions.
Stir until smooth and glossy.
Step 9: Chocolate Dunk
Remove chilled balls from refrigerator.
Using a dipping fork or toothpick, submerge each ball into melted chocolate.
Gently tap to remove excess coating.
Step 10: Final Set
Place chocolate-covered candies on the prepared parchment-lined sheet.
Allow them to sit at room temperature until the chocolate coating completely hardens.
Pro Tips for Creamy, Dreamy Candies

Creative Twists for Classic Candy Fans
Serving Up Martha Washington Candies with Flair
Storage Tips for Old-Fashioned Candies
FAQs
No, they’re surprisingly easy! With basic ingredients and simple steps, even beginner bakers can successfully create these delicious treats.
Yes, you can swap maraschino cherries for dried cherries, use different nuts like walnuts instead of pecans, and experiment with white or dark chocolate coating.
When stored in an airtight container in the refrigerator, these candies can stay fresh for up to 2 weeks. They also freeze wonderfully for longer storage.
Not at all! You’ll only need basic kitchen tools like mixing bowls, a baking sheet, parchment paper, and a spoon for dipping and coating.
Print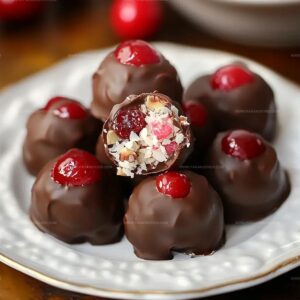
Martha Washington Candies Recipe
- Total Time: 2 hours 50 minutes
- Yield: 24 1x
Description
Sweet martha washington candies emerge as a classic confection from American culinary history. Coconut, condensed milk, and pecans blend into delightful bite-sized treats cherished by many dessert enthusiasts. You will love these nostalgic confections.
Ingredients
Main Ingredients:
- 3 cups finely chopped pecans
- 14 ounces (397 grams) sweetened shredded coconut
- 10 ounces (283 grams) maraschino cherries, drained and chopped
Base Ingredients:
- 1 pound (454 grams) powdered sugar
- 1 cup (227 grams) butter, melted
- 14 ounces (397 grams) sweetened condensed milk
- 1 tablespoon vanilla extract
Coating Ingredient:
- 16 ounces (454 grams) candy coating
Instructions
- Meticulously drain maraschino cherries, then pat completely dry using absorbent paper towels to remove excess moisture.
- Merge softened butter, powdered sugar, vanilla extract, shredded coconut, sweetened condensed milk, finely chopped cherries, and chopped pecans in a large mixing bowl.
- Blend ingredients thoroughly until a cohesive, slightly sticky mixture forms, ensuring even distribution of all components.
- Refrigerate the prepared mixture for approximately 2 hours, allowing it to firm up and become more manageable.
- Using clean hands, carefully roll the chilled mixture into uniform 1-inch spheres, roughly the size of a walnut.
- Position formed candies on a parchment-lined tray, then return to refrigerator for an additional 20-minute cooling period.
- Prepare a baking sheet with fresh parchment paper to receive the chocolate-coated confections.
- Gently melt candy coating using recommended package instructions, stirring until achieving a smooth, glossy consistency.
- Delicately immerse each chilled ball into melted coating, gently tapping to remove excess chocolate and ensure even coverage.
- Arrange chocolate-dipped candies on prepared sheet, allowing coating to solidify completely at room temperature.
Notes
- Pat cherries completely dry to prevent excess moisture from ruining candy texture.
- Use fresh, high-quality maraschino cherries for best flavor and appearance.
- Chill mixture thoroughly to ensure easy ball formation without sticking to hands.
- Select premium chocolate coating for rich, smooth exterior and professional finish.
- Experiment with dark or white chocolate coatings for flavor variations.
- Work quickly when dipping to maintain consistent chocolate coverage.
- Store candies in cool, dry place to preserve texture and prevent melting.
- Consider using gloves during shaping to keep mixture from sticking to hands.
- Keep candies refrigerated for firmer consistency and extended shelf life.
- Customize by adding different nuts or dried fruit for unique flavor profiles.
- Prep Time: 30 minutes
- Cook Time: 2 hours 20 minutes
- Category: Desserts, Snacks
- Method: Chilling
- Cuisine: American
Nutrition
- Serving Size: 24
- Calories: 177
- Sugar: 16 g
- Sodium: 25 mg
- Fat: 9 g
- Saturated Fat: 4 g
- Unsaturated Fat: 5 g
- Trans Fat: 0 g
- Carbohydrates: 23 g
- Fiber: 1 g
- Protein: 2 g
- Cholesterol: 20 mg
Clara Thompson
Recipe Developer & Food Educator
Expertise
Plant-based and vegetarian recipe development, Nutritional analysis and meal planning, Culinary education and workshop facilitation, Content writing with a focus on healthy living
Education
Diploma in Culinary Arts, Mt. San Jacinto College, CA
Focus: Comprehensive culinary training with an emphasis on sustainable cooking practices.
Certificate in Nutrition and Healthy Living, Cornell University (Online Program)
Focus: Understanding the principles of nutrition to create balanced and health-conscious recipes.
Clara lives where fresh ideas and fresh ingredients meet. She pairs her culinary know-how with her passion for healthy, planet-friendly cooking.
For Clara, good food should taste great, nourish your body, and feel easy to make. Her recipes highlight whole foods, colorful produce, and a deep respect for seasonal eating.