The Zesty Lime Marmalade Recipe That Brightens Any Toast
Crafting a tangy lime marmalade recipe brings a burst of citrusy sunshine to your kitchen.
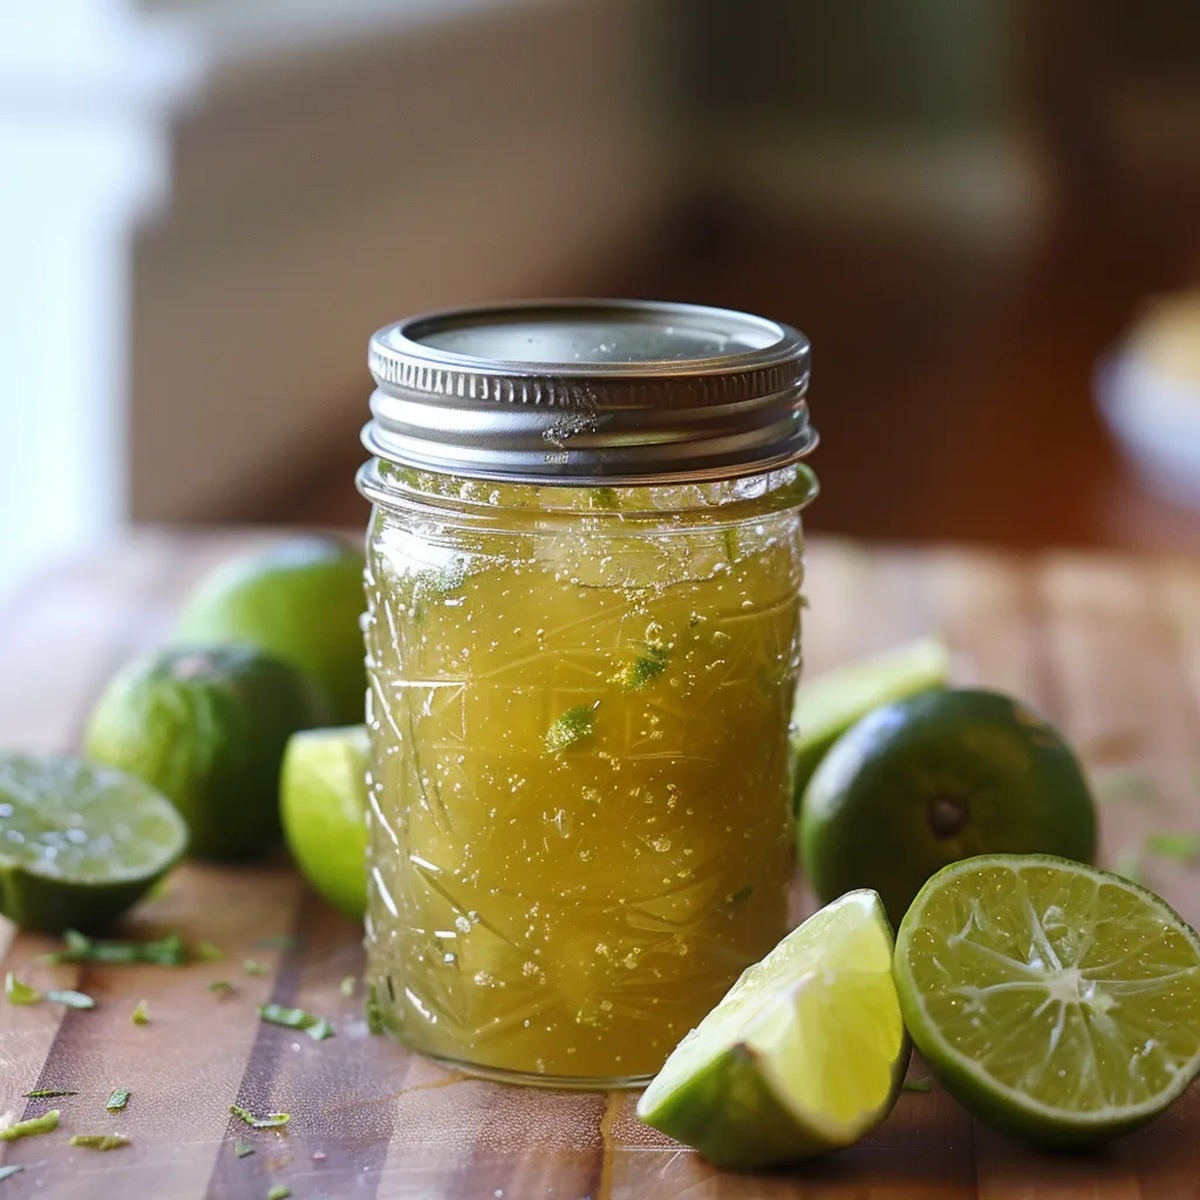
This zesty preserve captures the bright essence of limes in a delightful spread that dances across your taste buds.
Homemade marmalades offer a personal touch that store-bought versions can never match.
Bitter and sweet notes intertwine, creating a complex flavor profile that will elevate your morning toast or afternoon scones.
The process is simpler than you might expect, requiring just a few key ingredients and a bit of patience.
Each spoonful tells a story of careful preparation and vibrant citrus.
Get ready to transform simple limes into a spectacular preserve that will impress even the most discerning palates.
The Appeal of Homemade Lime Marmalade
Everything That Goes Into Lime Marmalade
Main Ingredients:Optional Flavor Enhancers:Preparation and Preservation Aids:Tools Required for Making Lime Marmalade
Marmalade-Making Instructions, Simplified
Step 1: Prepare Lime Base
Thoroughly wash limes under cool water.
Trim off blossom and stem ends.
Slice limes thinly using a sharp knife or mandoline.
Quarter each slice or alternatively, quarter whole limes and pulse in a food processor until evenly chopped but not mushy.
Transfer lime pieces to a large container and add water.
Stir mixture well, cover, and let sit overnight at room temperature.
Step 2: Sweeten and Soften Lime Mixture
Transfer lime mixture to a large saucepan.
Bring contents to a rolling boil over high heat.
Continue boiling uncovered for 40 minutes until lime peels become soft and tender.
Gradually add granulated sugar, stirring constantly to ensure complete dissolution.
Taste and adjust sweetness as needed.
Remove from heat, cover, and allow mixture to rest for 6 hours or overnight.
Step 3: Cook and Jar Marmalade
Sterilize glass jars and lids for storage.
Reheat lime mixture to a vigorous boil, stirring continuously to prevent burning.
Check consistency using cold plate test or thermometer (aim for 216-218°F).
Add water if mixture appears too thick.
Optional additions:Let marmalade rest for 10 minutes.
Stir thoroughly to distribute ingredients evenly.
Carefully ladle into prepared jars, leaving appropriate headspace.
For canning, process jars in boiling water bath for 10 minutes (15 minutes for high-altitude locations).
Allow jars to cool completely for 24 hours.
Check seals before storing.
Refrigerate opened or unsealed jars.
Tips to Get Your Lime Marmalade Just Right
Zesty Twists for Classic Lime Marmalade
Serving Lime Marmalade at Breakfast or Brunch
Keeping Your Lime Marmalade Fresh Longer
FAQs
Soaking limes helps soften the peels, extract natural pectin, and develop a more intense flavor. The overnight soak also allows the fruit to release its essential oils and break down fiber, which contributes to a smoother marmalade texture.
Granulated white sugar works best for lime marmalade. While you can experiment with other sugars like raw or brown sugar, they might alter the flavor and color of the final product. Stick to granulated sugar for the most consistent results.
Use the cold plate test by placing a small amount of marmalade on a chilled plate. If it wrinkles when pushed with your finger and doesn’t run quickly, it’s ready.
Print
Lime Marmalade Recipe
- Total Time: 8 hours 10 minutes
- Yield: 6 1x
Description
Crafting lime marmalade reveals a zesty citrus preserve from Mexico’s culinary traditions. Tangy slices of lime blend with sugar, creating a spreadable condiment perfect for toast or pastry accompaniments.
Ingredients
Main Ingredients:
- 2 pounds (907 grams) limes
- 8 cups (1.9 liters) water
- 6 to 7 cups (1.2 to 1.4 kilograms) granulated sugar
Optional Ingredients:
- Juice of 1 to 2 fresh lemons
- A few drops green food coloring
Instructions
- Thoroughly cleanse limes, trimming off blossom and stem ends. Slice limes thinly using a sharp knife or mandoline, quartering each slice. Alternatively, quarter limes and pulse in a food processor until evenly chopped but not pulverized.
- Combine prepared limes with water in a large container, mix well, cover, and allow to rest overnight at room temperature.
- Transfer lime mixture to a large saucepan, bringing to a rolling boil for 40 minutes until peel becomes tender and translucent.
- Gradually incorporate granulated sugar into boiling mixture, stirring continuously to ensure complete dissolution. Adjust sweetness by tasting and adding more sugar if needed.
- Remove from heat, cover, and let the mixture rest for 6 hours or overnight, allowing flavors to meld and intensify.
- Sterilize storage containers and prepare hot water bath for canning process.
- Reheat lime mixture to boiling point, stirring constantly to prevent burning. Add water if mixture appears too thick.
- Cook marmalade until it reaches desired consistency, using cold plate test or checking temperature between 216-218°F. Consider adding fresh lemon juice for balanced acidity.
- Optional: Incorporate green food coloring for enhanced visual appeal.
- Allow mixture to rest for 10 minutes before transferring to prepared containers.
- Stir marmalade thoroughly to ensure even distribution of ingredients.
- Carefully ladle into jars, leaving appropriate headspace for canning or freezing.
- Process sealed jars in hot water bath for 10 minutes (adjust to 15 minutes for high-altitude locations).
- Cool jars for 24 hours, verifying proper sealing before storage. Refrigerate opened or unsealed containers.
Notes
- Slice limes uniformly to ensure consistent cooking and texture throughout the marmalade.
- Use a sharp mandoline or careful knife skills to create thin, even lime pieces that will soften beautifully during cooking.
- Consider removing some lime seeds before processing to reduce potential bitterness in the final preserve.
- For a less sweet version, reduce sugar gradually and taste as you go, allowing the bright lime flavor to shine through.
- Experiment with adding a splash of vanilla or a cinnamon stick during the cooking process for subtle depth of flavor.
- Check marmalade’s consistency by placing a small amount on a chilled plate – it should wrinkle slightly when pushed with a finger, indicating proper gel formation.
- Store in sterilized glass jars in a cool, dark pantry to maintain maximum freshness and prevent spoilage.
- Prep Time: 20 minutes
- Cook Time: 7 hours 50 minutes
- Category: Snacks, Breakfast, Desserts
- Method: Boiling
- Cuisine: British
Nutrition
- Serving Size: 6
- Calories: 220
- Sugar: 36 g
- Sodium: 10 mg
- Fat: 0 g
- Saturated Fat: 0 g
- Unsaturated Fat: 0 g
- Trans Fat: 0 g
- Carbohydrates: 57 g
- Fiber: 1 g
- Protein: 0 g
- Cholesterol: 0 mg
Clara Thompson
Recipe Developer & Food Educator
Expertise
Plant-based and vegetarian recipe development, Nutritional analysis and meal planning, Culinary education and workshop facilitation, Content writing with a focus on healthy living
Education
Diploma in Culinary Arts, Mt. San Jacinto College, CA
Focus: Comprehensive culinary training with an emphasis on sustainable cooking practices.
Certificate in Nutrition and Healthy Living, Cornell University (Online Program)
Focus: Understanding the principles of nutrition to create balanced and health-conscious recipes.
Clara lives where fresh ideas and fresh ingredients meet. She pairs her culinary know-how with her passion for healthy, planet-friendly cooking.
For Clara, good food should taste great, nourish your body, and feel easy to make. Her recipes highlight whole foods, colorful produce, and a deep respect for seasonal eating.