
Zesty Lemon Cashew Bliss Balls Recipe: Wholesome Bites of Joy
Sweet, energizing, and packed with nutty lemon cashew bliss balls that deliver a burst of natural goodness in every bite.
These delightful no-bake treats combine zesty citrus with creamy cashews for a perfect snack.
Wholesome ingredients blend seamlessly to create a simple yet satisfying treat.
The recipe requires minimal effort and delivers maximum flavor and nutrition.
Rolled with care and infused with bright lemon essence, these bliss balls offer a quick energy boost.
You’ll love how these little spheres of happiness can brighten any moment.
Prepare to indulge in a guilt-free, delectable snack that nourishes both body and soul.
Why Lemon and Cashew Bliss Balls Are Worth Making
The Full Ingredient List for Lemon Cashew Bliss Balls
Base Ingredients:Flavor Enhancers:Coating and Preparation:What You’ll Need to Make Lemon Cashew Bliss Balls
Step-by-Step Guide for Lemon Cashew Bliss Balls
Step 1: Crush Nutty Base
Grab your food processor and toss in raw cashews and desiccated coconut.
Pulse and blend until the mixture transforms into a fine, sandy consistency that looks like delicate breadcrumbs.
Step 2: Harvest Citrus Sunshine
Grab fresh lemons and carefully zest their bright yellow skin.
Squeeze out the vibrant juice, making sure to strain out any pesky seeds that might sneak into your mixture.
Step 3: Infuse Flavor Explosion
Pour the lemon zest, vanilla essence, honey, and lemon juice into the nutty base.
If you’re feeling adventurous, sprinkle in some poppy seeds for an extra texture kick.
Step 4: Blend and Perfect the Mixture
Whirl everything together until it creates a harmonious blend.
Gently press a small amount between your fingers – it should stick together like a dream.
Need it moister?
Add a splash more lemon juice.
Too tart?
A drizzle of honey will balance things out perfectly.
Step 5: Prepare Rolling Station
Set up your workspace with:Step 6: Shape Delightful Bites
Dip your hands in water to prevent sticking.
Scoop a tablespoon of mixture and roll between your palms into smooth, perfect spheres.
Want extra pizzazz?
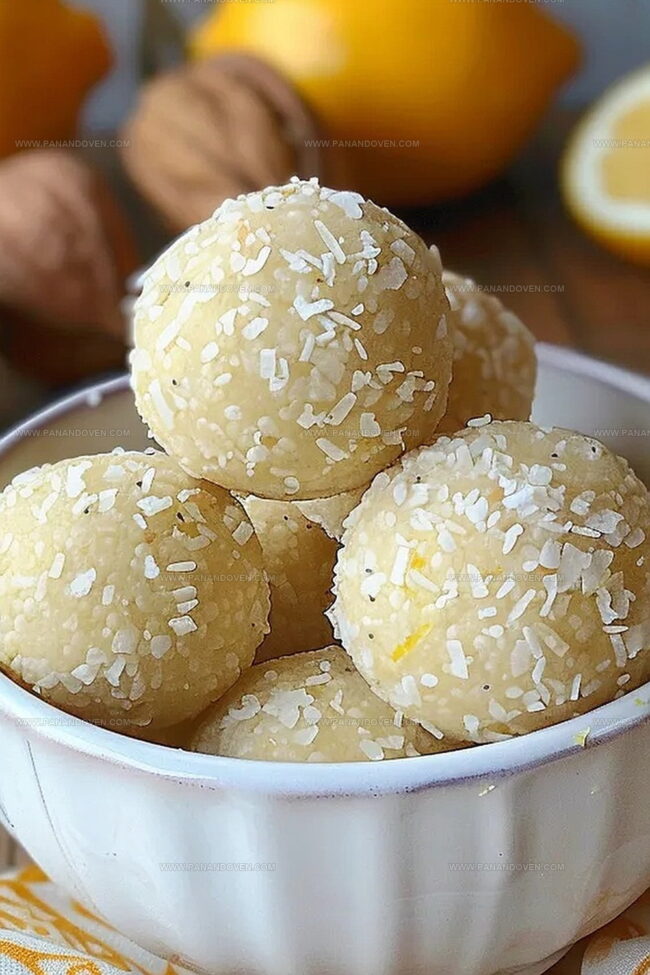
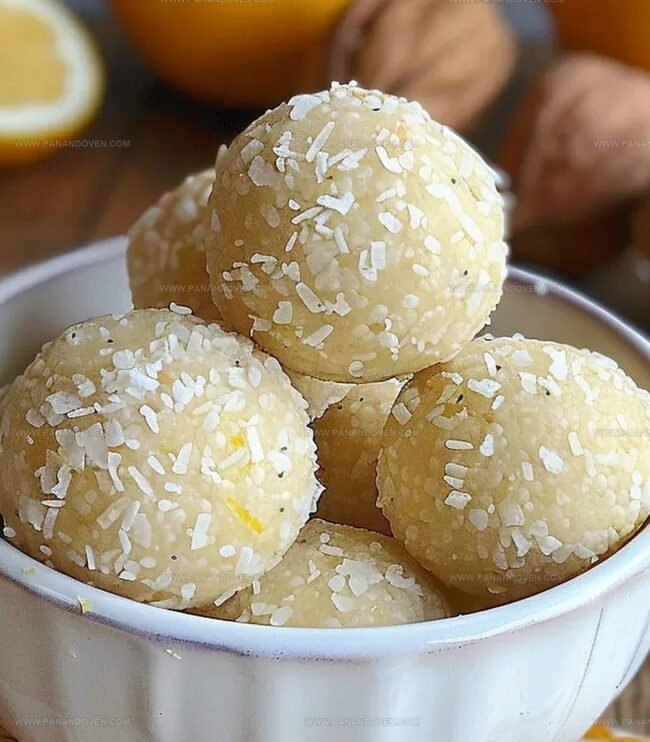
Roll each ball in coconut immediately after forming.
Step 7: Chill and Set
Place your beautiful energy bites in the refrigerator.
Let them hang out and firm up for at least an hour – patience is key!
Step 8: Store and Enjoy
Transfer the chilled bites to an airtight container.
They’ll happily chill in the refrigerator for two weeks or hibernate in the freezer for two months.
Grab and munch whenever energy calls!
Tips for Making Tasty Lemon Cashew Bliss Balls
Creative Variations for Lemon Cashew Bliss Ball Flavors
Delicious Ways to Serve Lemon Cashew Bliss Balls
Tips for Storing Lemon Cashew Bliss Balls
FAQs
Yes, you can substitute cashews with almonds or macadamia nuts. Just ensure they are raw and unsalted for the best texture and flavor.
The mixture should hold together when pressed. If it’s too crumbly, add a bit more lemon juice or honey. If too wet, add more desiccated coconut or ground cashews.
They can be made vegan by replacing honey with maple syrup or agave nectar. This simple swap makes the recipe completely plant-based.
Print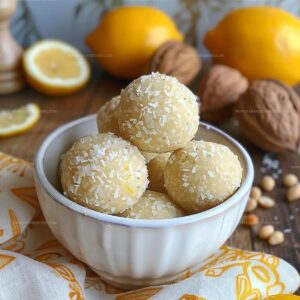
Lemon and Cashew Bliss Balls Recipe
- Total Time: 1 hour 20 minutes
- Yield: 12 1x
Description
Lemon and cashew bliss balls offer a zesty, nutty treat that delights palates with natural sweetness. Protein-packed ingredients blend seamlessly, creating a refreshing snack you’ll crave for quick energy boosts.
Ingredients
Lemon and Cashew Bliss Balls
Main Ingredients:
- 1 cup (140 grams) raw cashews
- 1 cup (90 grams) desiccated coconut
- 2 tablespoons lemon zest (from 1–2 large lemons)
Binding and Flavor Ingredients:
- 2 tablespoons honey (runny honey recommended)
- 3–5 tablespoons lemon juice (strained)
- 1/2 teaspoon vanilla essence
Optional Ingredients:
- 1 tablespoon poppy seeds
- Extra coconut for rolling
Instructions
- In a robust food processor, pulverize cashews and coconut until achieving a fine, uniform crumb consistency.
- Carefully extract zest from lemons, ensuring 2 tablespoons are collected. Strain fresh lemon juice to remove potential seeds.
- Incorporate lemon zest, vanilla essence, honey, and 3 tablespoons of lemon juice into the cashew-coconut mixture. Add poppy seeds if desired.
- Blend ingredients thoroughly, assessing mixture’s cohesiveness. If mixture appears dry, gradually introduce additional lemon juice. For excessive tartness, counterbalance with extra honey.
- Establish a rolling workspace with water bowl, measuring spoon, and serving plate. Prepare desiccated coconut for potential coating.
- Using moistened palms, portion mixture with tablespoon and gently roll into compact spheres. For coconut coating, immediately roll freshly formed balls in shredded coconut.
- Refrigerate formed bliss balls for minimum 1 hour, allowing complete solidification at 40°F.
- Transfer chilled balls to sealed container. Refrigerate up to 2 weeks or freeze for extended 2-month preservation.
Notes
- Moisture Control Keep hands slightly damp when rolling to prevent mixture from sticking and ensure smooth, uniform bliss balls.
- Texture Flexibility Adjust mixture consistency by adding lemon juice or honey incrementally, ensuring balls hold together perfectly without becoming too wet or dry.
- Dietary Adaptation Swap honey with maple syrup for vegan version, or use sugar-free alternatives like stevia for low-carb diets.
- Flavor Enhancement Toast cashews lightly before processing to intensify nutty undertones and add deeper complexity to the bliss balls.
- Prep Time: 20 minutes
- Cook Time: 1 hour
- Category: Snacks, Desserts
- Method: Blending
- Cuisine: American
Nutrition
- Serving Size: 12
- Calories: 107
- Sugar: 6 g
- Sodium: 1 mg
- Fat: 8 g
- Saturated Fat: 7 g
- Unsaturated Fat: 1 g
- Trans Fat: 0 g
- Carbohydrates: 9 g
- Fiber: 2 g
- Protein: 3 g
- Cholesterol: 0 mg
Clara Thompson
Recipe Developer & Food Educator
Expertise
Plant-based and vegetarian recipe development, Nutritional analysis and meal planning, Culinary education and workshop facilitation, Content writing with a focus on healthy living
Education
Diploma in Culinary Arts, Mt. San Jacinto College, CA
Focus: Comprehensive culinary training with an emphasis on sustainable cooking practices.
Certificate in Nutrition and Healthy Living, Cornell University (Online Program)
Focus: Understanding the principles of nutrition to create balanced and health-conscious recipes.
Clara lives where fresh ideas and fresh ingredients meet. She pairs her culinary know-how with her passion for healthy, planet-friendly cooking.
For Clara, good food should taste great, nourish your body, and feel easy to make. Her recipes highlight whole foods, colorful produce, and a deep respect for seasonal eating.