The Ultimate Leftover Candy Shortbread Bars Recipe for Sweet Treats
Sweet remnants of holiday joy transform into delectable leftover candy shortbread bars that promise pure indulgence.
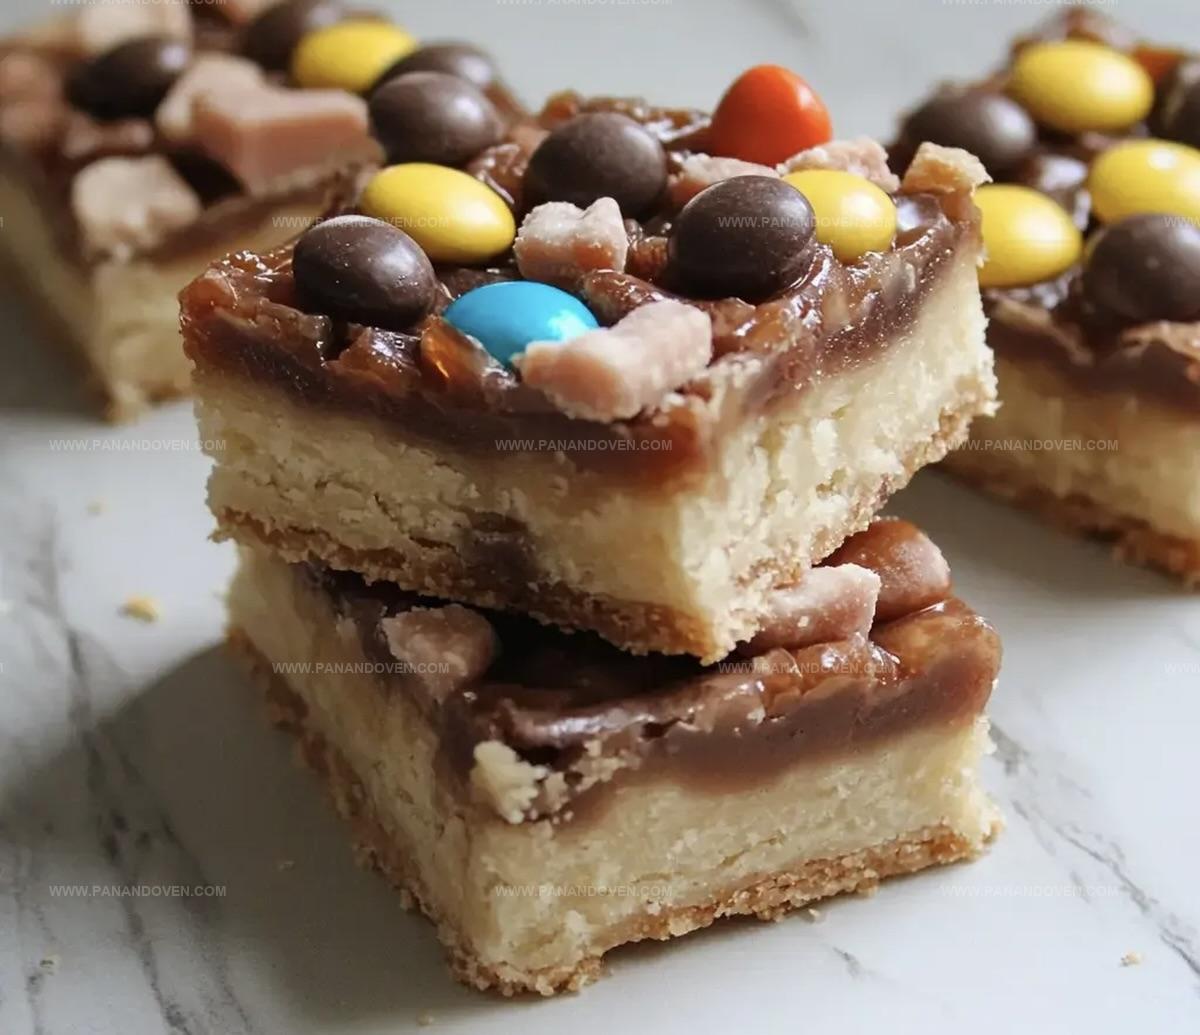
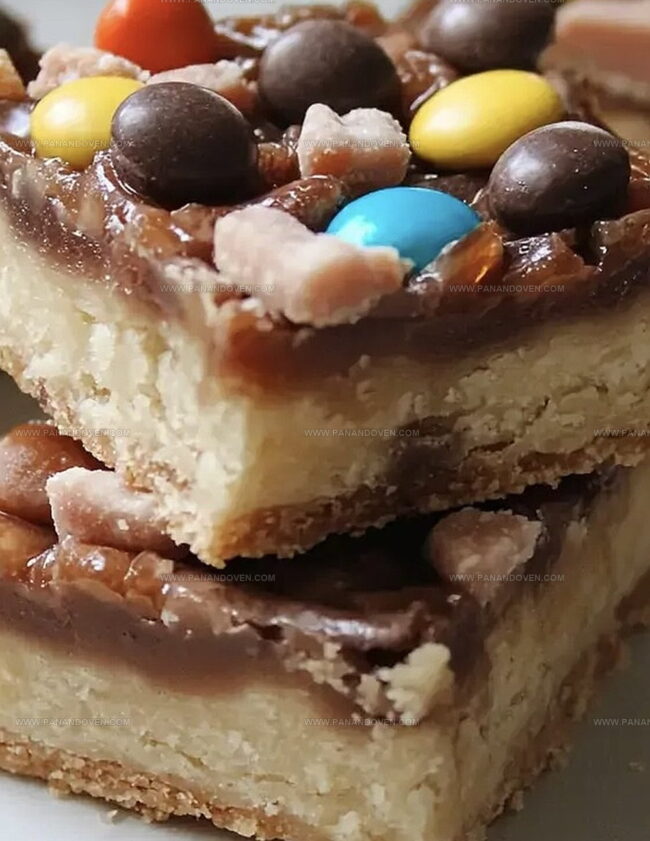
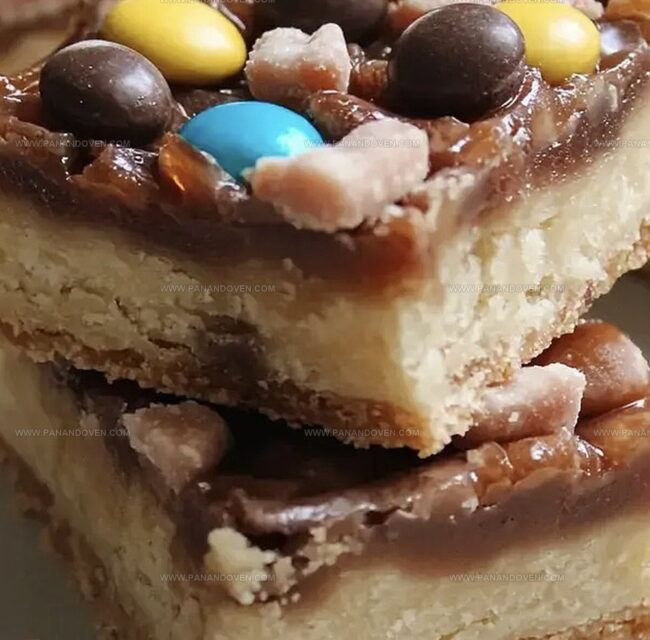
Buttery, crumbly shortbread serves as the perfect canvas for those forgotten chocolate treats lurking in your pantry.
Chocolate chips, caramel bits, and crushed candies meld into a decadent layer atop the golden shortbread base.
Each bite brings a delightful surprise of unexpected flavor combinations.
Rich, crisp, and incredibly simple to prepare, these bars rescue those lonely candy pieces from potential waste.
You’ll savor every crumbly, sweet morsel of this ingenious dessert.
Let these bars become your delicious solution to post-holiday candy overflow.
Reasons to Love Leftover Candy Shortbread Bars
Ingredients to Transform Leftover Candy Bars
Base Ingredients:Seasoning Ingredients:Topping Ingredients:Equipment Checklist for Candy Shortbread Bars
Steps for Delicious Leftover Candy Shortbread Bars
Step 1: Prep Your Baking Space
Grab your 8-inch square pan and line it with parchment paper, allowing extra edges to hang over.
This will make lifting your bars super easy later.
Set your oven to warm up at 300F (150C).
Step 2: Create Creamy Butter Base
In a spacious mixing bowl, whip together butter and sugar until the mixture becomes wonderfully light and fluffy.
Your goal is a smooth, airy texture that looks like soft clouds.
Step 3: Form Magical Shortbread Dough
Gently fold flour and salt into your butter mixture.
Keep mixing until the dough starts to come together and forms a cohesive, crumbly texture.
Don’t overmix – just blend until everything looks perfectly combined.
Step 4: Shape Your Delicious Foundation
Press the dough evenly into your prepared pan.
Use your fingertips to create a smooth, uniform layer that will become the delectable base of your bars.
Step 5: Bake to Golden Perfection
Slide the pan into the preheated oven.
Bake for 25-30 minutes, watching for a beautiful light golden color.
The edges should look slightly crisp and the center firm.
Step 6: Cool and Decorate
Allow the shortbread to cool completely in the pan.
Once cooled, sprinkle your favorite leftover candy pieces across the surface.
Think colorful, crunchy, and delightful!
Step 7: Add Luxurious Chocolate Drizzle
Melt white chocolate chips in a microwave-safe bowl.
Zap in 30-second intervals, stirring between each to ensure smooth melting.
Drizzle the silky chocolate over your candy-covered shortbread.
Step 8: Chill and Slice
Pop the pan into the refrigerator for about 30 minutes to let the chocolate set.
Once firm, lift out using the parchment paper edges.
Slice into bars and prepare for a taste sensation!
Shortbread Tips from the Test Kitchen
Mix & Match Ideas for Shortbread Bar Flavors
Fun Ways to Serve Up Candy Shortbread Bars
How to Store Candy Shortbread
FAQs
Chocolate bars, chocolate-covered candies, and hard candies like peppermints or butterscotch are perfect. Soft or chewy candies might not provide the best texture.
Unsalted butter is recommended to control the salt content. If using salted butter, reduce or eliminate the added salt in the recipe.
Look for light golden brown edges and a set center. The shortbread should be firm but not dark brown. It will continue to firm up while cooling.
You’ll need an 8-inch square baking pan, parchment paper or aluminum foil, mixing bowl, and basic baking tools like a mixer or whisk.
Print
Leftover Candy Shortbread Bars Recipe
- Total Time: 45 minutes
- Yield: 16 1x
Description
Delightful leftover candy shortbread bars offer a sweet solution for post-holiday treats. Crumbly, buttery shortbread meets chopped chocolate bars, creating a simple dessert you’ll crave again and again.
Ingredients
Main Ingredients:
- 2 cups all-purpose flour
- 1 1/2 cups (3 sticks) unsalted butter, softened
- 2 cups leftover candy pieces (such as M&M’s, chopped peanut butter cups, chopped candy bars, etc.)
Sweeteners and Flavor Enhancers:
- 1/2 cup granulated sugar
- 1 teaspoon pure vanilla extract
Seasoning:
- 1/4 teaspoon salt
Optional Topping:
- 1 cup white chocolate chips or chopped white chocolate
Instructions
- Prepare the baking vessel by lining an 8-inch square pan with parchment paper, ensuring edges extend for effortless removal. Preheat the oven to 300F (150C).
- In a spacious mixing bowl, whip butter and sugar until achieving a pillowy, aerated consistency with a pale, creamy texture.
- Gently incorporate flour and salt into the butter mixture, blending until the dough coheres into a uniform mass.
- Distribute the dough evenly across the prepared pan, using fingertips or a spatula to create a smooth, compact layer.
- Position the pan in the preheated oven and bake for 25-30 minutes, monitoring until the edges turn a delicate golden hue and the surface appears set.
- Allow the shortbread to cool completely within the pan, enabling it to firm up and stabilize.
- Artfully scatter leftover candy pieces across the cooled shortbread surface, ensuring consistent distribution.
- For the white chocolate drizzle, utilize a microwave-safe container to melt chips in 30-second intervals, stirring between each cycle until achieving a silky, glossy consistency.
- Cascade the molten white chocolate over the candy-studded surface, creating an elegant, marbled effect.
- Refrigerate for approximately 30 minutes to solidify the chocolate and set the topping.
- Utilize the extended parchment edges to extract the shortbread from the pan, then slice into precise, rectangular bars for serving.
Notes
- Choose high-quality butter for a rich, melt-in-your-mouth shortbread texture that elevates the entire dessert experience.
- Chill the dough for 15 minutes before pressing into the pan to prevent spreading and ensure clean, crisp edges during baking.
- Mix different candy types for a colorful, surprising flavor profile that makes each bite unique and exciting.
- Use a sharp knife dipped in hot water for clean, precise cuts when serving the bars, preventing crumbling and maintaining a professional presentation.
- Prep Time: 15 minutes
- Cook Time: 30 minutes
- Category: Desserts, Snacks
- Method: Baking
- Cuisine: American
Nutrition
- Serving Size: 16
- Calories: 290
- Sugar: 10 g
- Sodium: 40 mg
- Fat: 20 g
- Saturated Fat: 12 g
- Unsaturated Fat: 8 g
- Trans Fat: 0 g
- Carbohydrates: 30 g
- Fiber: 1 g
- Protein: 2 g
- Cholesterol: 60 mg
Marcus Reed
Founder & Food Content Creator
Expertise
Single-recipe development, Seasonal and local ingredient utilization, Food photography and styling, Culinary writing and content creation
Education
Culinary Arts Certificate, Blue Ridge Community and Technical College, WV
Focus: Fundamentals of culinary techniques, emphasizing hands-on experience in small-scale kitchen settings.
Marcus’s story begins in Asheville, where good food and family kitchens shaped his earliest memories. After hands-on culinary training and a lot of trial (and a little error), he realized that real cooking isn’t about perfection, it’s about connection.
At Pan and Oven, Marcus crafts recipes that are easy to follow, packed with flavor, and built for real kitchens.