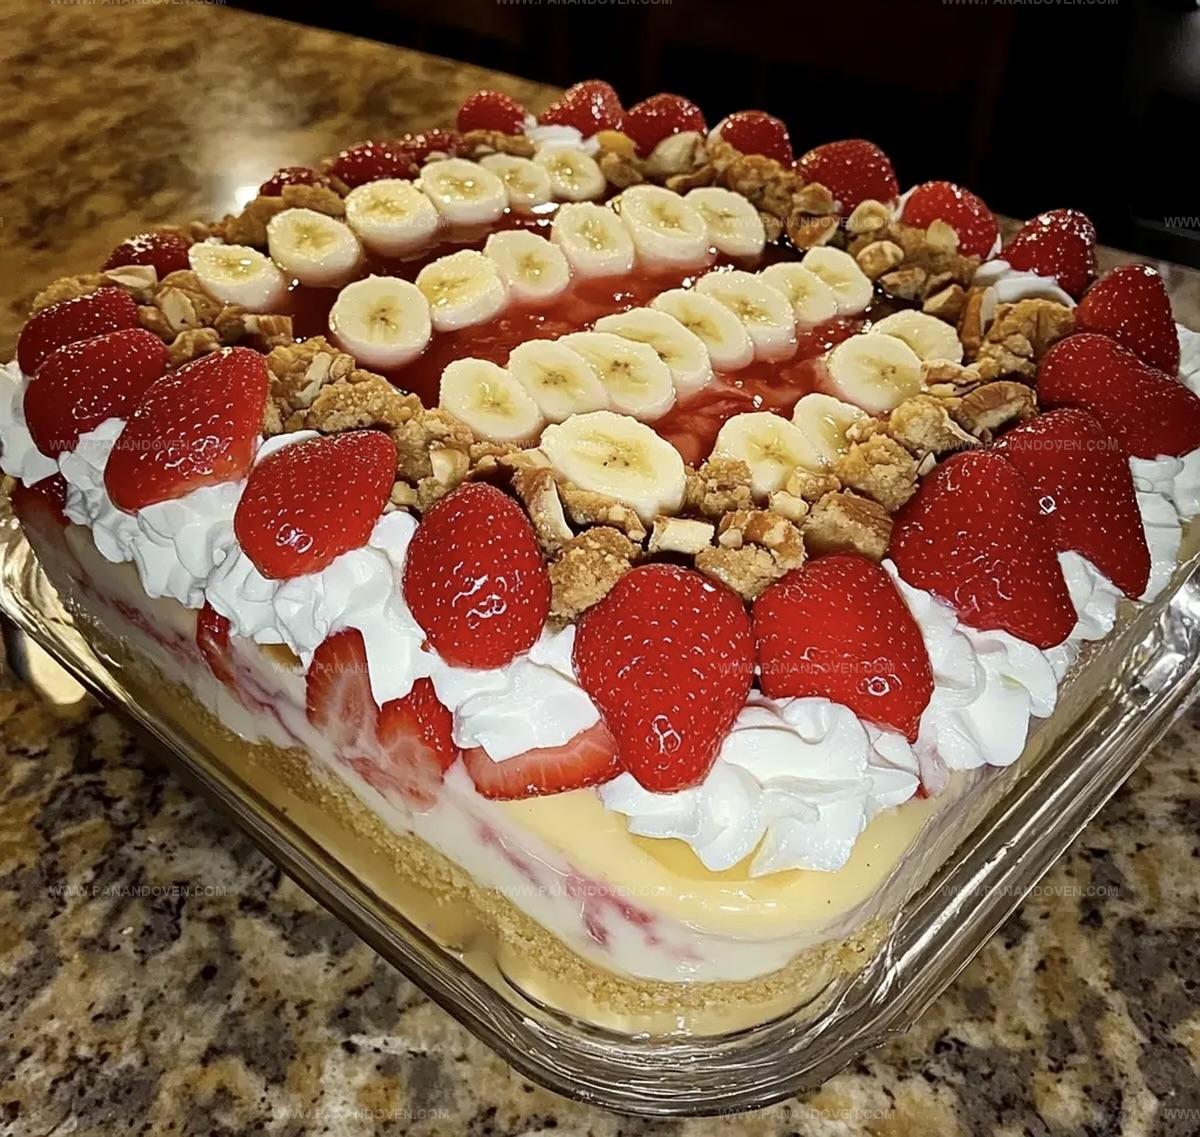
The Dreamiest Layered Pudding Shortcake Recipe for Sweet Bliss
Summer’s sweet symphony finds its perfect harmony in this decadent layered pudding shortcake that promises pure indulgence.
Creamy textures and delicate flavors dance together in every delightful bite.
Each layer reveals a careful blend of soft cake and silky pudding that melts effortlessly on your tongue.
Fresh ingredients combine to create a dessert that feels both elegant and comforting.
The shortcake serves as a tender foundation, absorbing the luscious pudding with grace.
Soft, light, and utterly irresistible, this dessert will become your new favorite summer treat.
Prepare to be enchanted by a dessert that turns ordinary moments into extraordinary memories.
Banana Pudding Shortcake Benefits

Dessert Combo Bar Ingredients
Dessert Combo Bar Tools
Dessert Combo Bar Directions
Step 1: Create Strawberry Crunch Base
Warm up the oven to 350F.
Grab a mixing bowl and toss in crushed vanilla wafers, chopped pecans, and sugar.
Drizzle melted butter over the dry ingredients and mix everything thoroughly.
Press this delightful crumbly mixture into the bottom of a 9-inch springform pan.
Bake until the base turns a gorgeous golden brown, about 10-12 minutes.
Let the crust cool down for 10 minutes.
Once cooled, lovingly arrange fresh strawberry slices across the entire surface.
Step 2: Whip Up Banana Pudding Cheesecake Filling
In a large bowl, whip cream cheese until silky smooth.
Add sugar and vanilla, blending until perfectly combined.
Gently incorporate eggs one at a time, ensuring each is fully mixed.
Fold in these delicious ingredients:Pour this luscious batter over the strawberry layer.
Bake for 60-70 minutes until the edges turn light brown and the center sets firmly.
Allow the cheesecake to cool completely before removing from the pan.
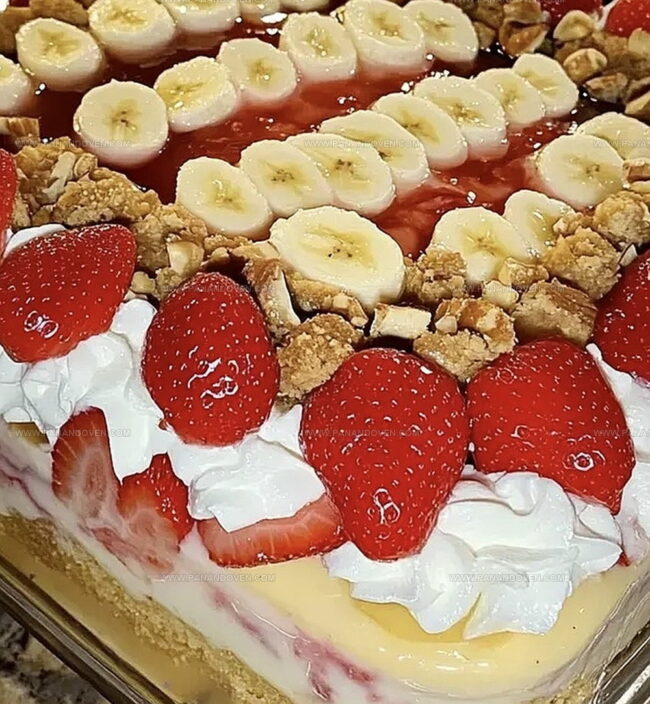
Step 3: Finish With Dreamy Topping
Carefully transfer the cooled cheesecake to a serving platter.
Prepare the whipped cream by combining:Whip these ingredients until they form beautiful stiff peaks.
Generously spread the whipped cream across the top of the cheesecake.
For an extra touch of elegance, sprinkle additional sliced strawberries and crushed vanilla wafers on top.
Tips for Dessert Combo Bars
Dessert Combo Bar Ideas
Serving Dessert Combo Bars
Dessert Combo Bar Storage
FAQs
Look for lightly browned edges and a set center. When you gently shake the pan, the middle should have a slight wobble but not appear liquid. The internal temperature should reach around 150-160°F for a perfectly baked cheesecake.
Fresh strawberries are recommended for the best texture and flavor. Frozen strawberries contain more moisture and might make your crust soggy. If you must use frozen, thaw and drain them completely before using, and pat them dry with paper towels to remove excess liquid.
Cracks can happen due to overmixing, sudden temperature changes, or overbaking.
Print
Layered Pudding Shortcake Recipe
- Total Time: 1 hour 35 minutes
- Yield: 12 1x
Description
Classic layered pudding shortcake merges creamy textures with sweet pastry delights. Homemade dessert perfection combines rich custard, fluffy cake, and delicate crumb for an irresistible culinary experience you’ll savor.
Ingredients
Main Ingredients:
- 16 ounces (454 grams) cream cheese, softened
- 4 large eggs
- 1 cup (240 milliliters) mashed ripe bananas
- 1 cup (240 milliliters) sliced fresh strawberries
Crust and Sugar Components:
- 2 cups (240 grams) crushed vanilla wafers
- 1/2 cup (60 grams) chopped pecans
- 1/2 cup (100 grams) unsalted butter, melted
- 1 1/4 cups (250 grams) granulated sugar
- 1/4 cup (30 grams) powdered sugar
- 1/2 cup (60 grams) all-purpose flour
Dairy and Flavoring Ingredients:
- 1/2 cup (120 milliliters) sour cream
- 2 1/2 cups (600 milliliters) heavy whipping cream
- 2 teaspoons vanilla extract
Instructions
- Craft the strawberry crunch foundation by blending crushed vanilla wafers, pecans, and sugar with melted butter. Spread this mixture evenly into a 9-inch springform pan and bake at 350°F for 10-12 minutes until golden. Cool for 10 minutes, then artfully arrange fresh strawberry slices across the crisp base.
- Create the banana pudding cheesecake filling by whipping cream cheese until smooth. Gradually incorporate sugar, vanilla, eggs, mashed bananas, sour cream, heavy cream, and flour into a silky, homogeneous batter. Gently pour this luxurious mixture over the strawberry layer. Bake for 60-70 minutes at 350°F, watching for lightly browned edges and a set center. Allow complete cooling before unmolding.
- Transform the cooled cheesecake into an elegant dessert by preparing a cloud-like whipped cream. Whip heavy cream with powdered sugar and vanilla until stiff peaks form. Lavishly spread the cream across the cheesecake’s surface. Embellish with additional sliced strawberries and a sprinkle of crushed vanilla wafers for a stunning presentation.
Notes
- Crust Customization: Swap vanilla wafers with graham crackers or gluten-free cookies for alternative texture and dietary needs.
- Banana Ripeness Matters: Use overripe bananas for deeper, sweeter flavor and smoother pudding consistency.
- Temperature Control: Allow cream cheese and eggs to reach room temperature before mixing to prevent lumpy cheesecake batter.
- Make-Ahead Magic: Prepare this dessert a day in advance to enhance flavor melding and simplify serving preparation.
- Prep Time: 25 minutes
- Cook Time: 1 hour 10 minutes
- Category: Desserts, Snacks
- Method: Baking
- Cuisine: American
Nutrition
- Serving Size: 12
- Calories: 384
- Sugar: 21 g
- Sodium: 202 mg
- Fat: 29 g
- Saturated Fat: 16 g
- Unsaturated Fat: 10 g
- Trans Fat: 1 g
- Carbohydrates: 31 g
- Fiber: 1 g
- Protein: 5 g
- Cholesterol: 115 mg
Marcus Reed
Founder & Food Content Creator
Expertise
Single-recipe development, Seasonal and local ingredient utilization, Food photography and styling, Culinary writing and content creation
Education
Culinary Arts Certificate, Blue Ridge Community and Technical College, WV
Focus: Fundamentals of culinary techniques, emphasizing hands-on experience in small-scale kitchen settings.
Marcus’s story begins in Asheville, where good food and family kitchens shaped his earliest memories. After hands-on culinary training and a lot of trial (and a little error), he realized that real cooking isn’t about perfection, it’s about connection.
At Pan and Oven, Marcus crafts recipes that are easy to follow, packed with flavor, and built for real kitchens.