
The Gooey Lava Brownies Recipe That Melts Hearts Instantly
Decadent chocolate lava brownies melt hearts with their gooey, rich centers that surprise and delight.
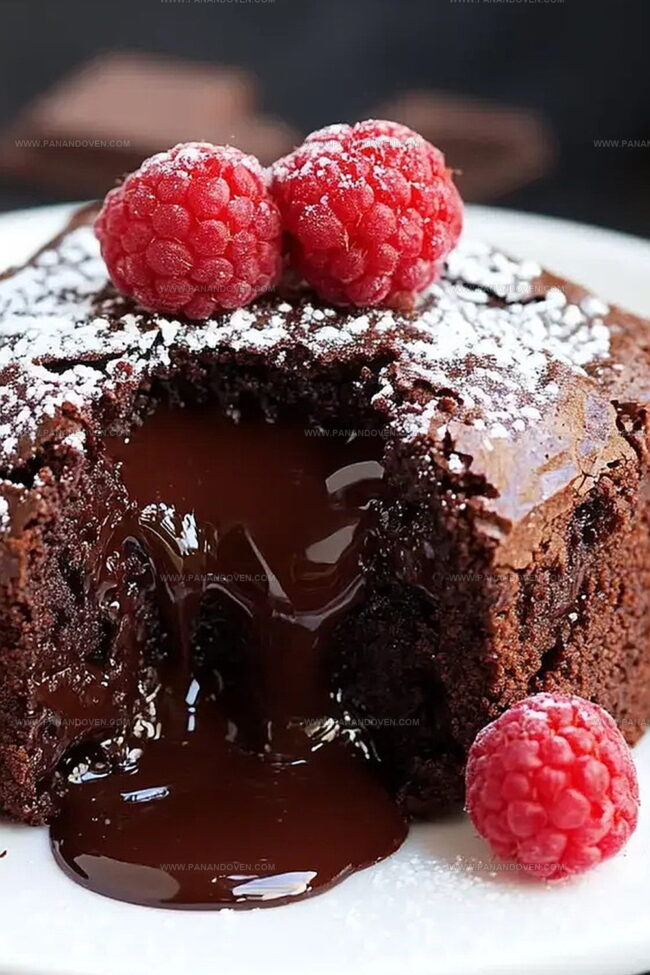
Every bite of these luscious brownies promises a molten chocolate experience that tantalizes taste buds.
Soft, fudgy edges give way to a warm, liquid chocolate core that oozes with intense flavor.
Professional bakers and home cooks alike adore this simple yet elegant dessert that looks impressive on any plate.
The secret lies in perfectly timing the baking to achieve that signature flowing chocolate center.
These brownies transform an ordinary dessert into an extraordinary culinary moment that will wow everyone at the table.
You won’t be able to resist diving into this irresistible chocolate indulgence.
Lava Brownies Why They’re So Irresistible
Lava Brownie Ingredient Checklist
Lava Filling:Dry Ingredients:Wet Ingredients and Binding Agents:Tools for Crafting Gooey Lava Brownies
Simple Steps to Lava Brownie Perfection
Step 1: Prepare Chocolate Filling
Grab semisweet chocolate, heavy cream, and butter.
Melt these ingredients together in a microwave or double boiler until smooth and glossy.
Pour the mixture into a small container and freeze for about 2 hours until completely solid.
Step 2: Shape Chocolate Filling
Remove the frozen chocolate mixture from the freezer.
Using a small spoon or melon baller, quickly roll the filling into 6 equal-sized balls.
Return these balls to the freezer to maintain their shape.
Step 3: Prepare Baking Space
Preheat your oven to 350°F.
Generously grease a standard muffin tin with butter or cooking spray to prevent sticking.
Step 4: Melt Chocolate Base
In a microwave-safe bowl, combine dark chocolate and butter.
Melt in short intervals, stirring between each, until the mixture is completely smooth and glossy.
Step 5: Whip Egg Mixture
In a large mixing bowl, whisk together eggs, granulated sugar, and vanilla extract.
Beat vigorously until the mixture becomes light and slightly fluffy.
Step 6: Create Brownie Batter
Ingredients for brownie batter:Gently fold all ingredients together until just combined.
Be careful not to overmix the batter.
Step 7: Assemble Lava Brownies
Divide the brownie batter evenly among the muffin cups.
Place a frozen chocolate ball in the center of each brownie-filled cup, ensuring it’s partially submerged.
Step 8: Bake to Perfection
Slide the muffin tin into the preheated oven.
Bake for approximately 25 minutes.
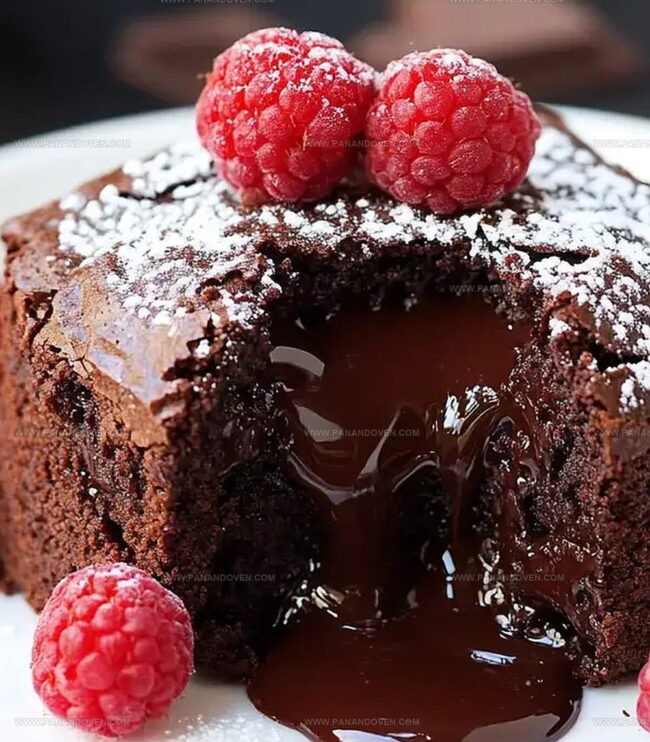
The edges should look set, but the center should remain slightly jiggly, indicating the molten chocolate core.
Step 9: Cool and Serve
Remove from oven and let the brownies cool in the tin for 5 minutes.
Carefully remove each brownie and serve warm.
When cut or bitten into, a luscious chocolate lava will ooze out.
Baking Tips for the Perfect Chocolate Lava Center
Fun Lava Brownie Twists for Chocolate Fans
Serving Lava Brownies with Flair
Best Ways to Store Lava Brownies
FAQs
The secret is freezing the chocolate filling beforehand, which ensures a molten, gooey center when baked. This technique helps create a dramatic lava effect when you cut into the brownie.
Yes, you can experiment with dark, milk, or semi-sweet chocolate. Each type will provide a slightly different flavor profile, so choose your favorite or try a combination for unique results.
Look for set edges with a slightly jiggly center. The brownies should look just cooked but not dry, which typically takes about 25 minutes in a 350F oven. The frozen filling helps maintain the lava-like consistency.
Print
Lava Brownies Recipe
- Total Time: 1 hour 40 minutes
- Yield: 12 1x
Description
Chocolate lava brownies melt hearts with their gooey chocolate center and rich, fudgy exterior. Dense chocolate goodness creates an indulgent dessert you’ll crave again and again.
Ingredients
Lava Filling:
- 1 cup (170 grams) semisweet chocolate chips
- 1/3 cup (80 milliliters) heavy cream
- 1 tablespoon (15 grams) unsalted butter
Brownie Base:
- 1 cup (170 grams) semisweet chocolate chips
- 1 1/2 sticks (170 grams) unsalted butter
- 4 ounces (113 grams) unsweetened chocolate
- 1 1/2 cups (300 grams) granulated sugar
- 3 eggs plus 1 egg yolk
- 3/4 cup (95 grams) all-purpose flour
- 1/4 teaspoon sea salt
Garnish:
- 1 teaspoon vanilla extract
- Fresh raspberries
Instructions
- Prepare the lava filling by melting chocolate and creating a smooth, rich mixture. Carefully pour into small molds and freeze until completely solid and firm.
- Remove frozen filling from molds and shape into six perfectly round balls. Return to freezer to maintain hardness.
- Preheat the oven to 350°F and thoroughly grease a standard muffin tin to prevent sticking.
- Create the brownie base by gently melting chocolate and butter together, stirring until smooth and glossy.
- Whip eggs with sugar and vanilla extract, incorporating air until the mixture becomes light and slightly frothy.
- Gradually fold dry ingredients into the chocolate mixture, blending until a uniform, silky batter forms without overmixing.
- Fill each muffin cavity halfway with brownie batter, then carefully nestle a frozen chocolate ball into the center of each.
- Cover the frozen filling completely with remaining brownie batter, ensuring no filling is visible.
- Bake for 22-25 minutes, watching carefully to achieve a set exterior while maintaining a molten, gooey center. Brownies should look slightly underdone but not wet.
- Remove from oven and let cool in the tin for 5 minutes before carefully transferring to a serving plate. Serve warm for maximum lava effect.
Notes
- Prep Filling Ahead Freeze chocolate lava balls at least 2 hours before baking to ensure perfect molten center.
- Temperature Matters Use room temperature eggs for smoother, more consistent brownie batter texture.
- Storage Secret Keep leftover brownies refrigerated and gently reheat for 10-15 seconds to restore gooey lava effect.
- Dietary Swap Substitute gluten-free flour blend for all-purpose flour to make brownies celiac-friendly without compromising rich taste.
- Prep Time: 1 hour 15 minutes
- Cook Time: 25 minutes
- Category: Desserts, Snacks
- Method: Baking
- Cuisine: American
Nutrition
- Serving Size: 12
- Calories: 408
- Sugar: 30 g
- Sodium: 70 mg
- Fat: 24 g
- Saturated Fat: 14 g
- Unsaturated Fat: 8 g
- Trans Fat: 0 g
- Carbohydrates: 43 g
- Fiber: 2 g
- Protein: 5 g
- Cholesterol: 87 mg
Clara Thompson
Recipe Developer & Food Educator
Expertise
Plant-based and vegetarian recipe development, Nutritional analysis and meal planning, Culinary education and workshop facilitation, Content writing with a focus on healthy living
Education
Diploma in Culinary Arts, Mt. San Jacinto College, CA
Focus: Comprehensive culinary training with an emphasis on sustainable cooking practices.
Certificate in Nutrition and Healthy Living, Cornell University (Online Program)
Focus: Understanding the principles of nutrition to create balanced and health-conscious recipes.
Clara lives where fresh ideas and fresh ingredients meet. She pairs her culinary know-how with her passion for healthy, planet-friendly cooking.
For Clara, good food should taste great, nourish your body, and feel easy to make. Her recipes highlight whole foods, colorful produce, and a deep respect for seasonal eating.