
Dreamy Kings Hawaiian Cheesecake Danish Recipe You’ll Adore
Crafting a delightful Kings Hawaiian cheesecake danish brings pure joy to weekend mornings.
Sweet aromas will drift through your kitchen, promising something spectacular.
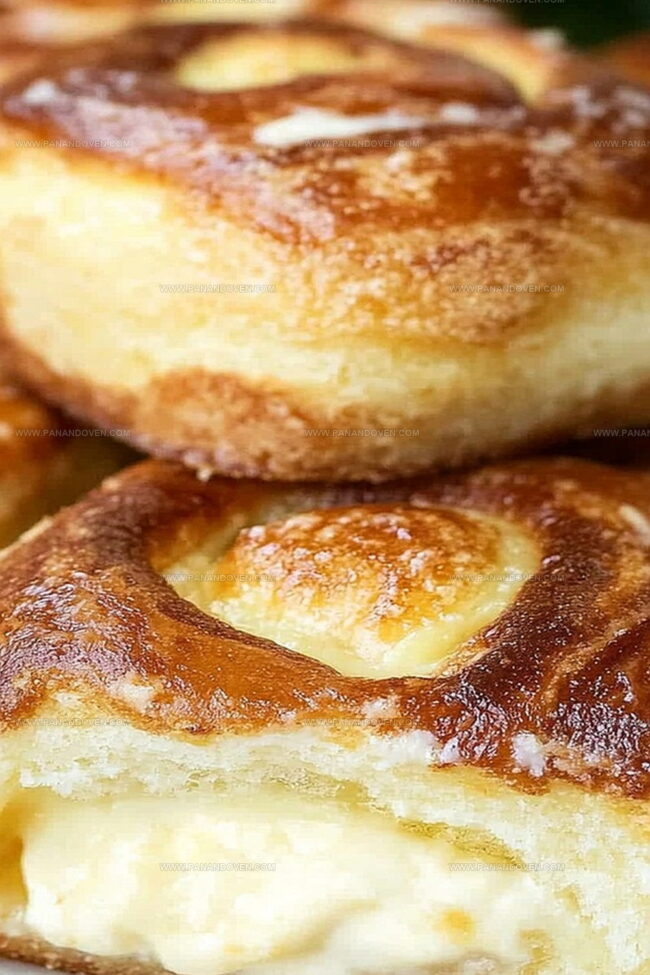
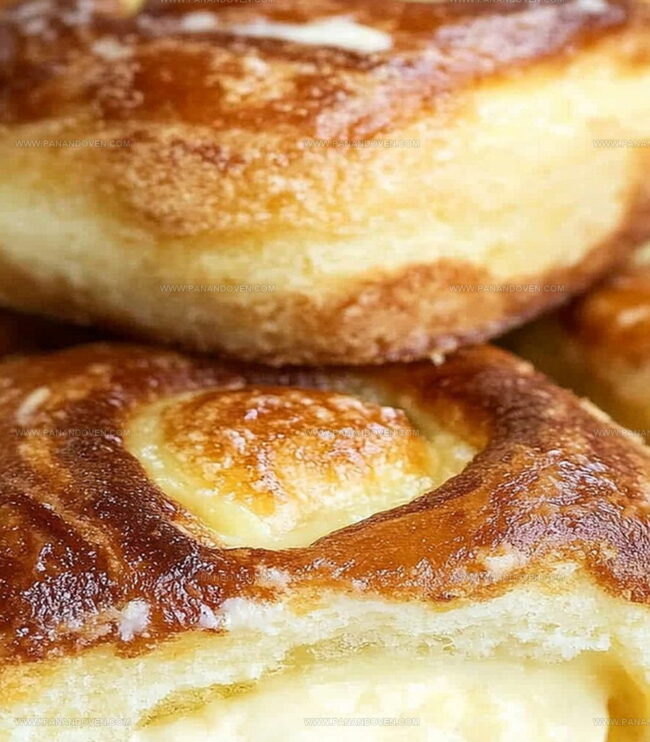
Soft, pillowy pastry meets creamy cheesecake in a dreamy combination that feels like culinary magic.
Golden bread transforms into an elegant breakfast treat with minimal effort.
Cream cheese melts into tender dough, creating layers of irresistible flavor.
Unexpected twists make this recipe stand out from typical morning pastries.
Comfort and indulgence dance together, beckoning you to roll up your sleeves and start baking.
Kings Hawaiian Danish: The Sweet Perks
Ingredient List for Hawaiian Cheesecake Danish
Bread Base:Cheesecake Filling:Fruit and Liquid Components:Glaze:Danish Made Easy – The Method
Step 1: Warm Up The Oven
Crank your oven to a toasty 350F (175C) and generously coat your baking dish with cooking spray or butter to prevent sticking.
Step 2: Slice Hawaiian Rolls
Carefully slice the Kings Hawaiian rolls horizontally, creating soft, fluffy pockets that will cradle the delicious cheesecake filling.
Step 3: Whip Up Creamy Filling
In a mixing bowl, blend together:Whisk until the mixture becomes silky smooth.
Gently fold in pineapple chunks for bursts of tropical flavor.
Step 4: Stuff The Rolls
Generously spoon the creamy cheesecake mixture into each roll’s pocket, ensuring every bite will be packed with delightful flavor.
Step 5: Bake To Golden Perfection
Arrange the filled rolls in the prepared baking dish and slide into the preheated oven.
Bake for 25-30 minutes until the tops turn a beautiful golden brown.
Step 6: Drizzle With Tropical Glaze
Mix powdered sugar with a splash of pineapple juice, stirring until the glaze reaches a smooth, drizzle-worthy consistency.
Shower the warm danish with this sweet tropical topping.
Tips for Better Hawaiian Cheesecake Danish
Storing Leftover Danish the Right Way
Pair Up Your Danish with These
Hawaiian Cheesecake Danish – New Variations
FAQs
No, Kings Hawaiian rolls have a unique sweetness and soft texture that’s crucial for this recipe. Regular bread won’t provide the same delicious result.
Yes, pineapple juice adds moisture, tropical flavor, and helps balance the cream cheese’s richness. It’s a key ingredient that gives the danish its distinctive taste.
Look for a golden-brown color on top and slightly set filling. The edges should be lightly crisp, and the rolls should look puffy and well-cooked.
You can prepare the filling and stuff the rolls in advance, then refrigerate for a few hours before baking. This can help develop richer flavors and make day-of preparation easier.
Print
Kings Hawaiian Cheesecake Danish Recipe
- Total Time: 45 minutes
- Yield: 8 1x
Description
Sweet Danish magic meets Hawaiian roll perfection in this Kings Hawaiian Cheesecake Danish, blending creamy richness with buttery pastry. Pillowy soft rolls create a delightful base that promises pure comfort with each heavenly bite you’ll savor.
Ingredients
Main Ingredients:
- 6 Kings Hawaiian Sweet Rolls
- 8 ounces (226 grams) cream cheese, softened
- 1/2 cup (75 grams) pineapple chunks (fresh or canned)
- 1 large egg
Sweeteners:
- 1/4 cup (50 grams) granulated sugar
- 1 cup (120 grams) powdered sugar (for glaze)
Flavor Enhancers:
- 1/4 cup (60 milliliters) pineapple juice
- 1 teaspoon vanilla extract
Instructions
- Prepare the oven at 350F (175C) and lightly coat a baking pan with cooking spray to prevent sticking.
- Carefully slice the Kings Hawaiian rolls midway, creating a delicate pocket for the filling without cutting completely through.
- Create a luscious cheesecake base by whisking cream cheese, sugar, pineapple juice, vanilla extract, and egg until achieving a silky, uniform consistency.
- Gently incorporate diced pineapple chunks into the cream cheese mixture, distributing them evenly throughout the filling.
- Meticulously spoon the creamy pineapple cheesecake mixture into each roll’s pocket, ensuring a generous and balanced distribution.
- Arrange the filled rolls in the prepared baking dish, maintaining a slight separation between each pastry.
- Slide the baking dish into the preheated oven and bake for 25-30 minutes, watching for a golden-brown exterior that signals perfect doneness.
- While the danish bakes, prepare a luxurious glaze by blending powdered sugar with a small amount of pineapple juice until achieving a smooth, drizzling consistency.
- Once baked and slightly cooled, elegantly drizzle the pineapple glaze over the warm danish, creating an enticing finishing touch.
Notes
- Slice Hawaiian rolls carefully to maintain structural integrity when creating pockets for cheesecake filling.
- Use room temperature cream cheese for smoother, lump-free mixing and better incorporation of ingredients.
- Drain pineapple chunks thoroughly to prevent excess moisture from making the danish soggy during baking.
- Adjust sweetness by reducing sugar for a less sweet version or using alternative sweeteners like stevia for low-sugar diets.
- Prep Time: 15 minutes
- Cook Time: 30 minutes
- Category: Desserts, Breakfast
- Method: Baking
- Cuisine: Hawaiian
Nutrition
- Serving Size: 8
- Calories: 292
- Sugar: 22 g
- Sodium: 230 mg
- Fat: 12 g
- Saturated Fat: 6 g
- Unsaturated Fat: 4 g
- Trans Fat: 0 g
- Carbohydrates: 38 g
- Fiber: 1 g
- Protein: 5 g
- Cholesterol: 48 mg
Clara Thompson
Recipe Developer & Food Educator
Expertise
Plant-based and vegetarian recipe development, Nutritional analysis and meal planning, Culinary education and workshop facilitation, Content writing with a focus on healthy living
Education
Diploma in Culinary Arts, Mt. San Jacinto College, CA
Focus: Comprehensive culinary training with an emphasis on sustainable cooking practices.
Certificate in Nutrition and Healthy Living, Cornell University (Online Program)
Focus: Understanding the principles of nutrition to create balanced and health-conscious recipes.
Clara lives where fresh ideas and fresh ingredients meet. She pairs her culinary know-how with her passion for healthy, planet-friendly cooking.
For Clara, good food should taste great, nourish your body, and feel easy to make. Her recipes highlight whole foods, colorful produce, and a deep respect for seasonal eating.