
The Foolproof Guide to Canning Peaches Recipe – Sweet Summer Magic
Summer’s bounty bursts with sweet, juicy peaches that beg to be preserved in this perfect how to can peaches recipe.
Ripe, fragrant peaches transform ordinary afternoons into memories of sunshine and harvest.
Canning lets you capture the essence of peak season fruit, locking in flavor and nutrition for months ahead.
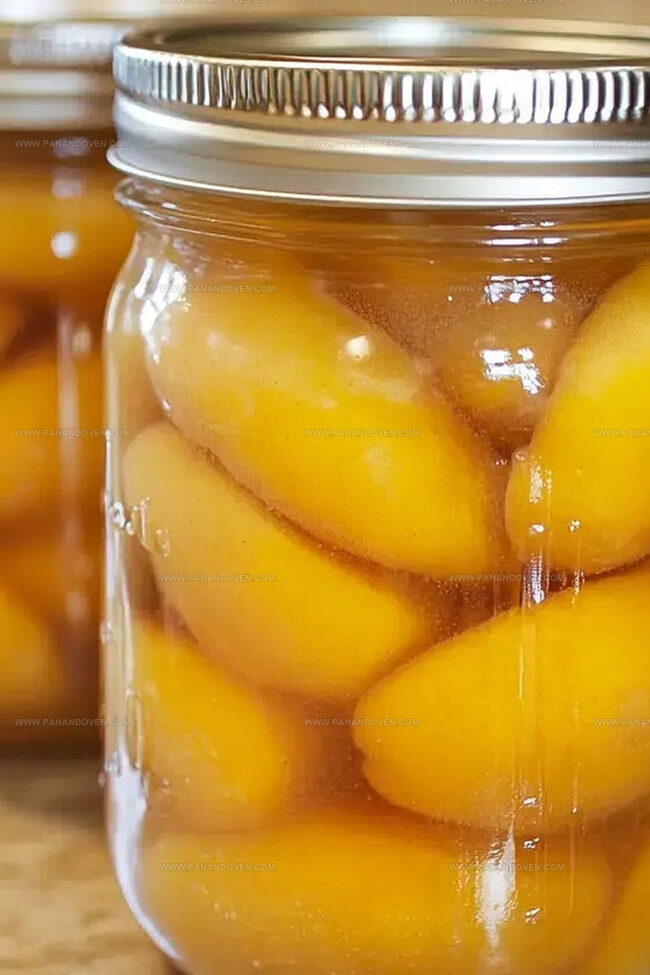
Stoneware jars gleam with golden peach slices, promising winter comfort and warmth.
Each jar represents a moment of culinary craft and connection to seasonal traditions.
Preserving peaches connects you to generations of home cooks who understood the magic of capturing summer’s sweetness.
This straightforward method ensures you can enjoy fresh, homemade peaches long after the orchards have gone quiet.
Grab your canning supplies and let’s turn those ripe peaches into a delicious pantry treasure.
Canning Peaches Why It’s Worth the Effort
What You Need for Peach Canning
Fresh Produce:Preserving Liquid:Canning Supplies:Canning Equipment for Peaches
Step by Step Guide to Canning Peaches
Step 1: Sanitize Your Canning Equipment
Thoroughly wash glass jars, lids, and rings with hot soapy water.
Rinse completely and sterilize by boiling jars and rings for 10 minutes.
Set aside on clean kitchen towels to air dry.
Ensure new lids are ready for sealing.
Step 2: Create Gentle Water Bath
Fill large canning pot with water, ensuring enough depth to completely submerge sealed jars by 1-2 inches.
Heat water to a gentle simmer, maintaining consistent temperature.
Step 3: Transform Fresh Peaches
Step 4: Craft Sweet Preservation Liquid
Mix water and sugar in separate pot, heating until sugar completely dissolves.
Create light, medium, or heavy syrup based on personal sweetness preference.
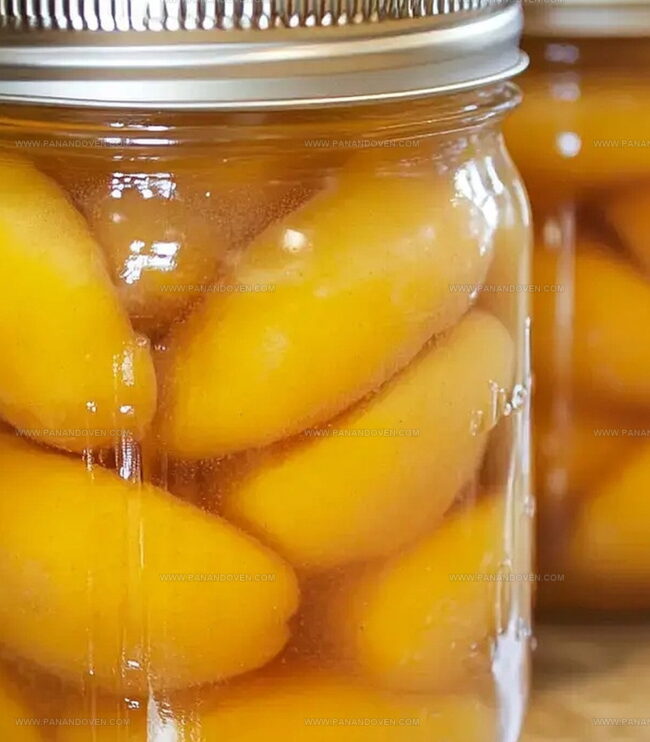
Step 5: Pack Peaches into Containers
Arrange peach slices neatly into sterilized jars.
Pour prepared syrup over peaches, leaving 1/2 inch space from jar’s top.
Remove air bubbles by sliding knife along jar’s interior.
Step 6: Seal and Process Preserves
Wipe jar rims clean.
Attach lids and rings, tightening fingertip-tight.
Carefully lower jars into simmering water bath.
Process for 25 minutes, adjusting time for altitude variations.
Step 7: Complete Preservation Ritual
Remove jars from water bath.
Allow to rest undisturbed for 12-24 hours.
Check seal by pressing lid center – it should not flex.
Store sealed jars in cool, dark location.
Canning Tips for Juicy Peaches
Peach Canning Flavor Variations
Serving Canned Peaches All Year Long
Peach Storage Advice After Canning
FAQs
Yes, peaches are perfect for home canning. They’re acidic enough and respond well to water bath processing, making them a safe and delicious preservation method for home canners.
Freestone peaches are ideal. They’re easier to pit and slice, which makes preparation faster and more efficient. Choose ripe, firm peaches without bruises or soft spots.
You’ll need a water bath canner, mason jars, new lids, jar rings, a large pot for blanching, and tongs. A jar lifter and funnel are helpful but not mandatory for successful canning.
Print
How to Can Peaches Recipe
- Total Time: 50 minutes
- Yield: 7 1x
Description
Homemade canned peaches from Southern United States showcase summer’s sweetest harvest in Mason jars. Preserving fresh peaches ensures delicious fruit for winter months when fresh produce becomes scarce.
Ingredients
Main Ingredients:
- 17 pounds fresh ripe peaches, preferably freestone
Canning Equipment:
- 7 quart jars
- 7 jar rings
- 7 new jar lids
Syrup Ingredients:
- Granulated sugar
- Water
Instructions
- Thoroughly sanitize glass containers and metal rings, ensuring pristine condition with fresh, unused sealing lids.
- Prepare water bath canner by filling with water, ensuring jar submersion of approximately 1-2 inches, maintaining gentle simmering temperature.
- Create peach skin removal technique by briefly immersing whole fruits in boiling water for approximately 30 seconds, immediately transferring to ice-cold water bath to facilitate effortless skin separation.
- Carefully slice peeled peaches into uniform sections, arranging neatly within sterilized jars, then delicately pour prepared sugar syrup, maintaining precise half-inch space from container rim.
- Gently lower filled jars into simmering water bath, processing for recommended duration of 25 minutes, adjusting time slightly for elevated geographical elevations.
- Allow jars to remain submerged for 5 minutes post-processing, then methodically extract and place on cooling rack, verifying complete seal formation by testing lid’s central depression.
Notes
- Always use ripe, blemish-free peaches for the best flavor and texture in your canned preserves.
- Quickly remove peaches from hot water to prevent overcooking and maintain their firm, fresh quality.
- Create a light sugar syrup for a balanced sweetness that enhances the natural peach flavor without overwhelming it.
- Check jar seals carefully to ensure food safety and prevent potential spoilage during storage.
- Prep Time: 20 minutes
- Cook Time: 30 minutes
- Category: None
- Method: Curing
- Cuisine: American
Nutrition
- Serving Size: 7
- Calories: 120
- Sugar: 20 g
- Sodium: 0 mg
- Fat: 0 g
- Saturated Fat: 0 g
- Unsaturated Fat: 0 g
- Trans Fat: 0 g
- Carbohydrates: 30 g
- Fiber: 2 g
- Protein: 1 g
- Cholesterol: 0 mg
Marcus Reed
Founder & Food Content Creator
Expertise
Single-recipe development, Seasonal and local ingredient utilization, Food photography and styling, Culinary writing and content creation
Education
Culinary Arts Certificate, Blue Ridge Community and Technical College, WV
Focus: Fundamentals of culinary techniques, emphasizing hands-on experience in small-scale kitchen settings.
Marcus’s story begins in Asheville, where good food and family kitchens shaped his earliest memories. After hands-on culinary training and a lot of trial (and a little error), he realized that real cooking isn’t about perfection, it’s about connection.
At Pan and Oven, Marcus crafts recipes that are easy to follow, packed with flavor, and built for real kitchens.