Irresistible Homemade Brownie Ice Cream Recipe for Sweet Lovers
Decadent chocolate melts seamlessly into creamy homemade brownie ice cream, creating a dessert that tantalizes every sweet tooth.
Rich fudgy brownies swirl through velvety smooth frozen custard, promising pure indulgence.
Each spoonful brings intense chocolate notes that dance across your palate.
homemade treats always feel more special than store-bought alternatives.
The combination of warm brownies and cold ice cream creates a delightful contrast of temperatures and textures.
Fresh ingredients elevate this dessert from ordinary to extraordinary.
You’ll want to savor every delicious bite of this irresistible frozen delight.
Homemade Brownie Ice Cream What Makes It Special
Everything Needed for Brownie Ice Cream Magic
Main Ingredients:Flavor Enhancers:Ice Cream Component:Tools to Whip Up Brownie Ice Cream at Home
Steps to Creamy Brownie Ice Cream Bliss
Step 1: Prepare the Oven
Warm up your oven to 350°F.
Grab a jelly roll pan and generously coat it with butter.
Line the pan with parchment paper, ensuring complete coverage.
Step 2: Mix Dry Ingredients
In a small bowl, whisk together flour and baking powder until perfectly combined and lump-free.
Step 3: Melt Chocolate Base
Use a saucepan to gently melt chocolate with butter over low heat.
Stir in vanilla and a pinch of salt.
Keep stirring until smooth and glossy.
Step 4: Create Brownie Batter
Pour sugars into the melted chocolate mixture.
Crack eggs one at a time, mixing thoroughly after each addition.
Carefully fold in the flour mixture until just combined.
Step 5: Bake the Brownie Layer
Spread the batter evenly across the prepared pan.
Slide into the preheated oven and bake for 15 minutes.
The top should look dry and set when done.
Step 6: Prepare Brownie Layers
Allow the brownie slab to cool completely.
Slice the brownie in half.
Trim the edges to create clean, even sides.
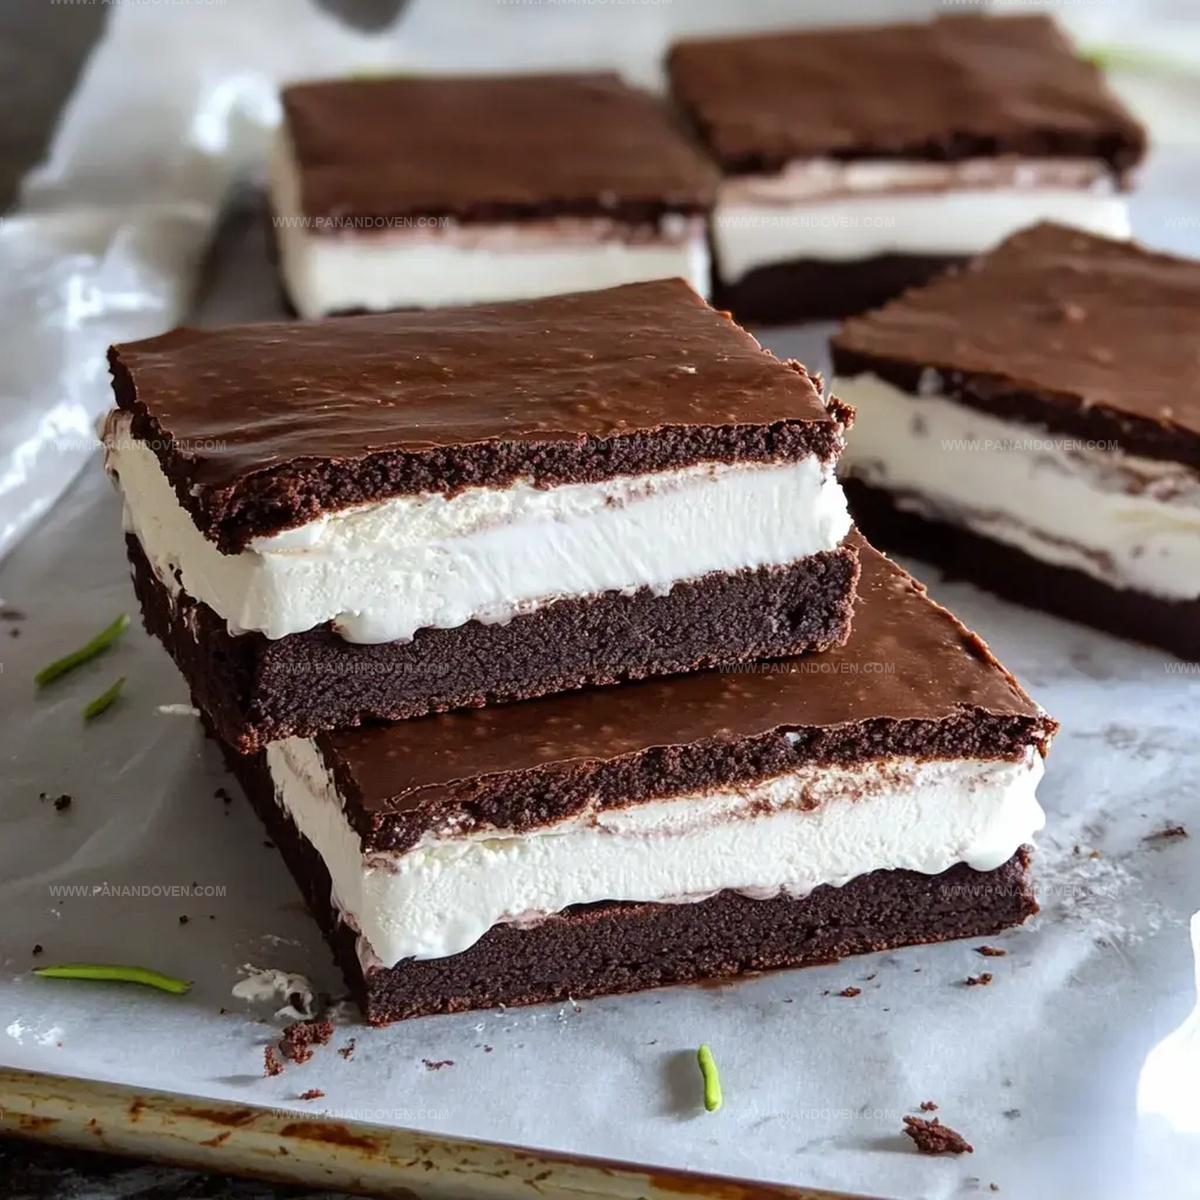
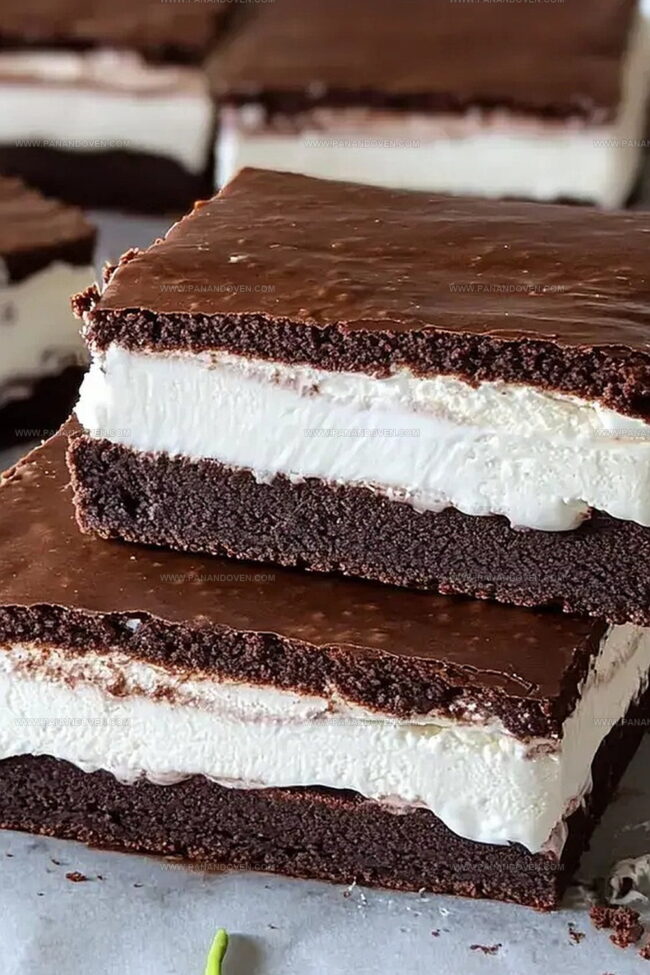
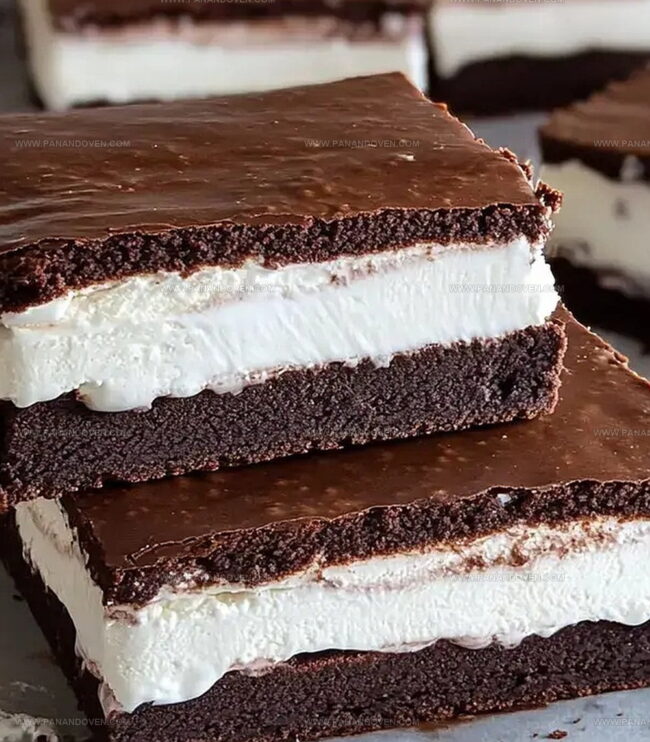
Step 7: Assemble Ice Cream Sandwich
Remove ice cream from the freezer to soften slightly.
Spread a generous layer of softened ice cream over one brownie half.
Carefully place the second brownie layer on top.
Wrap tightly in plastic wrap and freeze for 2 hours.
Step 8: Slice and Store
Cut the frozen treat into 6 rectangular sandwiches or 12 smaller squares.
Wrap individually and return to the freezer for storage.
Brownie Ice Cream Expert Advice
Brownie Ice Cream Variations to Try
Brownie Ice Cream Serving Ideas for Summer
How to Store Brownie Ice Cream Properly
FAQs
Yes, you can swap dark, milk, or semi-sweet chocolate based on your preference. Just ensure it’s high-quality baking chocolate for the best flavor.
Look for a dry top and slightly set edges. The center should still be slightly soft. A toothpick inserted should come out with a few moist crumbs.
Overbaking leads to dry brownies, while underbaking creates very gooey texture. Follow the 15-minute baking time and check doneness with the toothpick test to achieve the right consistency.
Print
Homemade Brownie Ice Cream Recipe
- Total Time: 40 minutes
- Yield: 8 1x
Description
Homemade brownie ice cream blends rich chocolate brownies with creamy vanilla ice cream for an indulgent dessert. Cool chocolate chunks nestle within smooth, sweet layers, creating a delightful treat that satisfies intense chocolate cravings.
Ingredients
Main Ingredients:
- 4 ounces (113 grams) semisweet chocolate, chopped
- 2 large eggs
- 1/2 gallon (1.89 liters) ice cream, any flavor
- 1/2 cup (113 grams) unsalted butter
Dry Ingredients:
- 1 cup (120 grams) all-purpose flour
- 1 cup (220 grams) brown sugar
- 1/4 cup (50 grams) granulated sugar
- 1/4 teaspoon (1.25 grams) baking powder
- 1/2 teaspoon (3 grams) salt
Flavor Enhancers:
- 1 1/2 teaspoons (7.5 milliliters) vanilla extract
Instructions
- Preheat the oven to 350°F. Grease a jelly roll pan and line with parchment paper, ensuring complete coverage for easy removal.
- In a separate bowl, combine flour and baking powder, whisking thoroughly to eliminate any lumps.
- Create a double boiler or use low heat to melt chocolate, butter, vanilla, and salt, stirring constantly until smooth and fully integrated.
- Incorporate sugars into the melted chocolate mixture, blending until uniform. Add eggs individually, mixing completely after each addition. Gently fold in the flour mixture until just combined.
- Transfer batter to prepared pan, spreading evenly with a spatula. Bake for 15 minutes, watching for a dry surface and set edges.
- Allow brownie to cool completely at room temperature. Carefully slice the slab in half, trimming edges for a clean, symmetrical shape.
- Soften ice cream slightly at room temperature. Spread a smooth, even layer of ice cream over one brownie half. Place second brownie layer on top, pressing gently.
- Wrap the assembled dessert tightly in plastic wrap. Freeze for 2 hours to set and firm up the ice cream.
- Remove from freezer and slice into 6 rectangles or 12 smaller squares. Immediately wrap individual portions and return to freezer for storage.
Notes
- Ensure chocolate melts gently to prevent burning by using low heat and stirring constantly.
- Line pan with parchment paper overhanging edges for easy brownie removal without breaking.
- Check brownies at 12-13 minutes to avoid overbaking, which can make them dry and crumbly.
- Let brownies cool completely before adding ice cream to prevent melting and maintain layered structure.
- For gluten-free version, substitute all-purpose flour with almond or gluten-free blend.
- Use high-quality chocolate and premium ice cream for richer, more decadent flavor profile.
- Experiment with different ice cream flavors like mint chocolate chip or salted caramel for variety.
- Prep Time: 25 minutes
- Cook Time: 15 minutes
- Category: Desserts, Snacks, Ice Cream
- Method: Baking
- Cuisine: American
Nutrition
- Serving Size: 8
- Calories: 360
- Sugar: 28 g
- Sodium: 180 mg
- Fat: 22 g
- Saturated Fat: 13 g
- Unsaturated Fat: 9 g
- Trans Fat: 0 g
- Carbohydrates: 38 g
- Fiber: 1 g
- Protein: 4 g
- Cholesterol: 70 mg
Clara Thompson
Recipe Developer & Food Educator
Expertise
Plant-based and vegetarian recipe development, Nutritional analysis and meal planning, Culinary education and workshop facilitation, Content writing with a focus on healthy living
Education
Diploma in Culinary Arts, Mt. San Jacinto College, CA
Focus: Comprehensive culinary training with an emphasis on sustainable cooking practices.
Certificate in Nutrition and Healthy Living, Cornell University (Online Program)
Focus: Understanding the principles of nutrition to create balanced and health-conscious recipes.
Clara lives where fresh ideas and fresh ingredients meet. She pairs her culinary know-how with her passion for healthy, planet-friendly cooking.
For Clara, good food should taste great, nourish your body, and feel easy to make. Her recipes highlight whole foods, colorful produce, and a deep respect for seasonal eating.