The Jolliest Holiday Whoopie Pies Recipe for Sweet Celebrations
Decadent holiday whoopie pies burst with festive cheer and nostalgia.
These classic treats blend soft, cake-like cookies with creamy, dreamy filling.
Bakers adore how holiday whoopie pies bring smiles to everyone’s faces during seasonal gatherings.
Rich chocolate and smooth marshmallow create a delightful combination that melts in your mouth.
Each bite transports you to cozy winter moments filled with warmth and joy.
The delicate balance of textures makes these whoopie pies an irresistible dessert for any celebration.
Whip up a batch and watch as friends and family eagerly devour these sweet, festive delights.
What Makes Holiday Whoopie Pies So Fun

Holiday Whoopie Pie Ingredient List
Main Ingredients:Wet Ingredients:Filling and Finishing Ingredients:Baking Essentials:Equipment for Holiday Whoopie Pies
Simple Steps for Whoopie Pie Baking
Step 1: Warm Up the Oven
Crank the oven to a toasty 350F.
Grab your baking sheets and cover them with parchment paper or silicone mats to prevent any sticky situations.
Step 2: Create the Dry Powder
Grab a bowl and whisk together:Make sure everything is mixed thoroughly with no lumpy surprises.
Step 3: Whip Up the Cookie Dough
In a separate bowl, cream together butter and brown sugar until they become light and fluffy.
Crack in an egg and splash of vanilla, mixing until smooth.
Slowly add your dry mixture and buttermilk, alternating between the two to create a perfect batter.
Step 4: Bake Delightful Cookies
Scoop small dollops of batter onto your prepared sheets.
Pop them in the oven and bake for about 10 minutes.
They’re ready when the centers bounce back when gently touched.
Step 5: Craft the Magical Filling
Beat butter and sugar until they become a dreamy cloud.
Add in vanilla and peppermint extracts with a pinch of salt.
Fold in marshmallow creme until everything is beautifully combined.
Chill the mixture in the refrigerator for half an hour to set.
Step 6: Assemble Holiday Treats
Take your cooled cookies and spread the filling between two like little sandwich clouds.
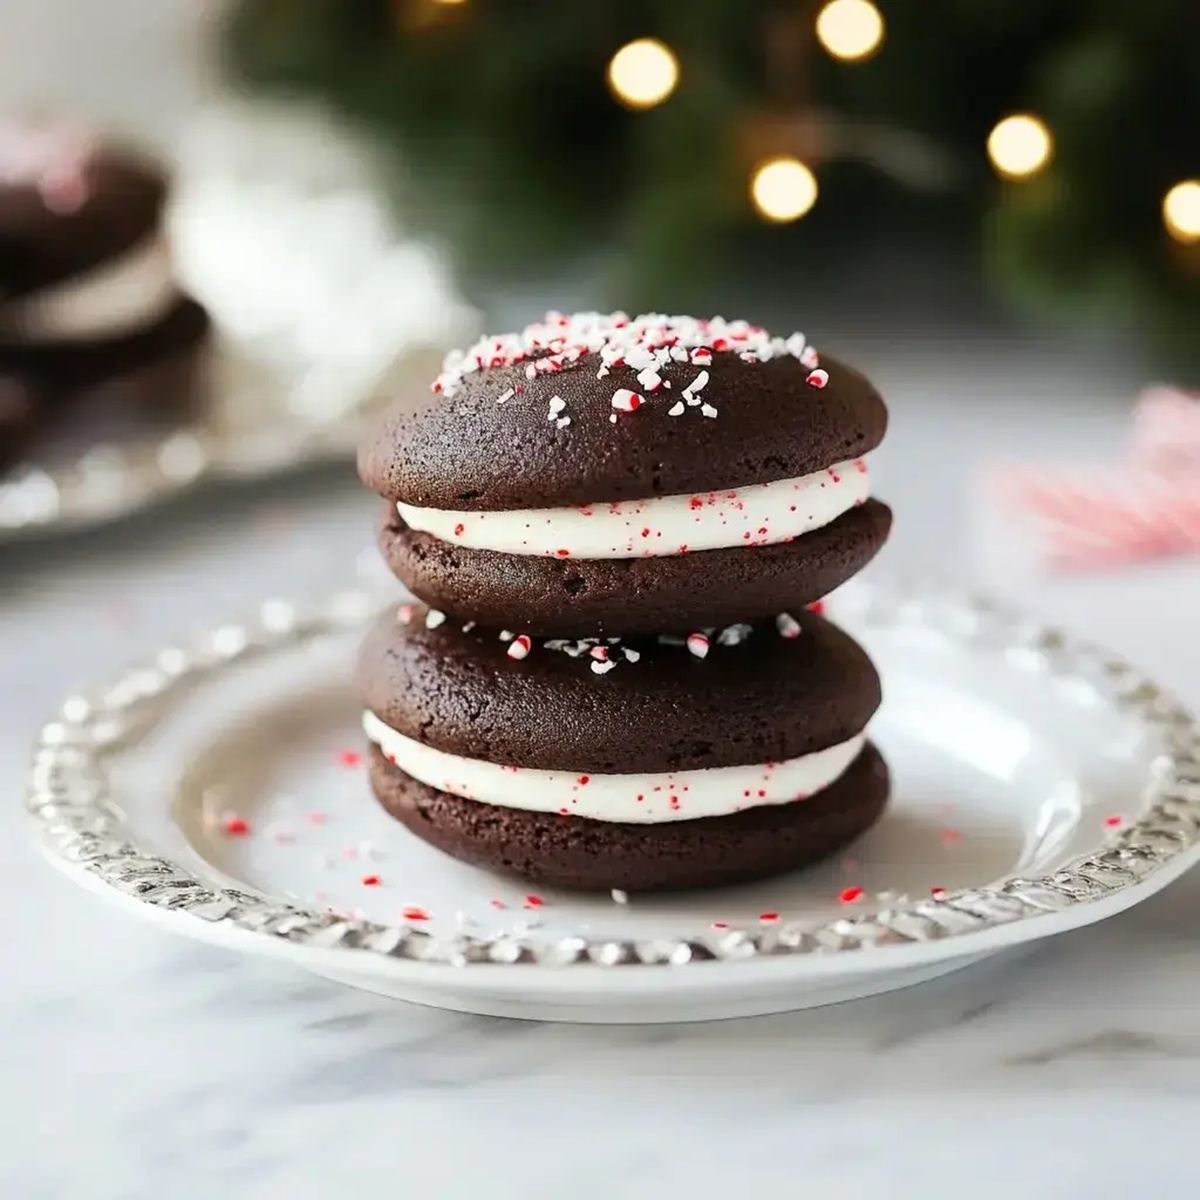
Roll the edges in crushed candy canes for a festive crunch and sparkle.
Tips for Fluffy Holiday Whoopie Pies

Ideas for Different Holiday Whoopie Pies
Presenting Holiday Whoopie Pies at Parties
Holiday Whoopie Pie Storage Instructions
FAQs
These whoopie pies are surprisingly easy to prepare. The recipe uses simple ingredients and straightforward mixing techniques that even beginner bakers can successfully complete.
Yes, you can make the cookies and filling in advance. The cookies can be stored in an airtight container for 2-3 days, and the filling can be refrigerated for up to a week before assembling.
The crushed candy canes rolled on the edges provide a festive peppermint touch, while the cocoa powder creates a rich chocolate base that screams holiday indulgence.
Print
Holiday Whoopie Pies Recipe
- Total Time: 57 minutes
- Yield: 12 1x
Description
Festive holiday whoopie pies combine classic American dessert charm with seasonal spices and rich cream filling. Chocolate cake-like cookies sandwich velvety peppermint frosting for a delightful winter treat you’ll savor with each delectable bite.
Ingredients
Main Ingredients:
- 2 cups all-purpose flour
- 1/2 cup cocoa powder
- 1 cup buttermilk
- 1 large egg
- 1 cup packed brown sugar
- 1/2 cup unsalted butter
Dry Ingredients:
- 1 teaspoon baking soda
- 3/4 teaspoon salt
Filling and Garnish Ingredients:
- 3/4 cup unsalted butter
- 1 1/4 cups confectioners’ sugar
- 2 1/2 cups marshmallow creme
- 1 teaspoon vanilla extract
- 1/2 teaspoon peppermint extract
- 1/8 teaspoon salt
- Crushed candy canes
Instructions
- Preheat the oven to 350°F and prepare baking sheets by lining them with parchment paper or silicone mats.
- Combine dry ingredients by whisking flour, cocoa powder, baking soda, and salt in a medium bowl until thoroughly blended.
- Create the cookie batter by creaming butter and brown sugar until light and fluffy, then incorporate egg and vanilla extract. Gradually mix in the dry ingredients, alternating with buttermilk to achieve a smooth consistency.
- Drop small dollops of batter (about 2 teaspoons each) onto prepared baking sheets, spacing them evenly. Bake for 10-12 minutes until cookie centers are springy and edges are set.
- Prepare the filling by whipping butter and sugar until creamy. Blend in vanilla and peppermint extracts, then fold in marshmallow creme. Chill the mixture in the refrigerator for 30 minutes to firm up.
- Assemble whoopie pies by spreading a generous layer of filling between two cooled cookies, creating sandwich-like treats.
- Finish by gently rolling the edges of the filled whoopie pies in crushed candy canes for a festive holiday touch and added crunch.
Notes
- Chill the marshmallow filling for at least 30 minutes to achieve a firmer, easier-to-spread consistency that won’t ooze out of the whoopie pies.
- Use room temperature ingredients like butter and egg to ensure smoother batter and more even cookie texture.
- Crush candy canes finely for a more even coating and to prevent large, sharp pieces that might make eating challenging.
- For a gluten-free version, swap wheat flour with a cup-for-cup gluten-free flour blend and ensure all other ingredients are gluten-free.
- Prep Time: 45 minutes
- Cook Time: 12 minutes
- Category: Desserts, Snacks
- Method: Baking
- Cuisine: American
Nutrition
- Serving Size: 12
- Calories: 270
- Sugar: 22 g
- Sodium: 130 mg
- Fat: 12 g
- Saturated Fat: 7 g
- Unsaturated Fat: 3 g
- Trans Fat: 0 g
- Carbohydrates: 36 g
- Fiber: 1 g
- Protein: 2 g
- Cholesterol: 30 mg
Clara Thompson
Recipe Developer & Food Educator
Expertise
Plant-based and vegetarian recipe development, Nutritional analysis and meal planning, Culinary education and workshop facilitation, Content writing with a focus on healthy living
Education
Diploma in Culinary Arts, Mt. San Jacinto College, CA
Focus: Comprehensive culinary training with an emphasis on sustainable cooking practices.
Certificate in Nutrition and Healthy Living, Cornell University (Online Program)
Focus: Understanding the principles of nutrition to create balanced and health-conscious recipes.
Clara lives where fresh ideas and fresh ingredients meet. She pairs her culinary know-how with her passion for healthy, planet-friendly cooking.
For Clara, good food should taste great, nourish your body, and feel easy to make. Her recipes highlight whole foods, colorful produce, and a deep respect for seasonal eating.