The Sweetest Hershey’s Red Velvet Blossoms Recipe Ever
Soft, pillowy cookies with a delightful chocolate kiss have become a beloved treat during holiday seasons.
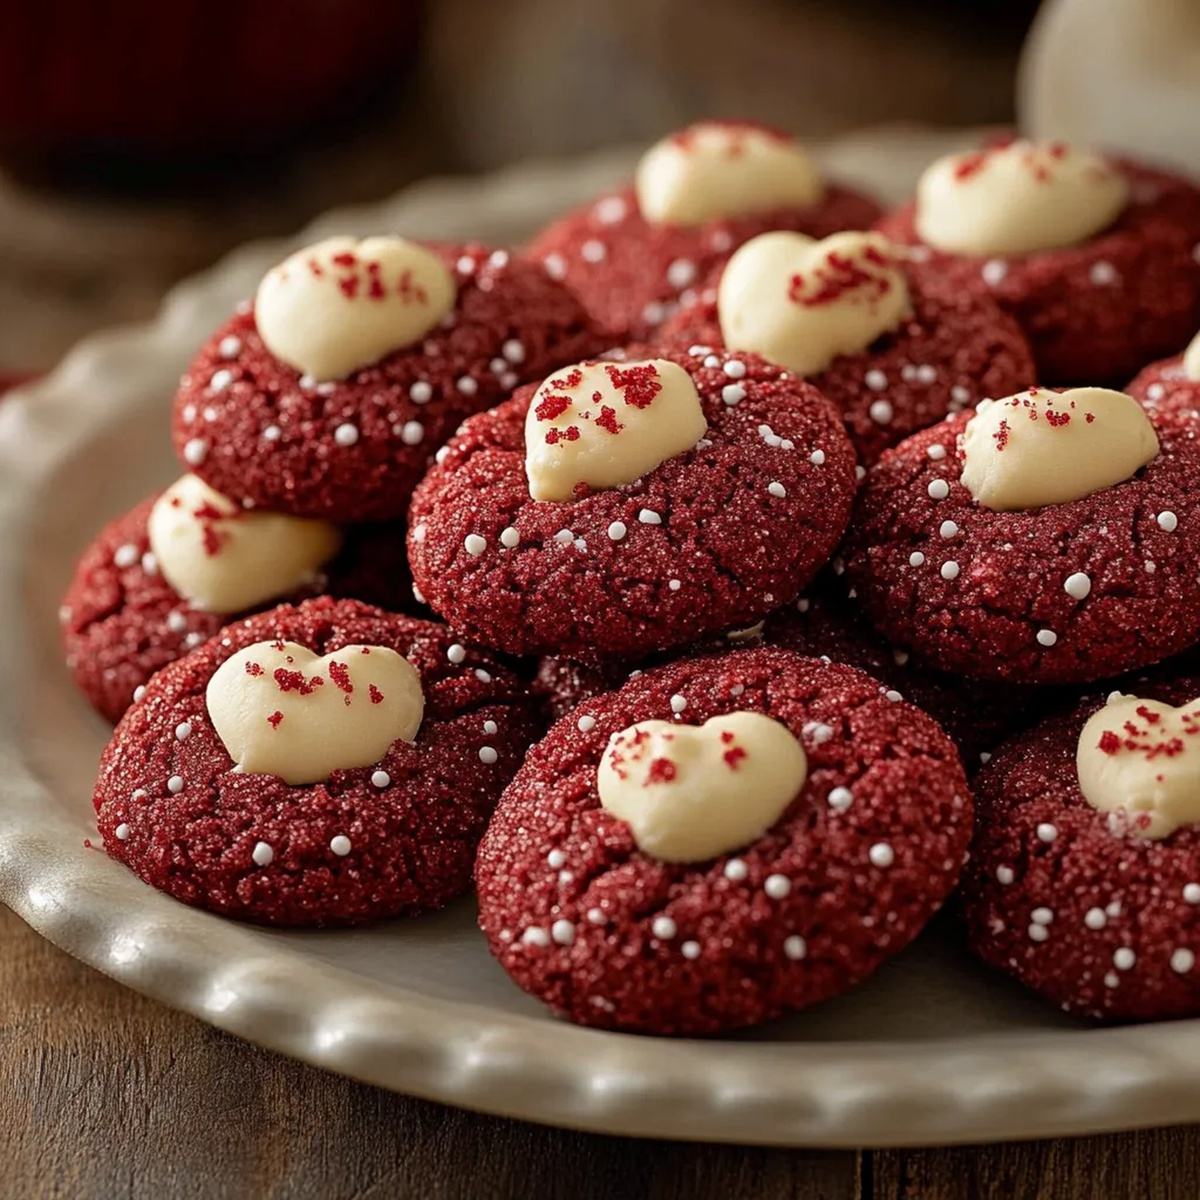
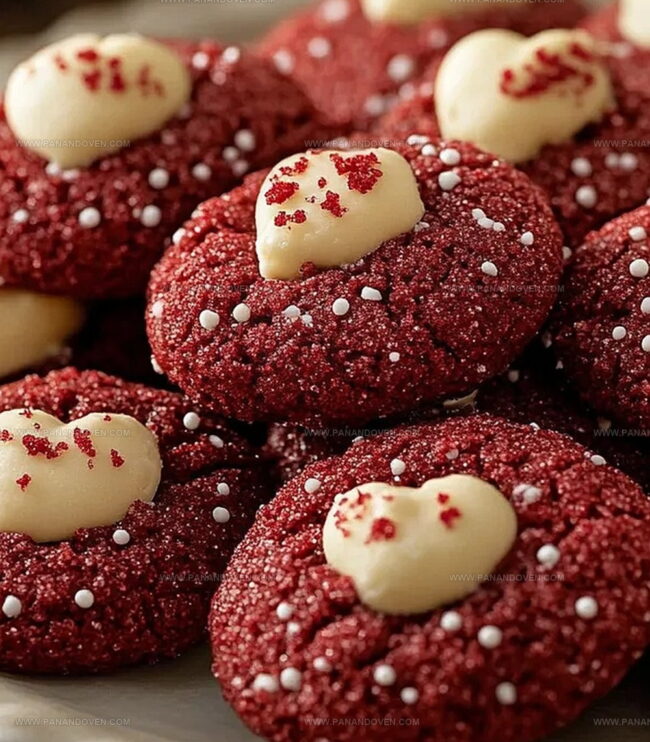
These decadent Hershey’s red velvet blossoms combine rich cocoa and vibrant red color into one irresistible bite.
Deep crimson dough swirls with classic blossom cookie techniques, creating a visually stunning dessert.
The smooth chocolate kiss nestled perfectly in the center adds a luxurious touch to each cookie.
Crumbly edges and a tender center make these blossoms melt in your mouth with every delectable bite.
Bakers of all skill levels can whip up these charming cookies in under an hour.
Serve these showstopping treats at your next gathering and watch everyone’s eyes light up with pure cookie delight.
Hershey’s Red Velvet Blossoms Highlights

Red Velvet Blossoms Ingredient Breakdown
Dry Ingredients:Wet Ingredients:Finishing Ingredients:Tools for Baking Hershey’s Red Velvet Blossoms
Baking Red Velvet Blossoms Directions
Step 1: Fire Up the Oven
Crank the oven to 350°F and grab a large baking sheet.
Line it with parchment paper to prevent any sticky situations.
Step 2: Whip Up the Creamy Base
In a stand mixer, blend butter and sugars until they’re smooth and dreamy.
Toss in:Mix until everything looks perfectly combined and vibrant.
Step 3: Create the Dough Magic
Fold in the dry ingredients until they disappear into the mixture:Stir gently until a soft dough forms.
Step 4: Roll and Sparkle
Scoop out 18 dough balls and roll them between your palms.
Give each ball a luxurious coating of red sanding sugar for extra pizzazz.
Step 5: Bake and Decorate
Pop the cookies into the oven for 10 minutes.
As soon as they come out, gently press a chocolate kiss into the center of each hot cookie.
Let them chill on the baking sheet for 10 minutes before transferring to a cooling rack.
Red Velvet Blossoms Baking Tips
Red Velvet Blossoms Creative Variations
Hershey’s Red Velvet Blossoms Serving Inspiration
Storage for Hershey’s Red Velvet Blossoms
FAQs
The red food coloring provides the classic red velvet appearance, creating a vibrant and eye-catching cookie that’s signature to red velvet desserts.
Yes, you can use a hand mixer or even mix by hand with a wooden spoon. Just ensure the butter and sugars are thoroughly creamed and ingredients are well combined.
The warm cookie slightly melts the bottom of the kiss, helping it stick and creating a beautiful presentation. The heat also softens the chocolate for a delightful texture contrast.
Use a cookie scoop or tablespoon to measure out equal amounts of dough. This helps ensure even baking and a consistent look for all your cookies.
Print
Hershey’s Red Velvet Blossoms Recipe
- Total Time: 30 minutes
- Yield: 24 1x
Description
Hershey’s red velvet blossoms blend classic cookie charm with romantic chocolate kisses. Rich crimson dough embraces silky chocolate, creating a delightful dessert perfect for celebrations and sweet moments you’ll savor.
Ingredients
Main Cookie Ingredients:
- 1 cup all-purpose flour
- 1 large egg yolk
- 1 tablespoon cocoa powder
- 7 tablespoons (99 grams) butter, softened
- 1/2 cup (100 grams) brown sugar
Wet and Flavor Ingredients:
- 2 tablespoons (25 grams) granulated sugar
- 1 teaspoon vanilla extract
- 1/4 teaspoon red food coloring gel
Dry and Finishing Ingredients:
- 1/2 teaspoon baking powder
- 1/4 teaspoon salt
- 1/4 cup (50 grams) red sanding sugar
- 18 Hershey’s chocolate kisses
Instructions
- Preheat the oven to 350°F and line a large baking sheet with parchment paper, ensuring even surface coverage.
- Using a stand mixer, cream butter and sugars until light and fluffy, creating a smooth base for the cookie dough.
- Incorporate egg yolk, vanilla extract, and red food coloring, mixing thoroughly to achieve a vibrant, consistent color.
- Gently fold in flour, cocoa powder, baking powder, and salt, stirring until the dry ingredients are just combined and no flour streaks remain.
- Form dough into 18 uniform balls, rolling each between palms to create smooth, round shapes.
- Roll each dough ball in red sanding sugar, ensuring complete and even coating for a sparkling exterior.
- Place coated dough balls on prepared baking sheet, spacing them evenly to allow proper spreading during baking.
- Bake for 10 minutes, creating a soft, slightly cracked cookie surface.
- Immediately after removing from oven, gently press a chocolate kiss into the center of each hot cookie, allowing the heat to slightly melt the chocolate.
- Allow cookies to cool on the baking sheet for 10 minutes to set the structure, then transfer to a wire cooling rack to complete cooling.
Notes
- Customize color by adjusting food coloring intensity for deeper or lighter red velvet shade.
- Swap traditional chocolate kiss with caramel, peanut butter, or white chocolate kiss for unique flavor variations.
- Ensure butter is softened at room temperature for smoother dough and better cookie texture.
- Chill dough for 30 minutes before rolling if it feels too sticky, helping maintain perfect cookie shape during baking.
- Prep Time: 20 minutes
- Cook Time: 10 minutes
- Category: Desserts, Snacks
- Method: Baking
- Cuisine: American
Nutrition
- Serving Size: 24
- Calories: 130
- Sugar: 8 g
- Sodium: 70 mg
- Fat: 5 g
- Saturated Fat: 3 g
- Unsaturated Fat: 2 g
- Trans Fat: 0 g
- Carbohydrates: 18 g
- Fiber: 0.5 g
- Protein: 1.5 g
- Cholesterol: 15 mg
Clara Thompson
Recipe Developer & Food Educator
Expertise
Plant-based and vegetarian recipe development, Nutritional analysis and meal planning, Culinary education and workshop facilitation, Content writing with a focus on healthy living
Education
Diploma in Culinary Arts, Mt. San Jacinto College, CA
Focus: Comprehensive culinary training with an emphasis on sustainable cooking practices.
Certificate in Nutrition and Healthy Living, Cornell University (Online Program)
Focus: Understanding the principles of nutrition to create balanced and health-conscious recipes.
Clara lives where fresh ideas and fresh ingredients meet. She pairs her culinary know-how with her passion for healthy, planet-friendly cooking.
For Clara, good food should taste great, nourish your body, and feel easy to make. Her recipes highlight whole foods, colorful produce, and a deep respect for seasonal eating.