The Crispiest Hawaiian Garlic Fried Chicken Recipe Ever
Crispy, golden chicken takes a delightful tropical turn with this Hawaiian garlic fried chicken recipe that promises explosive flavor in every bite.
The blend of Asian and Pacific influences creates a mouthwatering dish bursting with aromatic garlic and tangy notes.
You’ll love how the simple ingredients come together to craft something extraordinary.
Marinating the chicken ensures deep, rich flavors penetrate every morsel.
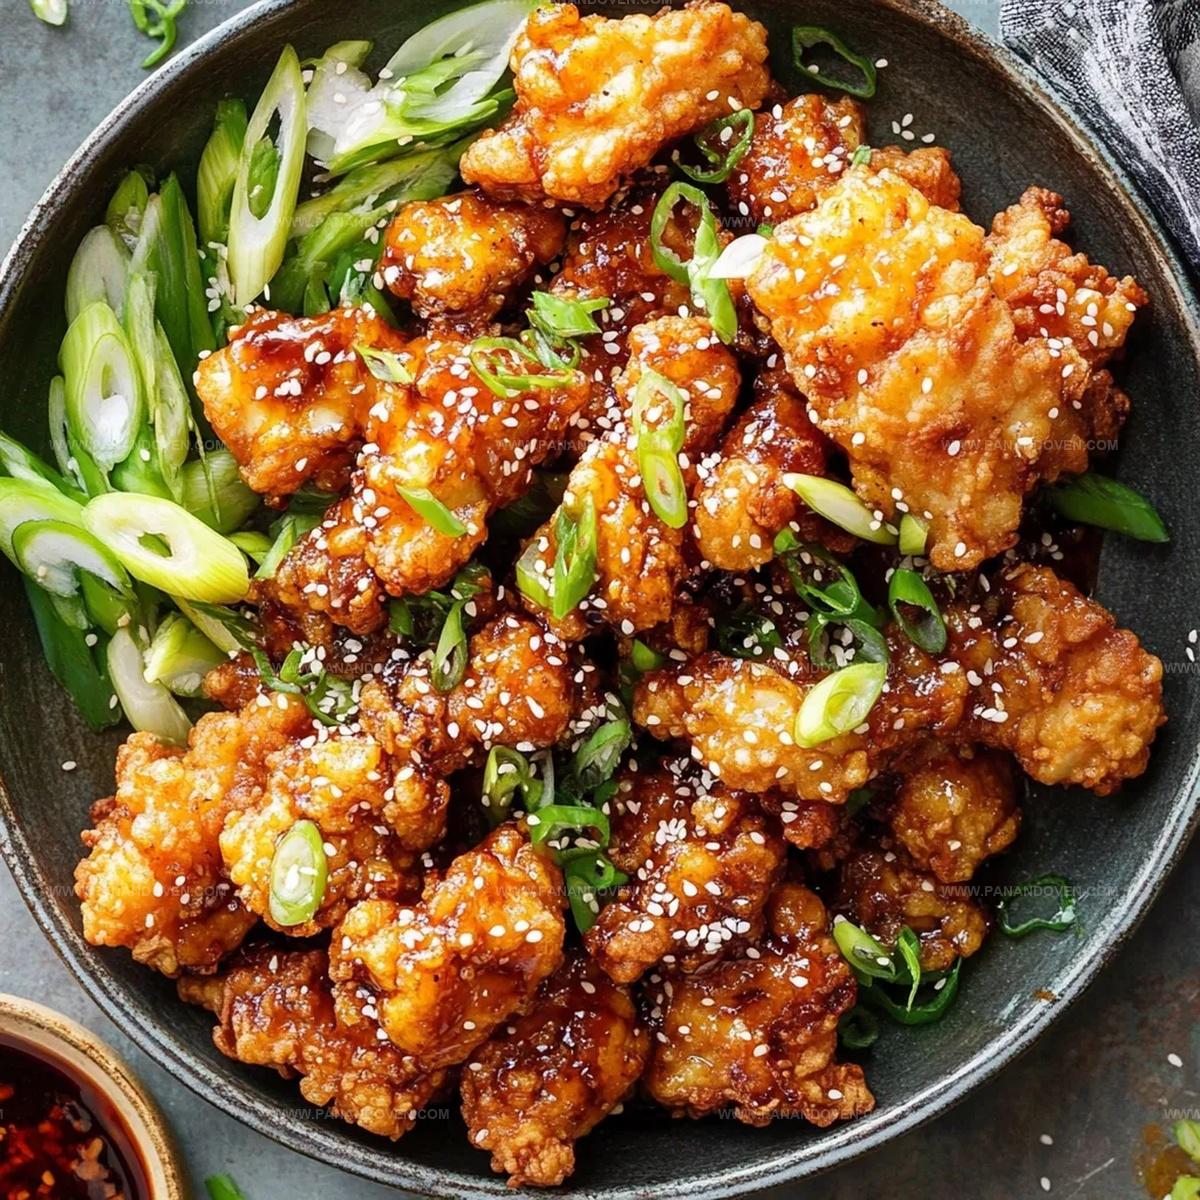
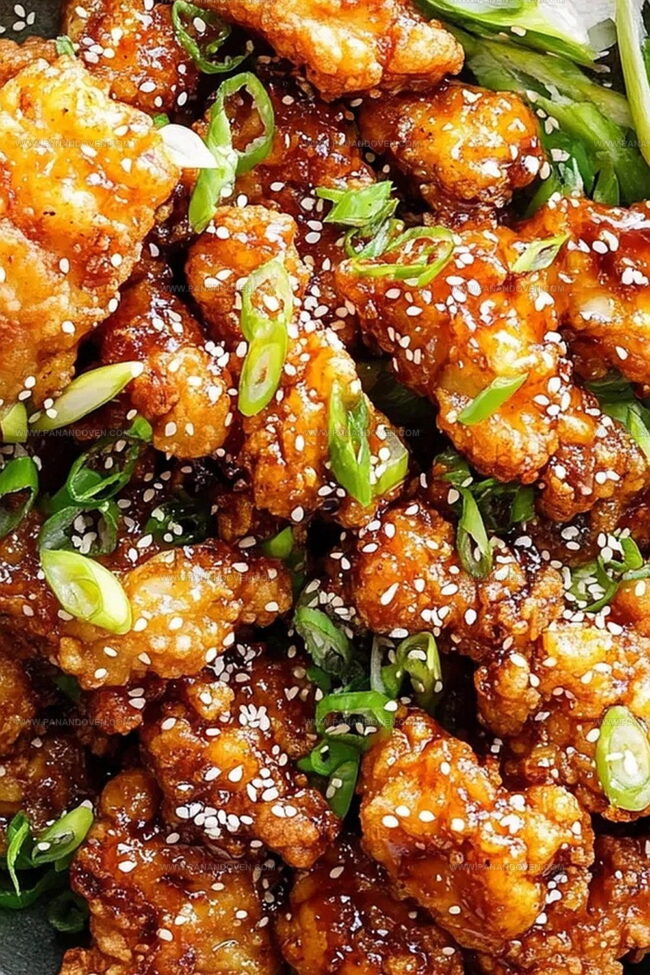
Each piece emerges from the pan with a perfect golden-brown crust that crackles with each bite.
The recipe transforms ordinary chicken into a celebration of Hawaiian-inspired cuisine.
This crowd-pleasing dish will have everyone asking for seconds and begging for your secret.
Hawaiian Garlic Fried Chicken – Why It’s Irresistible
The Ingredients That Make Hawaiian Garlic Fried Chicken
Main Proteins:Coating Ingredients:Frying Ingredients:Sauce Ingredients:Equipment Needed for Hawaiian Garlic Fried Chicken
Instructions for Crisp Hawaiian Garlic Fried Chicken
Step 1: Prepare Chicken Chunks
Cut chicken into bite-sized pieces.
In a bowl, combine potato starch, garlic powder, and salt.
Coat chicken pieces thoroughly in the mixture.
Refrigerate for at least one hour or overnight to enhance flavor and texture.
Step 2: Set Up Frying Station
Select a heavy-bottomed pan and fill with vegetable oil to about 3/4 inch depth.
Heat oil to 175 degrees Fahrenheit or use medium heat setting if no thermometer is available.
Step 3: First Frying Round
Carefully drop chicken pieces into hot oil, avoiding overcrowding.
Fry until lightly browned, approximately 8-10 minutes.
Remove chicken using a slotted spoon and place on paper towels to drain excess oil.
Step 4: Double Fry for Ultimate Crispiness
After a brief 1-2 minute rest, return chicken to hot oil.
Fry for an additional 2-3 minutes until achieving a golden brown color.
Transfer back to paper towels to drain.
Step 5: Create Hawaiian Sauce
In a large bowl, combine:Stir ingredients until well mixed and fully incorporated.
Step 6: Final Toss and Serve
While chicken remains hot, toss pieces in prepared Hawaiian sauce.
Ensure each piece is generously coated.
Serve immediately to enjoy maximum crispiness and flavor.
Handy Tips for Crunchy Hawaiian Garlic Fried Chicken
Flavor Variations for Hawaiian Garlic Fried Chicken

Serving Ideas for Hawaiian Garlic Fried Chicken
How to Store Hawaiian Garlic Fried Chicken Perfectly
FAQs
Potato starch helps create an extra crispy coating on the chicken by absorbing moisture and forming a light, crunchy exterior when fried.
Double-frying is a technique that ensures the chicken becomes incredibly crispy on the outside while remaining juicy and tender on the inside. The first fry cooks the chicken, and the second fry creates that perfect golden-brown crunch.
If you don’t have chili garlic sauce, you can use sriracha or sambal oelek as alternatives. These will provide a similar spicy kick to the Hawaiian-style sauce.
Print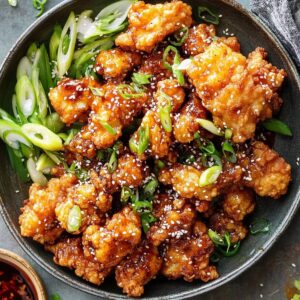
Hawaiian Garlic Fried Chicken Recipe
- Total Time: 1 hour 27 minutes
- Yield: 4 1x
Description
Crispy Hawaiian garlic fried chicken brings island flavors to your plate with bold, tangy seasonings. Marinated in soy sauce and garlic, this dish delivers authentic Hawaiian taste that you will crave again and again.
Ingredients
Main Ingredients:
- 2 lbs (907 grams) boneless, skinless chicken breasts or thighs
Dry Coating Ingredients:
- 3/4 cup (90 grams) potato starch
- 1 teaspoon garlic powder
- 1 teaspoon salt
Sauce Ingredients:
- 1/2 cup (120 milliliters) shoyu (Japanese soy sauce)
- 1/2 cup green onions, diced
- 1/3 cup (66 grams) brown sugar
- 2 tablespoons chili garlic sauce
- 1 tablespoon sesame seeds
- 2 cloves garlic, minced
- 2 teaspoons sesame oil
- Vegetable oil for frying
Instructions
- Prepare chicken chunks to a consistent bite-sized dimension, ensuring uniform cooking. Blend potato starch, garlic powder, and salt in a mixing vessel. Thoroughly coat chicken pieces in the seasoned mixture, then refrigerate for minimum 1 hour to enhance flavor absorption.
- Fill a heavy-bottomed pan with vegetable oil approximately 3/4 inch deep. Target oil temperature at 175 degrees fahrenheit using a food thermometer. Alternatively, set burner to medium heat for optimal frying conditions.
- Carefully introduce chicken pieces into hot oil, avoiding overcrowding. Fry until edges turn light golden brown, approximately 8-10 minutes. Remove chicken using a slotted spoon and transfer to paper towel-lined surface to drain excess oil.
- Execute the double-fry technique for maximum crispiness. After a brief 1-2 minute rest, return chicken to hot oil. Fry an additional 2-3 minutes until achieving a deep golden exterior. Drain again on fresh paper towels.
- Combine sauce ingredients in a spacious mixing bowl: shoyu, diced green onions, brown sugar, chili garlic sauce, sesame seeds, minced garlic, and sesame oil. Whisk thoroughly until ingredients integrate completely.
- While chicken remains piping hot, toss pieces in prepared sauce, ensuring complete and even coating. Immediately transfer to serving dish, preserving the crispy texture and vibrant flavor profile.
Notes
- Ensure chicken pieces are uniform in size for even cooking and consistent crispiness.
- Marinate chicken in potato starch mixture overnight to enhance flavor absorption and create a crunchier exterior.
- Use a candy or deep-fry thermometer for precise oil temperature control, preventing soggy or burnt chicken.
- Drain fried chicken on wire racks instead of paper towels to maintain maximum crispiness by preventing steam buildup.
- Adjust chili garlic sauce quantity based on personal spice tolerance for customized heat levels.
- Consider gluten-free alternatives like tamari instead of shoyu for those with wheat sensitivities.
- Prep all sauce ingredients beforehand to streamline the final tossing step and keep chicken warm.
- Prep Time: 1 hour 15 minutes
- Cook Time: 12 minutes
- Category: Dinner, Snacks
- Method: Frying
- Cuisine: Hawaiian
Nutrition
- Serving Size: 4
- Calories: 450
- Sugar: 10 g
- Sodium: 800 mg
- Fat: 20 g
- Saturated Fat: 3 g
- Unsaturated Fat: 15 g
- Trans Fat: 0 g
- Carbohydrates: 40 g
- Fiber: 1 g
- Protein: 30 g
- Cholesterol: 90 mg
Clara Thompson
Recipe Developer & Food Educator
Expertise
Plant-based and vegetarian recipe development, Nutritional analysis and meal planning, Culinary education and workshop facilitation, Content writing with a focus on healthy living
Education
Diploma in Culinary Arts, Mt. San Jacinto College, CA
Focus: Comprehensive culinary training with an emphasis on sustainable cooking practices.
Certificate in Nutrition and Healthy Living, Cornell University (Online Program)
Focus: Understanding the principles of nutrition to create balanced and health-conscious recipes.
Clara lives where fresh ideas and fresh ingredients meet. She pairs her culinary know-how with her passion for healthy, planet-friendly cooking.
For Clara, good food should taste great, nourish your body, and feel easy to make. Her recipes highlight whole foods, colorful produce, and a deep respect for seasonal eating.