Heavenly Hawaiian Butter Mochi Recipe: Tropical Sweetness Awaits
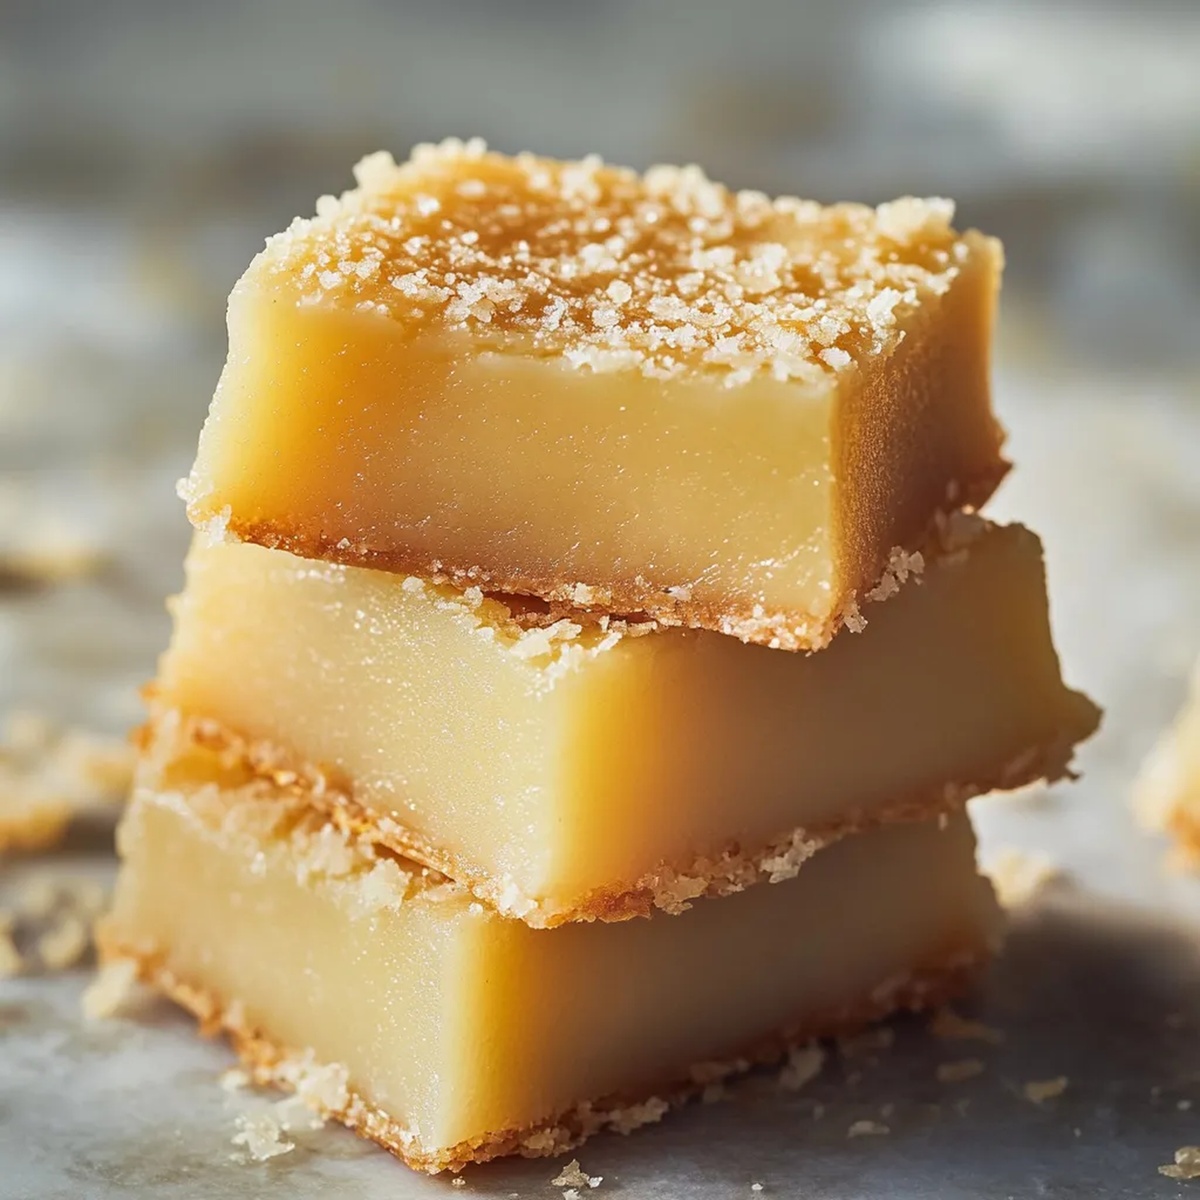
Soft, chewy, and utterly irresistible, this Hawaiian butter mochi recipe brings the sweet essence of island cuisine straight to your kitchen.
mochi lovers will adore the unique texture that blends traditional Japanese techniques with tropical Hawaiian flavors.
The delicate balance of glutinous rice flour and rich butter creates a dessert that melts in your mouth.
Every bite promises a delightful combination of sweetness and subtle richness that dance across your palate.
Coconut milk adds a creamy depth that transforms this simple treat into something truly spectacular.
You won’t be able to resist the temptation of these golden, pillowy squares that offer a perfect blend of comfort and exotic charm.
Prepare to fall in love with a dessert that celebrates the vibrant culinary heritage of Hawaii.
Hawaiian Butter Mochi: Island Inspiration
Hawaiian Butter Mochi: Shopping List
Flour Base:Sweeteners:Wet Ingredients:Leavening and Seasoning:Toppings:Tools for Making Hawaiian Butter Mochi
Steps to Craft Hawaiian Butter Mochi
Step 1: Warm Up the Oven
Slide a rack to the middle of the oven and crank up the heat to 350°F.
Grab a 9×13-inch baking pan and give it a quick butter or oil massage to prevent sticking.
Melt that delicious butter until it’s smooth and glossy.
Step 2: Whisk Dry Ingredients
Grab a large mixing bowl and toss in:Whisk these dry friends together until they’re perfectly blended.
Step 3: Blend Wet Ingredients
In a separate bowl, combine:Whisk these wet buddies until they’re singing in harmony.
Step 4: Create the Magical Batter
Pour the wet ingredients into the dry ingredients.
Grab a wooden spoon and stir until everything looks well-acquainted.
Now add the melted butter and coconut milk.
Mix until the batter looks smooth and dreamy.
Step 5: Prepare for Baking
Transfer the batter to your prepared pan.
Give the pan a few gentle taps on the counter to kick out any sneaky air bubbles.
Step 6: Add Delightful Toppings
Sprinkle shredded coconut across the top like a tropical snowfall.
If you’re feeling adventurous, add a pinch of flaky salt for an extra flavor punch.
Step 7: Bake to Perfection
Slide the pan into the oven and bake until the top turns a gorgeous golden brown.
This typically takes about 60-70 minutes.
Step 8: Cool and Slice
Let the mochi cool completely on a wire rack for about an hour.
Grab a plastic knife (buttered up to prevent sticking) and slice into 20 rectangular pieces of pure Hawaiian happiness.
Butter Mochi Baking Wisdom
Butter Mochi: Sweet and Savory Twists
Serving Suggestions for Butter Mochi
Storage Guide for Hawaiian Butter Mochi
FAQs
Mochiko flour is a sweet rice flour made from glutinous rice. It’s crucial for creating the unique chewy, bouncy texture that defines Hawaiian butter mochi, giving the dessert its signature mochi-like consistency.
Yes, this recipe is naturally gluten-free since mochiko flour does not contain wheat. Just ensure all other ingredients like baking powder are also certified gluten-free to avoid cross-contamination.
While they share similar ingredients, Hawaiian butter mochi is a local Hawaii fusion dessert that combines Japanese mochi techniques with American baking styles, resulting in a more cake-like texture compared to traditional Japanese mochi.
Print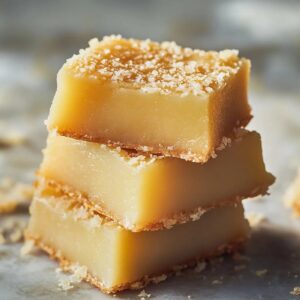
Hawaiian Butter Mochi Recipe
- Total Time: 1 hour 30 minutes
- Yield: 16 1x
Description
Luscious Hawaiian butter mochi showcases island flavors in a delightful dessert. Chewy, sweet squares deliver pure comfort with rich coconut and butter notes you’ll savor to the last crumb.
Ingredients
Main Ingredients:
- 1 pound mochiko flour (sweet rice flour)
- 2 cups granulated sugar
- 1 can (13.5 ounces) unsweetened coconut milk
- 2 cups milk, any fat percentage
Wet Ingredients:
- 4 large eggs
- 1 stick (8 tablespoons) unsalted butter, melted, plus more for pan
- 2 teaspoons vanilla extract
Dry and Topping Ingredients:
- 2 teaspoons baking powder
- 1/2 teaspoon kosher salt
- 1/2 cup unsweetened shredded coconut
- Flaky salt (optional)
Instructions
- Preheat oven to 350°F with rack positioned in the middle. Generously grease a 9×13-inch baking pan to prevent sticking. Melt butter thoroughly.
- In a large mixing bowl, combine mochiko flour, granulated sugar, baking powder, and kosher salt using a whisk until evenly distributed.
- Separately, whisk milk, eggs, and vanilla extract in a medium bowl until smooth and well integrated.
- Gradually pour wet ingredients into dry ingredients. Stir with a wooden spoon until mixture becomes uniform. Incorporate melted butter and coconut milk, mixing until batter achieves a silky, consistent texture.
- Transfer batter into prepared pan, gently tapping the pan against the counter surface to eliminate potential air pockets.
- Distribute shredded coconut uniformly across the batter’s surface. Optionally sprinkle flaky salt for enhanced flavor complexity.
- Bake for 60-70 minutes until top turns golden brown and center appears set. The mochi should have a slight wobble when gently shaken.
- Remove from oven and allow complete cooling on a wire rack for approximately one hour. Use a plastic knife lightly coated with butter to slice into 20 rectangular pieces, ensuring clean cuts.
Notes
- Adjust Sweetness Experiment with reducing sugar for a less sweet version or try alternative sweeteners like honey or coconut sugar for unique flavor profiles.
- Gluten-Free Friendly Mochiko flour naturally makes this recipe gluten-free, perfect for those with wheat sensitivities or celiac disease.
- Texture Tricks Tapping the pan removes air bubbles, ensuring a smooth, dense mochi with consistent texture throughout the dessert.
- Storage Hack Keep Hawaiian butter mochi at room temperature in an airtight container for 2-3 days or refrigerate for up to a week, maintaining its soft, chewy consistency.
- Prep Time: 20 minutes
- Cook Time: 1 hour 10 minutes
- Category: Desserts, Snacks
- Method: Baking
- Cuisine: Hawaiian
Nutrition
- Serving Size: 16
- Calories: 295
- Sugar: 22 g
- Sodium: 90 mg
- Fat: 12 g
- Saturated Fat: 7 g
- Unsaturated Fat: 4 g
- Trans Fat: 0 g
- Carbohydrates: 41 g
- Fiber: 1 g
- Protein: 5 g
- Cholesterol: 60 mg
Clara Thompson
Recipe Developer & Food Educator
Expertise
Plant-based and vegetarian recipe development, Nutritional analysis and meal planning, Culinary education and workshop facilitation, Content writing with a focus on healthy living
Education
Diploma in Culinary Arts, Mt. San Jacinto College, CA
Focus: Comprehensive culinary training with an emphasis on sustainable cooking practices.
Certificate in Nutrition and Healthy Living, Cornell University (Online Program)
Focus: Understanding the principles of nutrition to create balanced and health-conscious recipes.
Clara lives where fresh ideas and fresh ingredients meet. She pairs her culinary know-how with her passion for healthy, planet-friendly cooking.
For Clara, good food should taste great, nourish your body, and feel easy to make. Her recipes highlight whole foods, colorful produce, and a deep respect for seasonal eating.