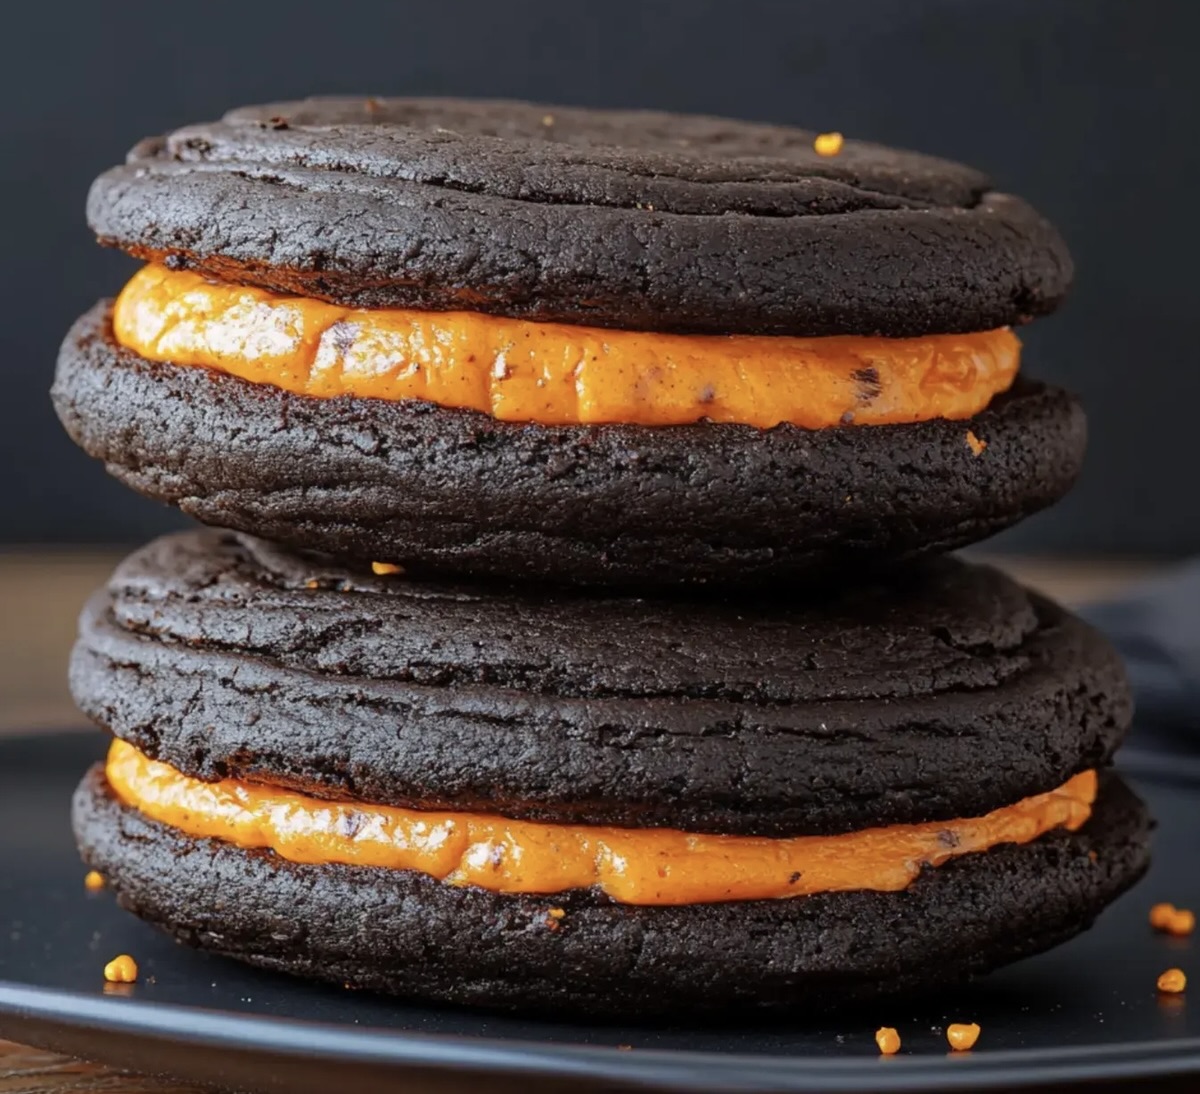
Spooky Halloween Whoopie Pies Recipe: Fun Festive Treats
Chocolate lovers rejoice as these delectable Halloween whoopie pies bring spooky sweetness to your dessert table.
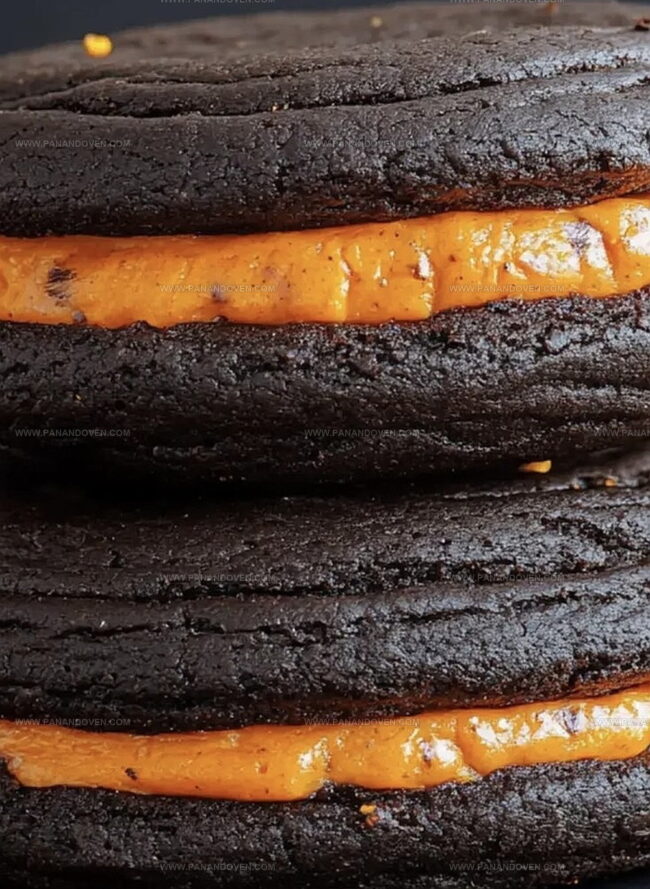
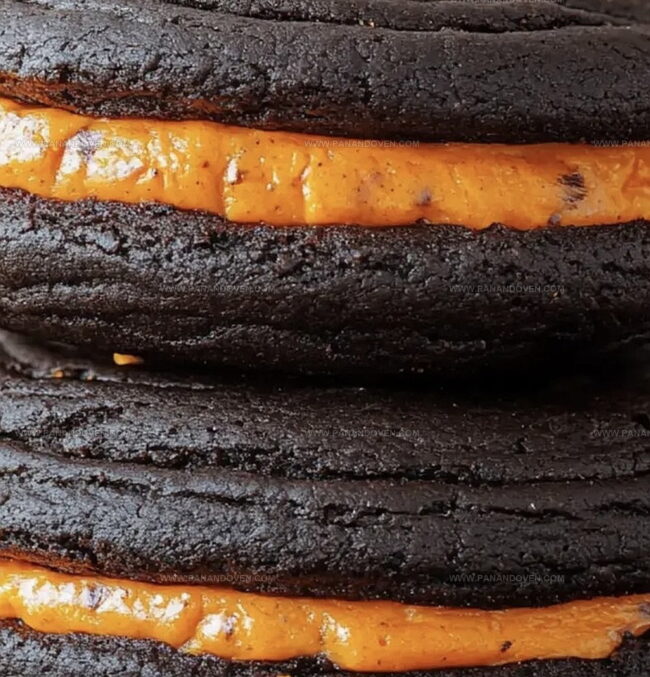
Dark, decadent cake-like cookies sandwich a creamy marshmallow filling that screams festive fun.
Rich cocoa and soft textures combine in a treat that captures the playful spirit of Halloween.
The pillowy chocolate whoopie pies offer a delightful twist on traditional Halloween sweets.
Swirls of orange and black frosting add a festive touch to these irresistible confections.
Each bite promises a perfect balance of moist cake and silky filling that will delight both kids and adults.
Prepare to indulge in a Halloween dessert that’s sure to become a seasonal favorite.
Why Everyone Loves Festive Halloween Whoopie Pies
Ingredients for Fun and Festive Whoopie Pies
Must-Have Tools for Halloween Whoopie Pie Making

Directions for Spooky Halloween Whoopie Pies
Step 1: Warm Up the Oven
Turn the oven to 350 degrees Fahrenheit.
This will create the perfect baking environment for your spooky treats.
Step 2: Whip Up the Batter
Grab your mixer and toss in:Blend everything on medium speed until the mixture looks smooth and delicious.
Step 3: Create Cake Circles
Choose your whoopie pie size:
For larger pies: Scoop 18 round portions onto a Silpat-lined baking sheet
For smaller pies: Create 36 tiny cake circles
Make sure the batter circles are evenly spaced and somewhat uniform.
Step 4: Bake to Perfection
Pop the baking sheet into the preheated oven.
Bake for 7-10 minutes, watching carefully.
The cakes should look set but not overdone.
Remove and let them cool completely.
Step 5: Mix Haunting Icing
Transform plain vanilla icing into a vibrant orange by adding orange food coloring gel.
Stir until you achieve a rich, Halloween-worthy shade.
Step 6: Sandwich the Pies
Take one cake and pipe the orange icing onto its flat side.
Gently place another cake on top to create a delightful sandwich.
Step 7: Add Spooky Sparkle
Sprinkle edible black glitter over the tops of your whoopie pies for an extra magical touch.
Step 8: Get Creative with Decorations
Turn your whoopie pies into Halloween characters:Pro Tricks for Whoopie Pies That Stand Out

Tasty Whoopie Pie Variations for Any Party
How to Serve Halloween Whoopie Pies for Smiles

Storing Whoopie Pies to Keep Them Soft and Fresh
FAQs
Yes, you can substitute with a homemade Devil’s food cake recipe. Just ensure the batter consistency is similar to the boxed mix for best results.
Use a silicone baking mat or parchment paper, and make sure your batter is chilled slightly. Don’t overmix the batter, as this can cause excessive spreading.
Use an ice cream scoop or piping bag for consistent size and shape. Gently smooth the batter with the back of a spoon to create even circles before baking.
Print
Halloween Whoopie Pies Recipe
- Total Time: 30 minutes
- Yield: 12 1x
Description
Spooky halloween whoopie pies combine chocolate cake-like cookies with creamy marshmallow filling for a festive treat. Ghostly decorations and orange-tinted frosting make these classic desserts perfect for seasonal celebrations you’ll enjoy creating and sharing.
Ingredients
Main Ingredients:
- 1 15.25 ounces (432 grams) Devil’s Food cake mix
- 3 eggs
- 1 4-serving box chocolate fudge instant pudding
- 1/2 cup (120 milliliters) vegetable oil
- 3/4 cup (180 milliliters) water
Frosting and Decorations:
- 2 16 ounces (907 grams) tubs vanilla cake icing
- Orange food coloring gel
- Edible black glitter
- Powdered sugar
- Candy eyes
Garnish:
- Black licorice
Instructions
- Preheat the oven to 350°F, ensuring the rack is positioned in the center for even baking.
- In a spacious mixing bowl, amalgamate the Devil’s food cake mix with water, vegetable oil, eggs, and pudding mix. Utilize an electric mixer to blend the ingredients thoroughly until a smooth, consistent batter emerges.
- Select your preferred Whoopie Pie size: for larger versions, distribute 18 uniform batter portions onto a Silpat-lined baking sheet, carefully crafting circular shapes. For petite treats, create 36 delicate batter rounds.
- Transfer the baking sheet to the preheated oven and bake for 7-10 minutes, monitoring the cakes’ texture until they achieve a soft, springy consistency. Allow the cakes to cool completely at room temperature.
- Transform vanilla icing into a vibrant Halloween palette by incorporating orange food coloring gel, stirring until the desired intense hue is achieved.
- Construct the Whoopie Pies by applying a generous layer of orange-tinted icing onto the flat surface of one cake, then gently pressing a second cake on top to form a delectable sandwich.
- Enhance the festive appearance by delicately sprinkling edible black glitter across the Whoopie Pie surfaces, creating a sparkling Halloween effect.
- For an extra creative touch, experiment with powdered sugar stenciling or craft whimsical spider-themed Whoopie Pies by attaching black licorice legs and playful candy eyes.
Notes
- Customize cake mix by swapping devil’s food for other flavors like chocolate or spice cake for varied Halloween themes.
- Ensure even baking by using a cookie scoop or piping bag to create uniform cake circles with consistent sizes.
- Prevent sticky mess by chilling the iced Whoopie Pies for 15 minutes before serving, which helps set the frosting and creates cleaner edges.
- Boost moisture by adding a tablespoon of sour cream or Greek yogurt to the cake batter, creating a softer, more tender texture.
- Prep Time: 20 minutes
- Cook Time: 10 minutes
- Category: Desserts, Snacks
- Method: Baking
- Cuisine: American
Nutrition
- Serving Size: 12
- Calories: 270
- Sugar: 21g
- Sodium: 320mg
- Fat: 12g
- Saturated Fat: 2g
- Unsaturated Fat: 8g
- Trans Fat: 0g
- Carbohydrates: 36g
- Fiber: 1g
- Protein: 3g
- Cholesterol: 25mg
Marcus Reed
Founder & Food Content Creator
Expertise
Single-recipe development, Seasonal and local ingredient utilization, Food photography and styling, Culinary writing and content creation
Education
Culinary Arts Certificate, Blue Ridge Community and Technical College, WV
Focus: Fundamentals of culinary techniques, emphasizing hands-on experience in small-scale kitchen settings.
Marcus’s story begins in Asheville, where good food and family kitchens shaped his earliest memories. After hands-on culinary training and a lot of trial (and a little error), he realized that real cooking isn’t about perfection, it’s about connection.
At Pan and Oven, Marcus crafts recipes that are easy to follow, packed with flavor, and built for real kitchens.