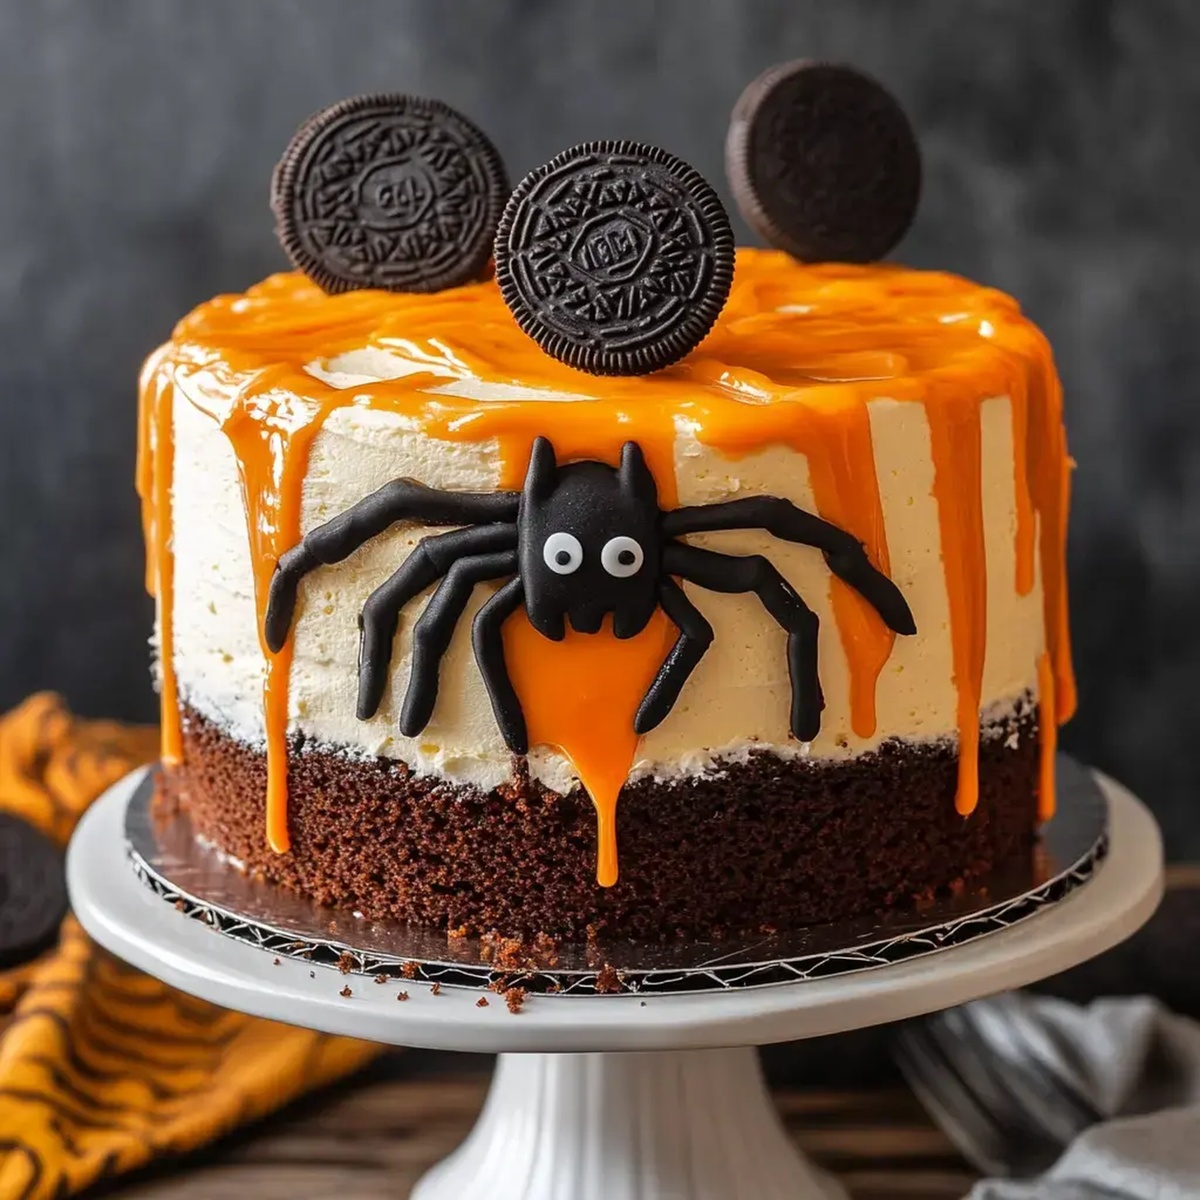
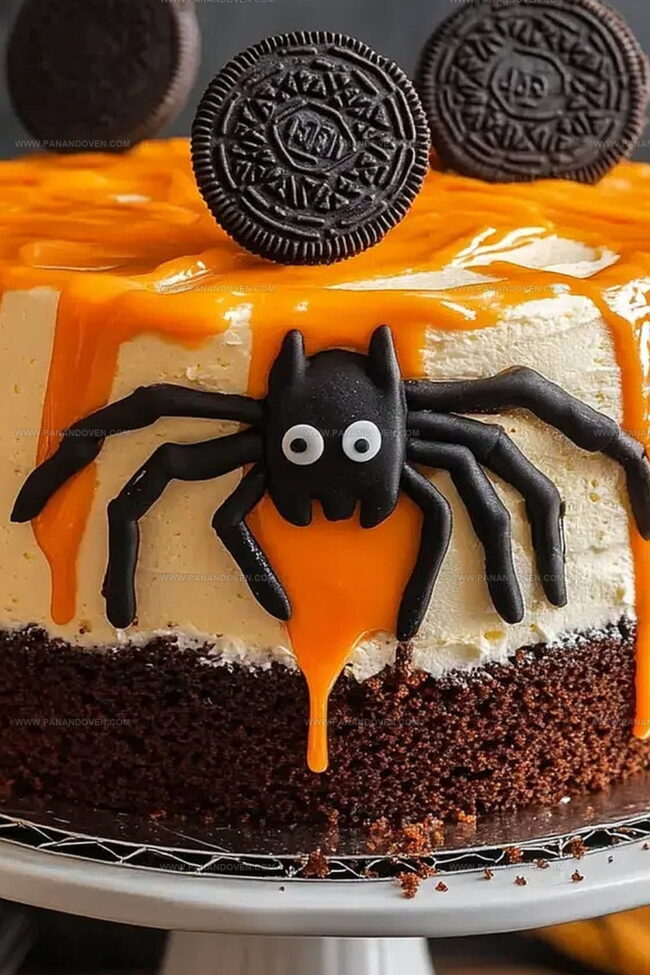
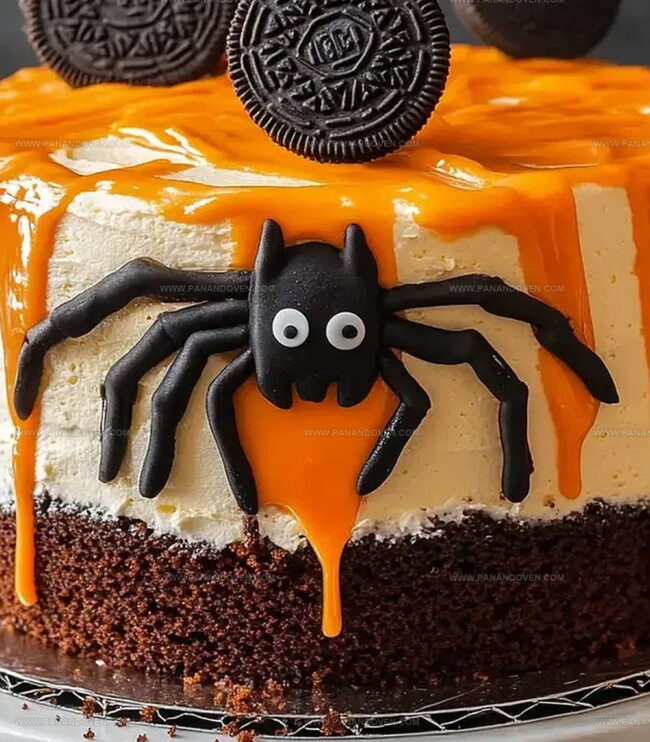
The Spookiest Halloween Spider Cake Recipe Ever Made
Creepy crawly desserts reach a whole new level with this delightful Halloween spider cake that will send shivers down your spine.
Dark chocolate layers intertwine with silky frosting, creating a wickedly delicious masterpiece.
Spooky decorations transform an ordinary cake into a showstopping centerpiece for any ghoulish gathering.
Intricate spider web designs and chocolate details bring this haunting treat to life.
Each slice promises a delectable blend of rich flavors and spine-tingling visual appeal.
Chocolate lovers and Halloween enthusiasts will adore this wickedly sweet creation that’s sure to be the star of any festive celebration.
Prepare to impress and delight with this sinfully good Halloween spider cake that’s as fun to make as it is to devour.
Halloween Spider Cake What Makes It Spooky and Delicious
Ingredients for Halloween Spider Cake Fun
Cake Base:Frostings:Decorative Elements:Equipment for Spider Cake Baking and Decorating
Steps for Creating a Halloween Spider Cake
Step 1: Warm Up The Oven
Preheat your oven and grab three 6-inch cake pans.
Spray them with cooking spray or brush with butter.
Mix cake batter following box instructions, adding orange food coloring to create a vibrant Halloween hue.
Pour batter evenly into prepared pans and bake until a toothpick comes out clean.
Step 2: Whip Up Magical Frostings
Create two delightful frosting varieties:Step 3: Build Your Spooky Cake Tower
Place first cake layer on serving plate.
Spread vanilla buttercream around edges as a protective border.
Fill center with black chocolate frosting.
Repeat layering process for remaining cake layers.
Step 4: Frost The Haunting Exterior
Cover entire cake with smooth vanilla buttercream, creating a clean canvas for your spider design.
Step 5: Weave Creepy Cobwebs
Use a piping bag with a narrow tip to draw intricate black spider web patterns across cake top and sides.
Start from center and create delicate connected lines.
Step 6: Spider Invasion
Tips for Spooky Cake Perfection
Spider Cake Flavor Ideas and Decorations
Serving Halloween Spider Cake for Parties
Storing Halloween Spider Cake
FAQs
This cake requires intermediate baking skills. Basic cake decorating experience helps, but even beginners can succeed with patience and careful piping techniques.
You’ll need three 6-inch cake pans, a piping bag, a #4 decorating tip, and food coloring. An offset spatula for frosting helps create smooth layers.
Yes, you can bake the cake layers 1-2 days ahead and store them wrapped in plastic. Frosting can be prepared a day before assembly, making the process more manageable.
Print
Halloween Spider Cake Recipe
- Total Time: 1 hour 10 minutes
- Yield: 12 1x
Description
Creepy halloween spider cake weaves a web of chocolatey delight across your dessert plate. Chocolate layers draped with dark ganache and spidery decorations create spine-tingling sweet drama you will devour with wicked pleasure.
Ingredients
Main Ingredients:
- 1 box yellow cake mix
- Ingredients required for cake mix (as specified on box)
Decorative Ingredients:
- 1 gel orange food coloring
- 1 gel black food coloring
- 1 package mini Oreos
Frosting Ingredients:
- 1 recipe vanilla buttercream
- 1 can chocolate frosting
Instructions
- Preheat oven to recommended temperature on cake mix box. Generously coat three 6-inch cake pans with cooking spray or butter.
- Prepare cake mix according to package instructions, adding orange food coloring to achieve vibrant Halloween-themed color.
- Evenly distribute cake batter among prepared pans, ensuring balanced layers.
- Bake cake layers as directed on box, watching carefully to prevent over-browning.
- Allow cakes to cool completely on wire rack for approximately 30-45 minutes.
- Create vanilla buttercream frosting, ensuring smooth and spreadable consistency.
- Prepare black chocolate frosting by mixing chocolate frosting with black food coloring.
- Level cake layers if necessary to ensure flat, even surfaces.
- Place first cake layer on serving plate, creating a stable base.
- Spread black chocolate frosting between cake layers, creating rich filling.
- Apply vanilla buttercream around layer edges to create clean border.
- Completely cover cake exterior with smooth layer of vanilla buttercream.
- Using black frosting and #4 piping tip, create intricate cobweb design across cake top and sides.
- Carefully place Mini Oreos around cake for decorative spider elements.
- Pipe additional black frosting to create spider legs and detailed eye accents.
- Refrigerate cake for 15-20 minutes to set decorative elements before serving.
Notes
- Enhance Color Intensity Adjust food coloring gradually to achieve vibrant orange without altering cake batter consistency.
- Create Smooth Texture Sift cake mix to eliminate lumps, ensuring even orange coloration and silky cake texture.
- Prevent Sticking Always use parchment paper rounds in cake pans for easy cake removal without breaking.
- Optimize Frosting Consistency Ensure buttercream is at room temperature for smooth spreading and clean piping details.
- Prep Time: 45 minutes
- Cook Time: 25 minutes
- Category: Desserts, Snacks
- Method: Baking
- Cuisine: American
Nutrition
- Serving Size: 12
- Calories: 250
- Sugar: 20 g
- Sodium: 300 mg
- Fat: 10 g
- Saturated Fat: 3.5 g
- Unsaturated Fat: 6 g
- Trans Fat: 0 g
- Carbohydrates: 38 g
- Fiber: 1 g
- Protein: 2 g
- Cholesterol: 25 mg
Marcus Reed
Founder & Food Content Creator
Expertise
Single-recipe development, Seasonal and local ingredient utilization, Food photography and styling, Culinary writing and content creation
Education
Culinary Arts Certificate, Blue Ridge Community and Technical College, WV
Focus: Fundamentals of culinary techniques, emphasizing hands-on experience in small-scale kitchen settings.
Marcus’s story begins in Asheville, where good food and family kitchens shaped his earliest memories. After hands-on culinary training and a lot of trial (and a little error), he realized that real cooking isn’t about perfection, it’s about connection.
At Pan and Oven, Marcus crafts recipes that are easy to follow, packed with flavor, and built for real kitchens.