
Spooky and Sweet Halloween Krispies Recipe for Fall Fun
Creepy and delightful Halloween krispies dance with sweet charm on dessert tables everywhere.
Marshmallow magic meets spooky decoration in this wickedly delicious treat.
Crispy rice cereal becomes the perfect canvas for ghoulish creativity.
Dark chocolate drizzles and candy eyeballs add playful terror to each bite-sized morsel.
Crafting these haunting snacks takes less than thirty minutes and delivers maximum Halloween spirit.
Kids and adults alike will shriek with delight over these festive goodies.
One taste transports you straight into the heart of Halloween fun.
Why Rice Krispie Candy Corn Treats Are a Hit
What You Need for Candy Corn-Shaped Krispies

Easy Tools for Crafting Cute Halloween Treats
Instructions for Fun Candy Corn Krispie Bars
Step 1: Prepare Workspace
Grab three microwave-safe bowls and two round cake pans.
Spray the inside of bowls and pans with nonstick cooking spray to prevent sticking.
Step 2: Create White Layer
Ingredients:Melt butter and marshmallows in the microwave, stirring until completely smooth.
Mix in Rice Krispie cereal and stir thoroughly.
Use buttered hands to shape two small white circles in the center of cake pans.
Step 3: Mix Orange Section
Ingredients:Melt butter and marshmallows, then add orange food coloring.
Stir in Rice Krispie cereal and carefully wrap the orange mixture around the white circles.
Step 4: Prepare Yellow Layer
Ingredients:Melt butter and marshmallows, then mix in yellow food coloring.
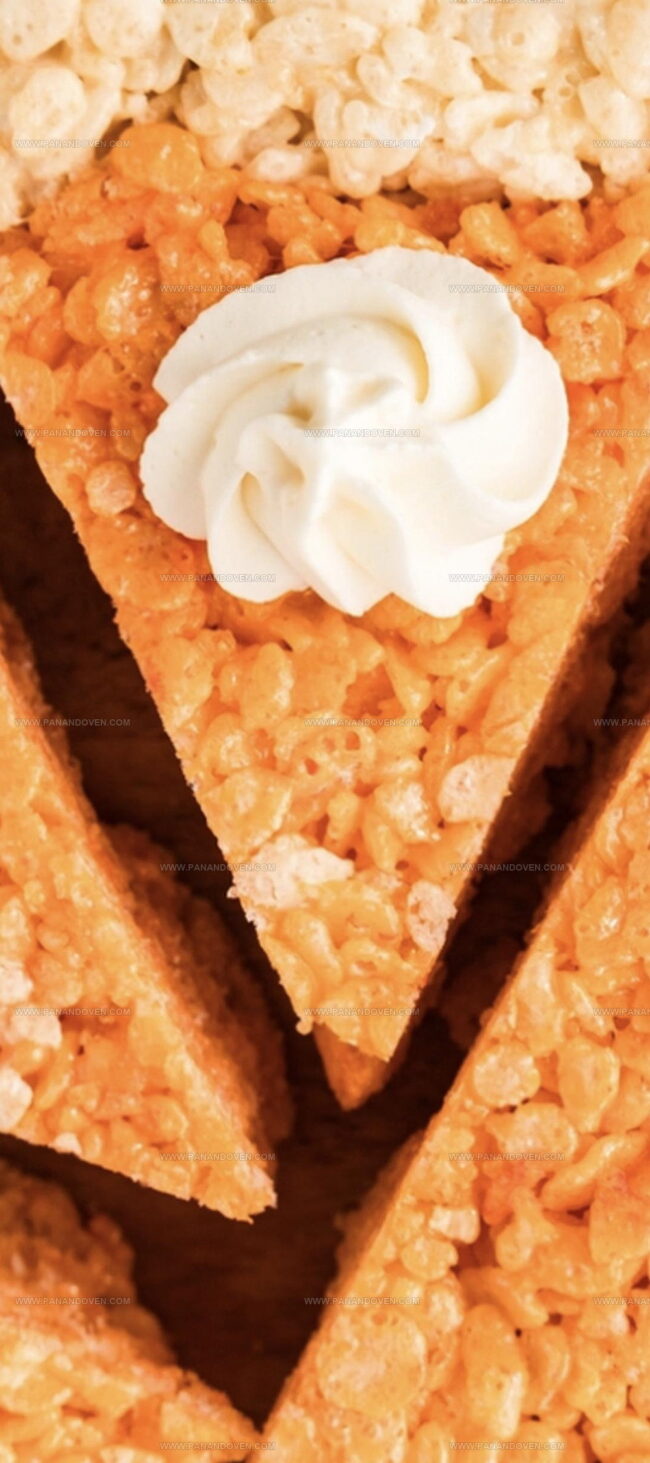
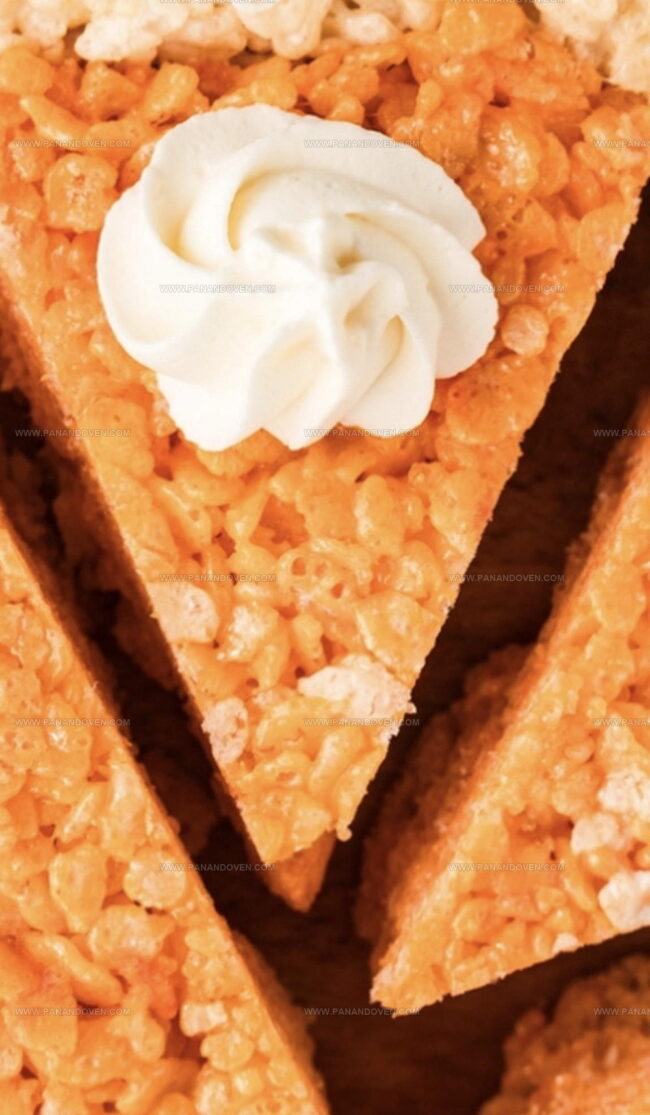
Add Rice Krispie cereal and spread the yellow mixture around the orange section, creating the final candy corn layer.
Step 5: Chill And Shape
Allow the treats to cool at room temperature or speed up the process in the refrigerator or freezer for about 10 minutes.
Use a plastic knife to slice the treats into 8 pie-like wedges.
Step 6: Serve And Store
Enjoy the treats immediately or keep them tightly covered at room temperature for up to one day.
Share with friends and family for a spooky Halloween treat!
Tips to Keep Krispie Treats Chewy and Delicious
Fun Ideas for Spooky Krispie Treat Variations

Playful Serving Suggestions for Rice Krispie Treats
Storing Krispie Treats to Maintain Freshness
FAQs

Butter your hands thoroughly before handling the mixture. This creates a non-stick barrier and makes shaping much easier.
Absolutely! You can experiment with gel or liquid food coloring to achieve the classic orange and yellow candy corn colors. Just add drops gradually to get the desired shade.
Use a plastic knife for cutting. Plastic knives create smoother edges and won’t stick to the marshmallow mixture like metal knives do.
Yes! Kids can help with mixing cereal, adding food coloring, and watching the marshmallows melt. Just supervise them during microwave and cutting steps for safety.
Print
Halloween Krispies Recipe
- Total Time: 20 minutes
- Yield: 12 1x
Description
Spooky halloween krispies bring ghoulish delight to festive gatherings with marshmallow-coated rice cereal. Colorful candy decorations and playful shapes make these treats a monster hit for seasonal celebrations.
Ingredients
Main Ingredients:
- 2 cups Rice Krispie cereal
- 3 cups Rice Krispie cereal
- 4 cups Rice Krispie cereal
- 2 cups mini marshmallows, packed
- 3 cups mini marshmallows, packed
- 4 cups mini marshmallows, packed
Butter and Salt:
- 1 tablespoon butter
- 2 tablespoons butter
- 2 1/2 tablespoons butter
- Dash salt
Food Coloring and Extras:
- Orange food coloring
- Yellow food coloring
Instructions
- Sanitize three microwave-safe bowls and two 8 or 9-inch round cake pans with nonstick spray, ensuring complete coverage.
- Combine butter, mini marshmallows, and salt in the first bowl. Microwave at high power for 30-second intervals until marshmallows begin to melt, stirring until completely smooth.
- Fold Rice Krispie cereal into the white marshmallow mixture. Using butter-coated hands, create two 3.5-inch circular layers in the center of each prepared cake pan.
- Melt butter, marshmallows, and salt in the second bowl. Stir until uniform, then incorporate orange food coloring. Mix in Rice Krispie cereal and carefully distribute the orange layer around the white circles.
- In the third bowl, combine butter, marshmallows, and salt. Heat until fully melted, then blend in yellow food coloring. Integrate Rice Krispie cereal and encase the orange section with this vibrant layer, pressing evenly.
- Allow treats to solidify at room temperature for 10 minutes or accelerate cooling in refrigerator or freezer. Use a plastic knife to slice into 8 pie-like segments.
- Serve immediately or preserve in an airtight container at room temperature for up to one day, maintaining optimal texture and flavor.
Notes
- Butter Your Hands: Keep hands lightly buttered when shaping layers to prevent sticky mixture from clinging and ensure smooth, clean edges.
- Color Precision: Use gel food coloring for vibrant, concentrated colors without adding extra liquid that could change treat texture.
- Marshmallow Melting: Microwave marshmallows in short intervals to prevent burning, stirring between each burst for even melting.
- Storage Tip: Wrap individual treats in wax paper to maintain moisture and prevent them from sticking together when stored.
- Prep Time: 15 minutes
- Cook Time: 5 minutes
- Category: Snacks, Desserts
- Method: Microwaving
- Cuisine: American
Nutrition
- Serving Size: 12
- Calories: 140
- Sugar: 12 g
- Sodium: 50 mg
- Fat: 5 g
- Saturated Fat: 3 g
- Unsaturated Fat: 1.5 g
- Trans Fat: 0 g
- Carbohydrates: 24 g
- Fiber: 0 g
- Protein: 1 g
- Cholesterol: 15 mg
Marcus Reed
Founder & Food Content Creator
Expertise
Single-recipe development, Seasonal and local ingredient utilization, Food photography and styling, Culinary writing and content creation
Education
Culinary Arts Certificate, Blue Ridge Community and Technical College, WV
Focus: Fundamentals of culinary techniques, emphasizing hands-on experience in small-scale kitchen settings.
Marcus’s story begins in Asheville, where good food and family kitchens shaped his earliest memories. After hands-on culinary training and a lot of trial (and a little error), he realized that real cooking isn’t about perfection, it’s about connection.
At Pan and Oven, Marcus crafts recipes that are easy to follow, packed with flavor, and built for real kitchens.