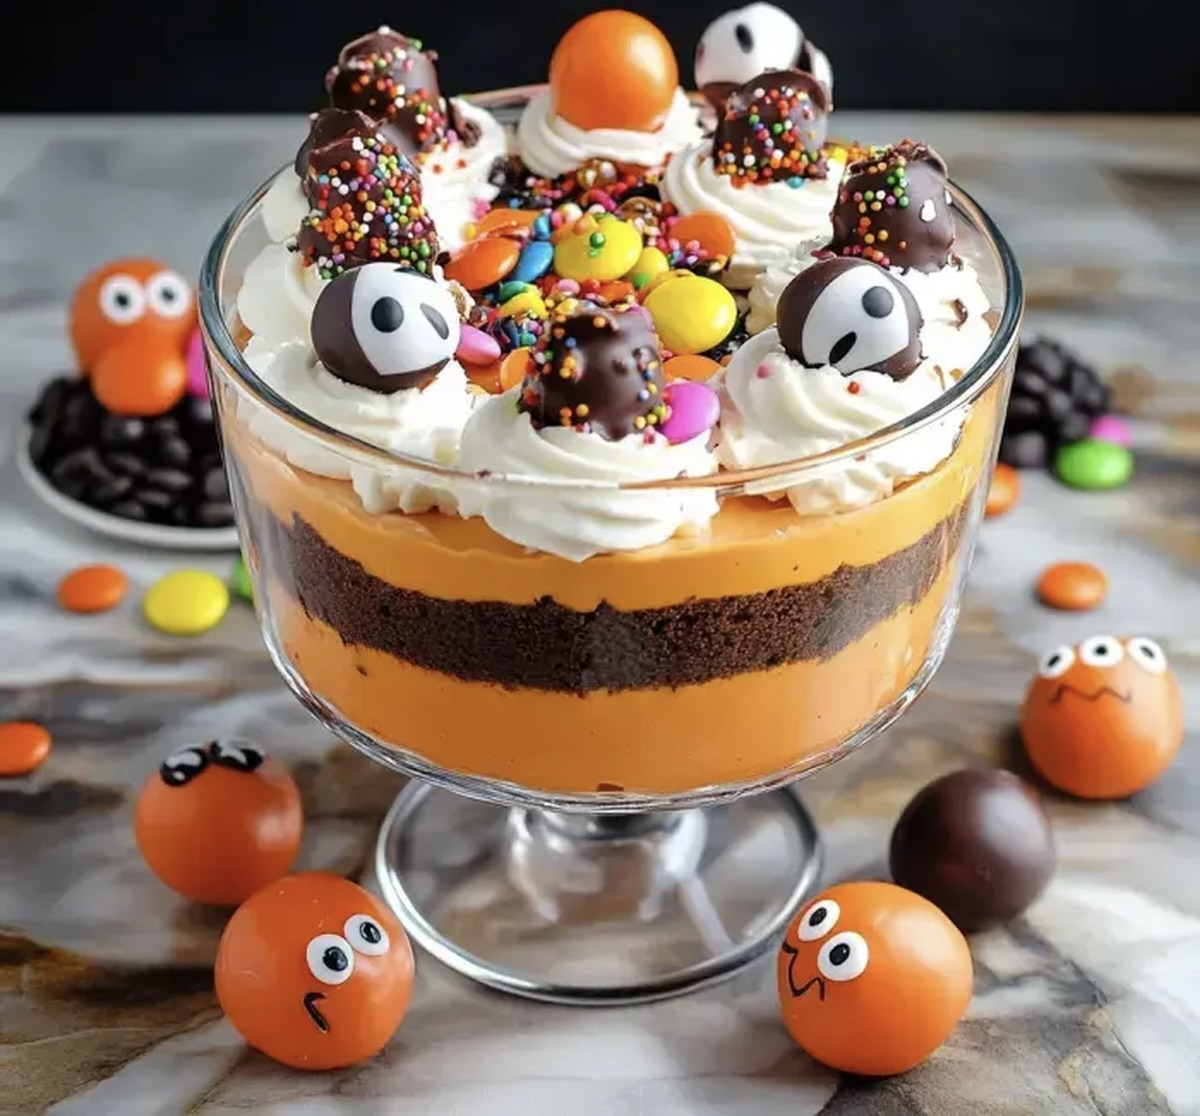
Hauntingly Delicious Halloween Chocolate Trifle Recipe
Creamy layers of decadent chocolate dance with spooky Halloween chocolate trifle delights that capture the essence of seasonal indulgence.
Dark chocolate pudding creates a rich foundation for this haunting dessert.
Crushed cookies add a delightful crunch between silky smooth layers.
Whipped cream swirls bring a ghostly elegance to each serving.
chocolate shavings and festive sprinkles crown this wickedly delicious treat.
chocolate lovers will swoon over every hauntingly delectable bite.
Prepare to enchant your guests with this bewitching dessert that screams Halloween spirit.
Spooky Halloween Trifle: Why It’s a Party Hit

Ingredients for Halloween Cake Trifle

Tools for Building Halloween Trifles

Layering Up a Halloween Trifle: Steps

Step 1: Prepare Cake Base
Preheat the oven to 350F (175C).
Position the rack in the middle of the oven.
Grab a small rimmed baking sheet and coat it with cooking spray to prevent sticking.
Step 2: Create Cake Batter
In a large mixing bowl, combine:Blend the ingredients until the batter becomes smooth and creamy.
Spread the mixture evenly across the prepared baking sheet.
Step 3: Bake Cake
Place the baking sheet in the oven and bake for 12-15 minutes.
Check doneness by inserting a toothpick into the center – it should come out clean.
Transfer the cake to a wire rack and allow it to cool completely.
Step 4: Whip Up Pudding
In a medium bowl, whisk together:Mix until the pudding becomes smooth.
For a festive touch, add orange food coloring and blend well.
Refrigerate the pudding for 10-15 minutes to set.
Step 5: Prepare Piping Bags
Remove the pudding and Cool Whip from the refrigerator.
Prepare two pastry bags with large round tips.
Fill one bag with pudding and the other with Cool Whip.
Step 6: Shape Cake Layer
Use the rim of the trifle dish as a guide to cut a perfect cake circle.
Carefully place the cake circle at the bottom of the trifle dish.
Step 7: Create Delicious Layers
Pipe alternating layers of pudding and Cool Whip over the cake base.
Continue layering until you reach the top of the dish.
Step 8: Add Spooky Decorations
Unleash your creativity by topping the trifle with:Step 9: Chill and Serve
Refrigerate the trifle until ready to serve.
The dessert can be stored for up to one day before your Halloween gathering.
Tips for Perfect, Spooky Trifle Layers

Halloween Trifle Twists and Mix-Ins

Presenting Halloween Trifle at Parties
Storing Trifle for Next-Day Enjoyment

FAQs
Insert a toothpick into the center of the cake. If it comes out clean without any wet batter, the cake is done. This usually takes 12-15 minutes in a 350F oven.
Yes, you can prepare the trifle up to one day in advance. Keep it refrigerated until ready to serve. The layers will stay fresh and the flavors will meld together nicely.
No problem! You can use a clear glass bowl or individual clear glasses to create the same layered effect. The key is using a transparent container to showcase the beautiful layers.
Print
Halloween Chocolate Trifle Recipe
- Total Time: 35 minutes
- Yield: 12 1x
Description
Sinister Halloween Chocolate Trifle combines dark chocolate layers with spooky seasonal charm. Creamy pudding, crushed cookies, and haunting decorations create a ghoulishly delightful dessert you’ll devour with wicked pleasure.
Ingredients
Main Ingredients:
- 1 box chocolate cake mix
- 3 large eggs, room temperature
- 1 small box instant vanilla pudding
- 8 ounces (226 grams) container Cool Whip
Liquid Ingredients:
- 1 cup (240 milliliters) water
- 1/2 cup (120 milliliters) vegetable oil
- 2 cups (480 milliliters) milk
Decorative Ingredients:
- Orange food coloring (optional)
- Sprinkles
- Chocolate balls wrapped like eyes
- Gummy body parts (brains, teeth, fingers, etc.)
- Any decorations you like
Instructions
- Heat the oven to 350F (175C) and position the rack in the center. Coat a small rimmed baking sheet with cooking spray to prevent sticking.
- Combine cake mix, water, oil, and eggs in a large bowl. Whisk until the batter becomes smooth and uniform. Carefully spread the mixture evenly across the prepared baking sheet.
- Bake for 12-15 minutes, checking doneness by inserting a toothpick into the center. The cake is ready when the toothpick comes out clean. Transfer to a wire rack and allow to cool completely.
- Prepare the pudding by whisking pudding mix and milk until completely smooth. For a festive touch, add orange food coloring and blend thoroughly. Refrigerate for 10-15 minutes until the pudding sets.
- Remove pudding and Cool Whip from refrigerator. Equip two pastry bags with large round tips – one for pudding and one for Cool Whip.
- Use the trifle dish rim as a template to cut a precise cake circle. Carefully place the cake circle at the bottom of the dish.
- Create alternating layers by piping pudding directly onto the cake base, followed by a generous layer of Cool Whip. Repeat layering process to build height and visual appeal.
- Transform the dessert with spooky decorations – sprinkle Halloween-themed confetti, strategically place chocolate eyeballs, and scatter gummy body parts across the surface.
- For optimal freshness, serve immediately or refrigerate for up to one day before presenting this ghoulishly delightful dessert.
Notes
- Customize cake mix by swapping water with buttermilk for richer, moister texture.
- Use gluten-free cake mix to make recipe celiac-friendly and accommodate dietary restrictions.
- Control pudding consistency by chilling longer for firmer set or adding less milk for thicker texture.
- Opt for natural food coloring from beet or carrot juice instead of artificial orange coloring for healthier Halloween treat.
- Prep Time: 20 minutes
- Cook Time: 15 minutes
- Category: Desserts, Snacks
- Method: Baking
- Cuisine: American
Nutrition
- Serving Size: 12
- Calories: 250
- Sugar: 18 g
- Sodium: 300 mg
- Fat: 10 g
- Saturated Fat: 2 g
- Unsaturated Fat: 8 g
- Trans Fat: 0 g
- Carbohydrates: 35 g
- Fiber: 1 g
- Protein: 3 g
- Cholesterol: 40 mg
Marcus Reed
Founder & Food Content Creator
Expertise
Single-recipe development, Seasonal and local ingredient utilization, Food photography and styling, Culinary writing and content creation
Education
Culinary Arts Certificate, Blue Ridge Community and Technical College, WV
Focus: Fundamentals of culinary techniques, emphasizing hands-on experience in small-scale kitchen settings.
Marcus’s story begins in Asheville, where good food and family kitchens shaped his earliest memories. After hands-on culinary training and a lot of trial (and a little error), he realized that real cooking isn’t about perfection, it’s about connection.
At Pan and Oven, Marcus crafts recipes that are easy to follow, packed with flavor, and built for real kitchens.