
Juicy Grilled Cheese Dogs Recipe: A Fun Twist on Classic Favorites
Melted cheese and juicy hot dogs create a mouthwatering fusion in this irresistible grilled cheese dogs recipe that combines comfort food classics.
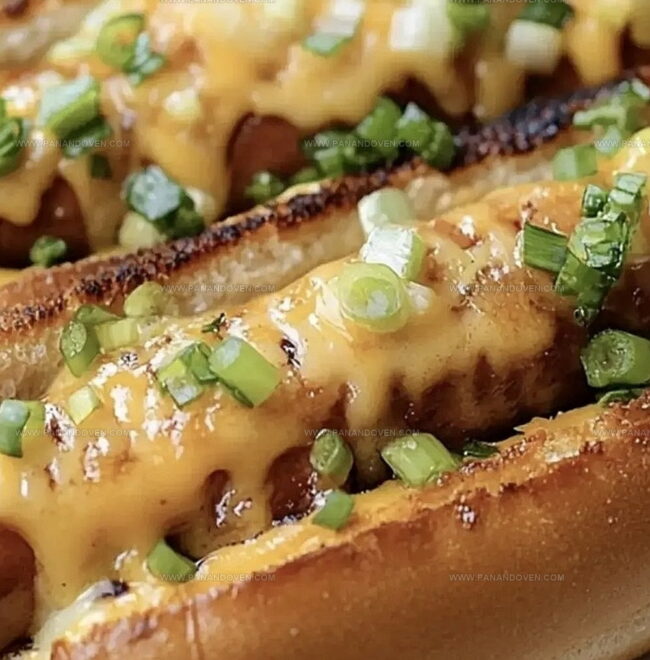
Crispy golden bread hugs savory sausages nestled with gooey melted cheese.
Each bite promises a delightful crunch and rich flavor explosion.
The simple ingredients come together quickly for a satisfying meal anyone can master.
Weeknight dinners or weekend gatherings just got an exciting upgrade with this crowd-pleasing dish.
Kids and adults alike will devour these cheesy hot dog sandwiches with pure joy.
Prepare to elevate your sandwich game with this easy and delicious recipe that screams pure culinary happiness.
Why Grilled Cheese Dogs Are Comfort on a Bun

Ingredients for Satisfying Grilled Cheese Dogs
Equipment Needed for Cheese Dog Magic
Steps for Making Grilled Cheese Dogs at Home
Step 1: Prepare Buttery Bun Base
Grab your rolling pin and gently flatten the hot dog buns to create a perfect canvas.
In a small mixing bowl, blend softened butter with garlic powder and onion powder.
Generously brush this flavor-packed mixture on the exterior of each bun, ensuring complete coverage.
Step 2: Sear Hot Dogs to Perfection
Fire up a large skillet over medium heat.
Carefully place hot dogs in the pan, rotating them occasionally to achieve a beautiful char on all sides.
This should take about 2 minutes per side, creating a deliciously crispy exterior.
Step 3: Build Flavor-Packed Masterpieces
Position a bun butter-side down in the sizzling skillet.
Layer your ingredients:Step 4: Melt and Seal the Magic
Cover the skillet and let the heat work its charm.
Cook until the cheese transforms into a gooey, molten blanket.
Use a spatula to gently fold the bun around the hot dog, creating a sealed packet of deliciousness.
Step 5: Create a Full Batch of Goodness
Repeat the entire process until you’ve crafted 4 mouthwatering grilled cheese dogs.
Serve immediately while they’re hot and the cheese is wonderfully melted.
Tips for Melty, Cheesy Hot Dogs

Fun Cheesy Dog Variations for Parties
Serving Grilled Cheese Dogs with Flair

Best Storage for Cheesy Hot Dog Leftovers
FAQs
The key ingredients are hot dog buns, hot dogs, cheddar cheese, butter, garlic powder, onion powder, and scallions. You’ll want to have these ready before starting the recipe.
Sear the hot dogs in a skillet over medium heat, turning occasionally to ensure even charring on all sides. Aim for about 2 minutes per side to get a nice, crispy exterior.
Absolutely! While cheddar cheese works great, you can experiment with other melting cheeses like American, Monterey Jack, or Swiss to suit your taste preferences.
Print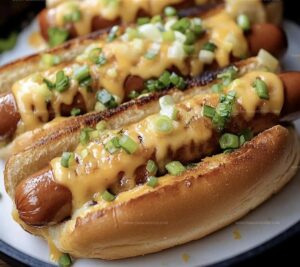
Grilled Cheese Dogs Recipe
- Total Time: 25 minutes
- Yield: 4 1x
Description
Mouthwatering grilled cheese dogs blend classic American comfort foods into one irresistible sandwich. Melted cheese, juicy hot dogs, and crispy bread create a satisfying meal that brings pure culinary joy.
Ingredients
Protein:
- 4 hot dogs, split lengthwise (be careful not to cut all the way through)
- 3 cups shredded cheddar cheese (113 grams / 4 ounces)
Bread:
- 4 hot dog buns
Seasonings and Garnish:
- 2 tablespoons butter, softened
- 1/4 teaspoon garlic powder
- 1/4 teaspoon onion powder
- 4 scallions, sliced
Instructions
- Prepare the buns by gently flattening them with a rolling pin to create a more compact surface for grilling. Create a flavor-packed butter blend by combining softened butter with garlic and onion powder.
- Generously coat the exterior of each bun with the seasoned butter mixture, ensuring complete coverage for optimal browning.
- Preheat a large skillet over medium heat for approximately 2-3 minutes. Carefully sear the hot dogs, rotating occasionally to achieve an even char on all sides, which typically takes about 8-10 minutes total.
- Position a buttered bun face-down in the hot skillet, creating a crispy golden base. Sprinkle a generous layer of shredded cheddar cheese across the bun.
- Nestle the perfectly charred hot dog onto the cheese-covered bun. Add an additional layer of cheese for maximum melting potential.
- Garnish with fresh, thinly sliced scallions to introduce a bright, sharp flavor contrast.
- Cover the skillet and cook for 2-3 minutes until the cheese becomes completely melted and gooey. Use a spatula to gently fold the bun around the hot dog, creating a sealed, crispy sandwich.
- Repeat the process for remaining ingredients, yielding four deliciously crispy grilled cheese dogs.
Notes
- Bread Flattening Tip Gently press down on buns with a rolling pin to create a thin, even surface that helps achieve maximum crispiness and ensures uniform butter coating.
- Butter Enhancement Mix garlic and onion powder into softened butter for an extra flavor boost that elevates the classic grilled cheese dog experience.
- Cheese Melting Hack Cover the skillet with a lid to trap heat and create a steamy environment that melts cheese quickly and evenly without burning the bun.
- Customization Option Experiment with different cheese varieties like pepper jack or Swiss to personalize your grilled cheese dogs and add unique flavor profiles.
- Prep Time: 10 minutes
- Cook Time: 15 minutes
- Category: Lunch, Snacks
- Method: Frying
- Cuisine: American
Nutrition
- Serving Size: 4
- Calories: 450
- Sugar: 2 g
- Sodium: 900 mg
- Fat: 30 g
- Saturated Fat: 15 g
- Unsaturated Fat: 10 g
- Trans Fat: 0 g
- Carbohydrates: 36 g
- Fiber: 1 g
- Protein: 18 g
- Cholesterol: 50 mg
Marcus Reed
Founder & Food Content Creator
Expertise
Single-recipe development, Seasonal and local ingredient utilization, Food photography and styling, Culinary writing and content creation
Education
Culinary Arts Certificate, Blue Ridge Community and Technical College, WV
Focus: Fundamentals of culinary techniques, emphasizing hands-on experience in small-scale kitchen settings.
Marcus’s story begins in Asheville, where good food and family kitchens shaped his earliest memories. After hands-on culinary training and a lot of trial (and a little error), he realized that real cooking isn’t about perfection, it’s about connection.
At Pan and Oven, Marcus crafts recipes that are easy to follow, packed with flavor, and built for real kitchens.