
The Best Greek Yogurt Brownies Recipe: Fudgy & Guilt-Free Treat
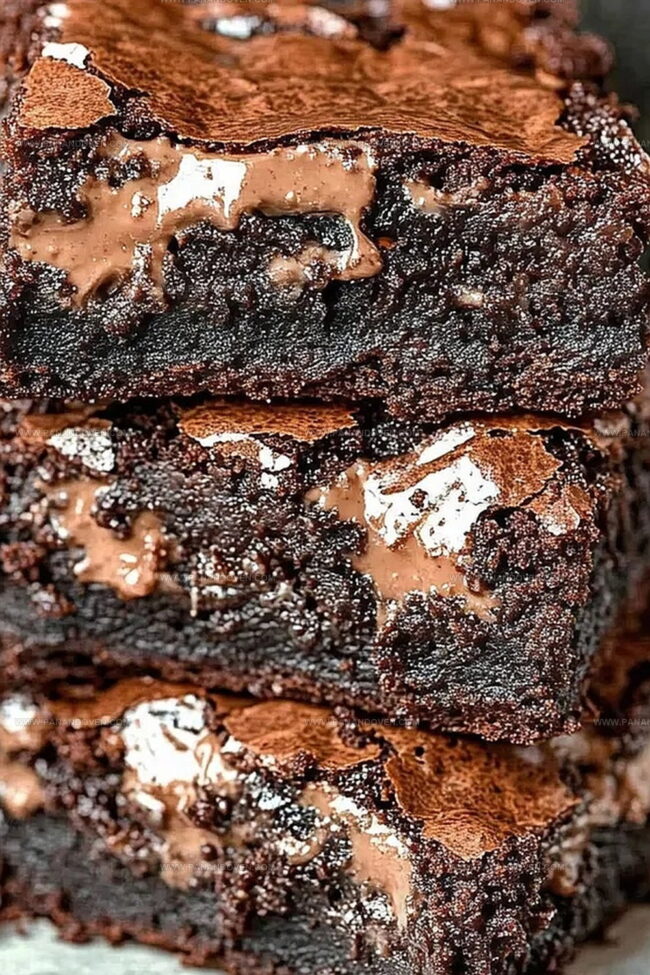
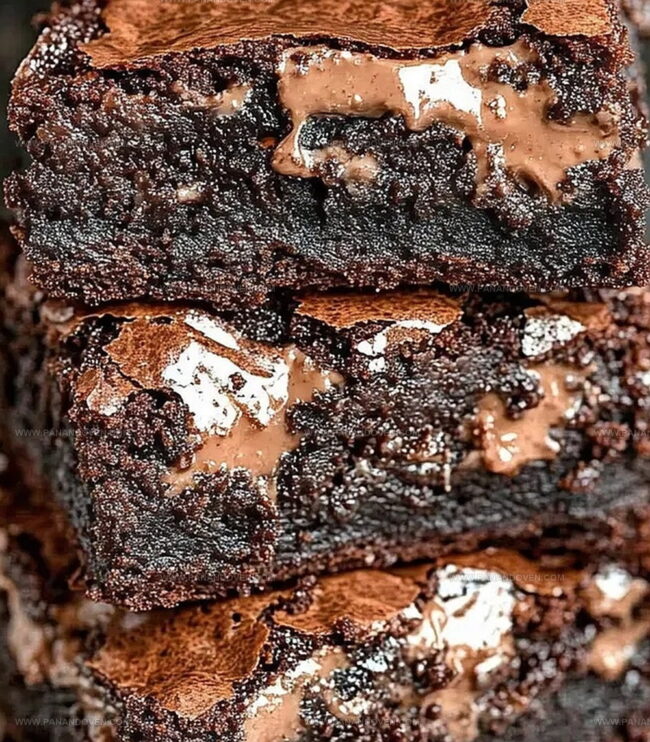
Chocolate cravings hit hard when you stumble upon this decadent Greek yogurt brownies recipe that promises rich, fudgy goodness.
The secret ingredient adds unexpected moisture and tang to these irresistible treats.
Dense, dark chocolate mingles with creamy yogurt, creating a dessert that’s both indulgent and surprisingly light.
Each bite delivers a perfect balance of sweetness and depth that will make your taste buds dance.
Baking these brownies is easier than you might expect, with simple ingredients and straightforward steps.
Chocolate lovers and health-conscious dessert enthusiasts will adore this delightful twist on a classic favorite.
Prepare to transform your dessert game with these incredibly moist and delectable brownies.
Chocolate Meets Greek Yogurt Brownies
Ingredients That Bring Brownies to Life
Wet Ingredients:Dry Ingredients:Optional Add-Ins:Brownie Baking Equipment Guide
Making Greek Yogurt Brownies Your Way
Step 1: Warm Up the Oven
Set your oven to a toasty 350 degrees Fahrenheit.
Grab an 8×8-inch baking pan and line it with parchment paper, creating a smooth surface that will make removing your brownies a breeze.
Step 2: Create Chocolate Magic
Chop up your chocolate and melt it gently in the microwave.
Let it cool down for a couple of minutes, then stir in Greek yogurt and sugar until the mixture becomes silky smooth and well combined.
Step 3: Blend Dry Components
Incorporate the following ingredients into your chocolate mixture:Mix everything until just combined.
Pour in milk and blend thoroughly.
If you’re feeling extra indulgent, fold in chocolate chips for an added burst of chocolatey goodness.
Step 4: Bake to Perfection
Transfer the batter into your prepared pan.
Slide it into the preheated oven and bake for 25-30 minutes.
To check doneness, insert a skewer – it should come out nearly clean with just a few moist crumbs.
Step 5: Cooling and Settling
Allow the brownies to rest in the pan for 10 minutes.
Then carefully lift them out using the parchment paper and place on a wire rack.
Let them cool completely, allowing the flavors to settle and the texture to become wonderfully fudgy.
Tips for Fudgy Greek Yogurt Brownies
Flavor Swaps for Brownie Lovers
Ways to Serve Brownies as Dessert
Storing Brownies for Maximum Freshness
FAQs
Yes, they are lighter because Greek yogurt replaces butter and oil, reducing fat content while adding protein and making brownies more moist.
No, Greek yogurt is thicker and provides better texture. Regular yogurt might make brownies too wet and affect the final consistency.
They taste rich and chocolatey, with a slightly tangier flavor from the yogurt. The texture remains fudgy and dense, very similar to traditional brownies.
Absolutely. Greek yogurt brownies have fewer calories and less fat compared to standard brownie recipes, making them a smarter dessert choice for health-conscious individuals.
Print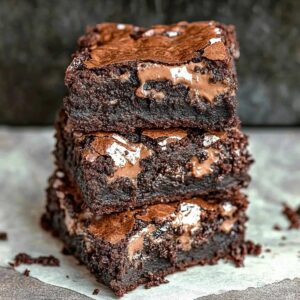
Greek Yogurt Brownies Recipe
- Total Time: 45 minutes
- Yield: 12 1x
Description
Indulgent greek yogurt brownies merge rich chocolate with tangy dairy for a healthier dessert twist. Moist chocolate squares offer guilt-free pleasure with protein-packed yogurt and deep cocoa intensity.
Ingredients
Main Ingredients:
- 3/4 cup all-purpose flour (gluten-free if needed)
- 1/2 cup cocoa powder
- 1/2 cup sugar (white, brown, or sugar-free)
- 1/2 cup chocolate, chopped
Dairy and Liquids:
- 1 cup vanilla yogurt (non-fat or reduced fat)
- 1/2 cup milk of choice
Leavening and Extras:
- 1/2 teaspoon baking soda
- 1 cup chocolate chips (optional)
Instructions
- Prepare the oven by heating to 350°F and lining an 8×8-inch baking pan with parchment paper, ensuring complete coverage of the bottom and sides.
- Carefully melt the chocolate in the microwave, allowing it to cool for 1-2 minutes to prevent overheating.
- Whisk the cooled chocolate with greek yogurt and sugar until the mixture becomes uniformly smooth and glossy.
- Gently incorporate flour, cocoa powder, and baking soda into the wet mixture, stirring until ingredients are just combined without overmixing.
- Pour in milk and blend thoroughly, creating a consistent batter with no dry patches.
- If desired, fold chocolate chips into the batter, distributing them evenly throughout the mixture.
- Transfer the batter to the prepared pan, spreading it evenly to ensure uniform baking.
- Bake in the preheated oven for 25-30 minutes, checking doneness by inserting a skewer that should come out with minimal, moist crumbs.
- Remove from oven and allow brownies to rest in the pan for 10 minutes to set and stabilize.
- Carefully transfer to a wire rack, letting brownies cool completely before cutting into squares for serving.
Notes
- Swap yogurt with dairy-free alternatives like coconut or almond yogurt to create a vegan-friendly brownie option.
- Reduce sugar content by using monk fruit sweetener or stevia for a lower-calorie, diabetic-friendly dessert.
- Add chopped nuts or dried fruit to enhance texture and introduce extra nutritional complexity without compromising the rich chocolate flavor.
- Use high-quality dark chocolate with 70% cocoa content to boost antioxidant properties and create a more intense, sophisticated brownie experience.
- Prep Time: 15 minutes
- Cook Time: 30 minutes
- Category: Desserts, Snacks
- Method: Baking
- Cuisine: American
Nutrition
- Serving Size: 12
- Calories: 150
- Sugar: 7 g
- Sodium: 50 mg
- Fat: 5 g
- Saturated Fat: 2 g
- Unsaturated Fat: 3 g
- Trans Fat: 0 g
- Carbohydrates: 24 g
- Fiber: 2 g
- Protein: 4 g
- Cholesterol: 5 mg
Clara Thompson
Recipe Developer & Food Educator
Expertise
Plant-based and vegetarian recipe development, Nutritional analysis and meal planning, Culinary education and workshop facilitation, Content writing with a focus on healthy living
Education
Diploma in Culinary Arts, Mt. San Jacinto College, CA
Focus: Comprehensive culinary training with an emphasis on sustainable cooking practices.
Certificate in Nutrition and Healthy Living, Cornell University (Online Program)
Focus: Understanding the principles of nutrition to create balanced and health-conscious recipes.
Clara lives where fresh ideas and fresh ingredients meet. She pairs her culinary know-how with her passion for healthy, planet-friendly cooking.
For Clara, good food should taste great, nourish your body, and feel easy to make. Her recipes highlight whole foods, colorful produce, and a deep respect for seasonal eating.