
The Sweet Magic: Gourmet Caramel Apples Recipe for Fall Fun
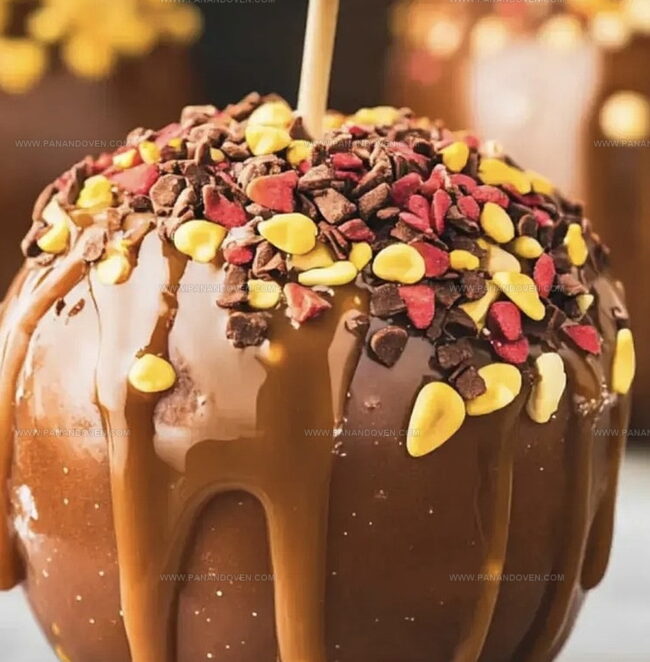
Sweet autumn evenings come alive with this gourmet caramel apples recipe that blends crisp fruit and rich, golden caramel.
Orchards burst with ripe, juicy apples waiting to be transformed into a decadent treat.
Each bite promises a perfect balance of tart fruit and smooth, buttery caramel coating.
Layers of flavor dance across your palate, creating a dessert that feels both nostalgic and sophisticated.
Professional pastry techniques elevate this classic fall favorite into a stunning confection.
Craft these indulgent treats and watch as friends marvel at your culinary skills.
Savor the magic of homemade caramel apples that sparkle with sweetness and charm.
Gourmet Caramel Apples: Reasons to Indulge

Essentials for Making Caramel Apples
Tools for Crafting Caramel Apples

Caramel Apple-Making Instructions
Step 1: Prepare Apple Bases
Wash your apples thoroughly under cool running water.
Gently pat them dry with a clean kitchen towel.
Remove any stems and insert sturdy wooden skewers or popsicle sticks firmly into the apple cores.
Chill the prepared apples in the refrigerator to help the caramel stick better.
Step 2: Create Caramel Coating
Unwrap soft caramel candies and place them in a microwave-safe bowl.
Pour a small amount of water to help create a smooth consistency.
Microwave the caramels, stopping every 30 seconds to stir and prevent burning.
Continue until the caramel becomes completely smooth and glossy.
Step 3: Dunk and Decorate
Hold each apple by the stick and carefully dip it into the warm caramel, twirling to ensure even coverage.
Allow excess caramel to drip off naturally.
For extra excitement, roll the caramel-coated apples in fun toppings like:Step 4: Set and Chill
Place the decorated apples on a parchment-lined baking sheet.
Transfer to the refrigerator and let them rest for about 20 minutes.
This helps the caramel firm up and creates a delightful crisp coating.
Step 5: Serve and Enjoy
Remove the caramel apples from the refrigerator and let them sit at room temperature for a few minutes before serving.
Cut into slices or enjoy whole for a spectacular treat that’s perfect for parties, holidays, or spontaneous sweet cravings.
Best Tips for Smooth, Gourmet Apples

Caramel Apple Add-On Ideas
Serving Gourmet Caramel Apples
Storing Caramel Apples for Freshness

FAQs
The key is to prepare your apples by washing and thoroughly drying them. Remove any waxy coating by wiping with white vinegar, which helps the caramel stick better.
Yes, crisp and firm apples like Granny Smith, Honeycrisp, or Gala work best. Avoid soft or overripe apples as they won’t hold the caramel coating well.
Heat the caramel slowly and stir frequently. Allow excess caramel to drip off by gently rotating the apple, and tap the stick lightly against the bowl’s edge to remove extra drips.
Print
Gourmet Caramel Apples Recipe
- Total Time: 25 minutes
- Yield: 6 1x
Description
Homemade caramel apples from scratch delight dessert enthusiasts with their rich autumn flavors. Crisp orchard apples draped in silky caramel create an irresistible treat perfect for seasonal celebrations.
Ingredients
Main Ingredients:
- 5–6 apples
- 11 ounces (311 grams) baking caramels
Liquid Ingredient:
- 3 tablespoons (45 milliliters) water
Accessories:
- Popsicle sticks
- Toppings of choice (such as nuts, sprinkles, or crushed candy)
Instructions
- Thoroughly rinse apples, pat dry with a clean towel, and chill in the refrigerator to maintain firmness. Remove stems and carefully insert wooden sticks into the apple cores.
- Cover a baking sheet with parchment paper and lightly coat with non-stick spray to prevent sticking during the caramel coating process.
- Unwrap caramels and place in a microwave-safe bowl. Pour water into the bowl and heat for 2 minutes at 50% power, stirring midway. Continue microwaving in 30-second intervals until caramel reaches a smooth, glossy consistency.
- Hold each apple by the inserted stick and carefully dip into the warm caramel, allowing excess to drip off. Gently rotate the apple to ensure even coverage, then immediately roll in desired toppings while caramel remains tacky.
- Transfer caramel-coated apples to the prepared parchment-lined sheet. Refrigerate for 15-20 minutes at 40°F to set the caramel and help toppings adhere firmly before serving.
Notes
- Select firm, fresh apples like Granny Smith or Honeycrisp for the best texture and tartness that complements the sweet caramel.
- Thoroughly dry apples before dipping to ensure caramel adheres smoothly and prevents liquid interference.
- Use room temperature caramels for more even melting and prevent scorching during microwave heating.
- Rotate apples slowly while dipping to create a uniform caramel coating and minimize dripping.
- Prepare toppings in advance like chopped nuts, chocolate chips, or sprinkles for quick application before caramel sets.
- Work quickly when coating to prevent caramel from hardening before adding additional decorations.
- For dietary alternatives, try using dairy-free caramel or sugar-free options to accommodate different nutritional needs.
- Prep Time: 15 minutes
- Cook Time: 10 minutes
- Category: Desserts, Snacks
- Method: Blending
- Cuisine: American
Nutrition
- Serving Size: 6
- Calories: 80
- Sugar: 15g
- Sodium: 25mg
- Fat: 0g
- Saturated Fat: 0g
- Unsaturated Fat: 0g
- Trans Fat: 0g
- Carbohydrates: 20g
- Fiber: 1g
- Protein: 0g
- Cholesterol: 0mg
Marcus Reed
Founder & Food Content Creator
Expertise
Single-recipe development, Seasonal and local ingredient utilization, Food photography and styling, Culinary writing and content creation
Education
Culinary Arts Certificate, Blue Ridge Community and Technical College, WV
Focus: Fundamentals of culinary techniques, emphasizing hands-on experience in small-scale kitchen settings.
Marcus’s story begins in Asheville, where good food and family kitchens shaped his earliest memories. After hands-on culinary training and a lot of trial (and a little error), he realized that real cooking isn’t about perfection, it’s about connection.
At Pan and Oven, Marcus crafts recipes that are easy to follow, packed with flavor, and built for real kitchens.