
The Ultimate Festive Christmas Kitchen Sink Cookies Recipe
Cookies bursting with holiday magic and kitchen sink ingredients offer a delightful twist on traditional treats.
These delectable morsels combine unexpected flavors that dance across your taste buds.
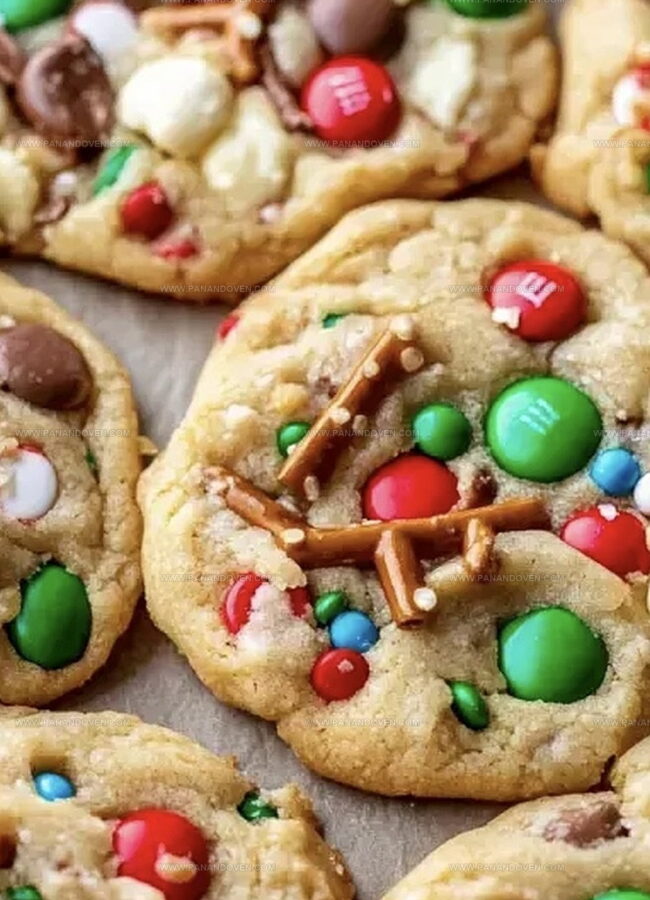
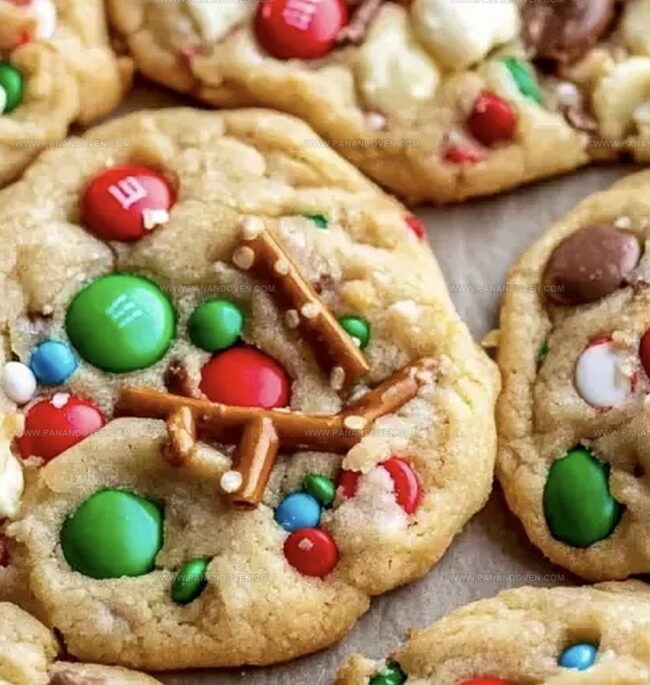
Packed with chocolate chips, nuts, pretzels, and sprinkles, the recipe brings festive cheer to every bite.
Each cookie tells a story of creativity and spontaneous baking joy.
The mix of sweet and salty creates an irresistible combination that sparks smiles.
Bakers of all skill levels can master this simple yet spectacular dessert.
Grab your apron and get ready to spread some delicious holiday cheer.
Why Kitchen Sink Cookies Delight
Kitchen Sink Cookie Ingredients
Primary Ingredients:Dry Ingredients:Mix-Ins and Decorative Elements:Tools for Christmas Cookies
Making Festive Cookie Magic
Step 1: Prepare Baking Station
Grab your baking sheets and line them with parchment paper.
Preheat the oven to a cozy 350F (175C) so it’s ready for cookie magic.
Step 2: Whip Up Butter Base
Grab a large mixing bowl and combine softened butter with:Use an electric mixer to create a fluffy, creamy mixture that looks like clouds of sweetness.
Mix for about 2 minutes until everything looks light and dreamy.
Step 3: Enhance Flavor Profile
Add these liquid ingredients and mix on medium speed:Continue mixing for another 2 minutes until the mixture becomes pale and incredibly smooth.
Step 4: Create Cookie Foundation
Gradually introduce dry ingredients into your mixture:Mix until everything blends perfectly without overmixing.
Step 5: Go Wild With Mix-ins
Gently fold in these fun ingredients using a spatula:Ensure everything is evenly distributed for maximum flavor excitement.
Step 6: Shape Cookie Balls
Scoop the dough into 20 beautiful balls, spacing them 2 inches apart on prepared baking sheets.
Step 7: Add Extra Pizzazz
Sprinkle additional mix-ins on top of each dough ball for an Instagram-worthy look.
Step 8: Bake To Perfection
Slide the baking sheets into the oven and bake for 10-12 minutes.
Choose 10 minutes for chewy centers or 12 minutes for crispy edges.
Step 9: Create Perfect Circles
Optional pro tip: Use a large circular cookie cutter to swirl around each cookie right after baking for perfectly round shapes.
Step 10: Cool Down
Let cookies rest on baking sheets for 5 minutes, then transfer to a cooling rack to reach room temperature.
Step 11: Store And Enjoy
Keep leftover cookies in an airtight container for up to 3 delicious days.
Christmas Cookie Pro Tips
Cookie Recipe Flavor Variations
How to Serve These Cookies
Storing Kitchen Sink Cookies
FAQs
The mix-ins include M&M’s, white chocolate chips, pretzel pieces, potato chip pieces, and sprinkles, creating a fun and unexpected flavor combination.
Absolutely! Feel free to swap in similar crunchy or sweet ingredients like crushed candy canes, different chocolate chips, or alternative salty snacks to match the kitchen sink style.
The name comes from the phrase “everything but the kitchen sink,” meaning these cookies include a wild variety of ingredients, mixing sweet and salty elements into one delicious treat.
You’ll just need a standard electric mixer, baking sheets, parchment paper, and a spatula.
Print
Festive Christmas Kitchen Sink Cookies Recipe
- Total Time: 32 minutes
- Yield: 24 1x
Description
Christmas kitchen sink cookies blend delightful textures and flavors from multiple sweet ingredients. Crammed with chocolate chips, pretzels, and festive sprinkles, these cookies deliver pure holiday joy to hungry bakers.
Ingredients
Main Ingredients:
- 3/4 cup salted butter (softened)
- 3/4 cup light brown sugar (packed)
- 1/4 cup granulated white sugar
- 2 egg yolks (room temperature)
- 1 1/2 cups all-purpose flour (spooned and leveled)
Flavoring and Binding Ingredients:
- 2 teaspoons vanilla bean paste or extract
- 1/2 teaspoon baking powder
- 1/2 teaspoon baking soda
- 1/2 teaspoon salt
Mix-In Ingredients:
- 1/2 cup red and green M&M’s
- 1/3 cup white chocolate chips
- 1/3 cup pretzel pieces
- 1/3 cup potato chip pieces
- 2 tablespoons red and green jimmies
Instructions
- Preheat the oven to 350F (175C) and prepare two baking sheets with parchment paper for optimal cookie performance.
- Utilize an electric mixer to cream butter and sugars until the mixture transforms into a light, airy texture, approximately 2 minutes.
- Incorporate egg yolks and vanilla, continuing to mix at medium speed until the blend becomes pale and voluminous, roughly 2 minutes.
- Gradually introduce dry ingredients (flour, baking powder, baking soda, salt) and blend until completely integrated.
- Delicately fold in festive mix-ins including M&M’s, white chocolate chips, pretzel fragments, potato chip pieces, and sprinkles using a spatula for even distribution.
- Create 20 uniform dough spheres, positioning them with 2-inch spacing across prepared baking sheets.
- Enhance visual appeal by strategically placing additional mix-ins atop each dough ball for decorative flair.
- Bake for 10-12 minutes, selecting 10 minutes for softer centers or 12 minutes for crispier edges.
- Immediately post-baking, optionally reshape cookies using a circular cookie cutter for precise, professional presentation.
- Allow cookies to rest on baking sheets for 5 minutes before transferring to a cooling rack for complete temperature reduction.
- Preserve remaining cookies in an airtight container, maintaining freshness for up to 3 days.
Notes
- Boost flavor intensity by using room temperature ingredients, ensuring smoother mixing and more consistent texture.
- Create gluten-free version by substituting all-purpose flour with almond or gluten-free baking blend, maintaining cookie’s delightful crunch.
- Enhance texture variation by crushing mix-ins differently – larger pretzel chunks for crackle, finely crushed chips for subtle saltiness.
- Maximize freshness by freezing dough balls for spontaneous baking, allowing perfectly portioned cookies anytime craving strikes.
- Prep Time: 20 minutes
- Cook Time: 12 minutes
- Category: Desserts, Snacks
- Method: Baking
- Cuisine: American
Nutrition
- Serving Size: 24
- Calories: 170
- Sugar: 10 g
- Sodium: 110 mg
- Fat: 7 g
- Saturated Fat: 4 g
- Unsaturated Fat: 2.5 g
- Trans Fat: 0 g
- Carbohydrates: 24 g
- Fiber: 1 g
- Protein: 2 g
- Cholesterol: 35 mg
Clara Thompson
Recipe Developer & Food Educator
Expertise
Plant-based and vegetarian recipe development, Nutritional analysis and meal planning, Culinary education and workshop facilitation, Content writing with a focus on healthy living
Education
Diploma in Culinary Arts, Mt. San Jacinto College, CA
Focus: Comprehensive culinary training with an emphasis on sustainable cooking practices.
Certificate in Nutrition and Healthy Living, Cornell University (Online Program)
Focus: Understanding the principles of nutrition to create balanced and health-conscious recipes.
Clara lives where fresh ideas and fresh ingredients meet. She pairs her culinary know-how with her passion for healthy, planet-friendly cooking.
For Clara, good food should taste great, nourish your body, and feel easy to make. Her recipes highlight whole foods, colorful produce, and a deep respect for seasonal eating.